Home › Start here › Applications › Tables ›
Tables
The following article teaches how to create a Table, how to customize it, and how to export data to an Excel file.
Make sure you have:
-
the correct administrator permissions (“applications-find” & “applications-view”)
-
familiarized yourself with how filters work.
-
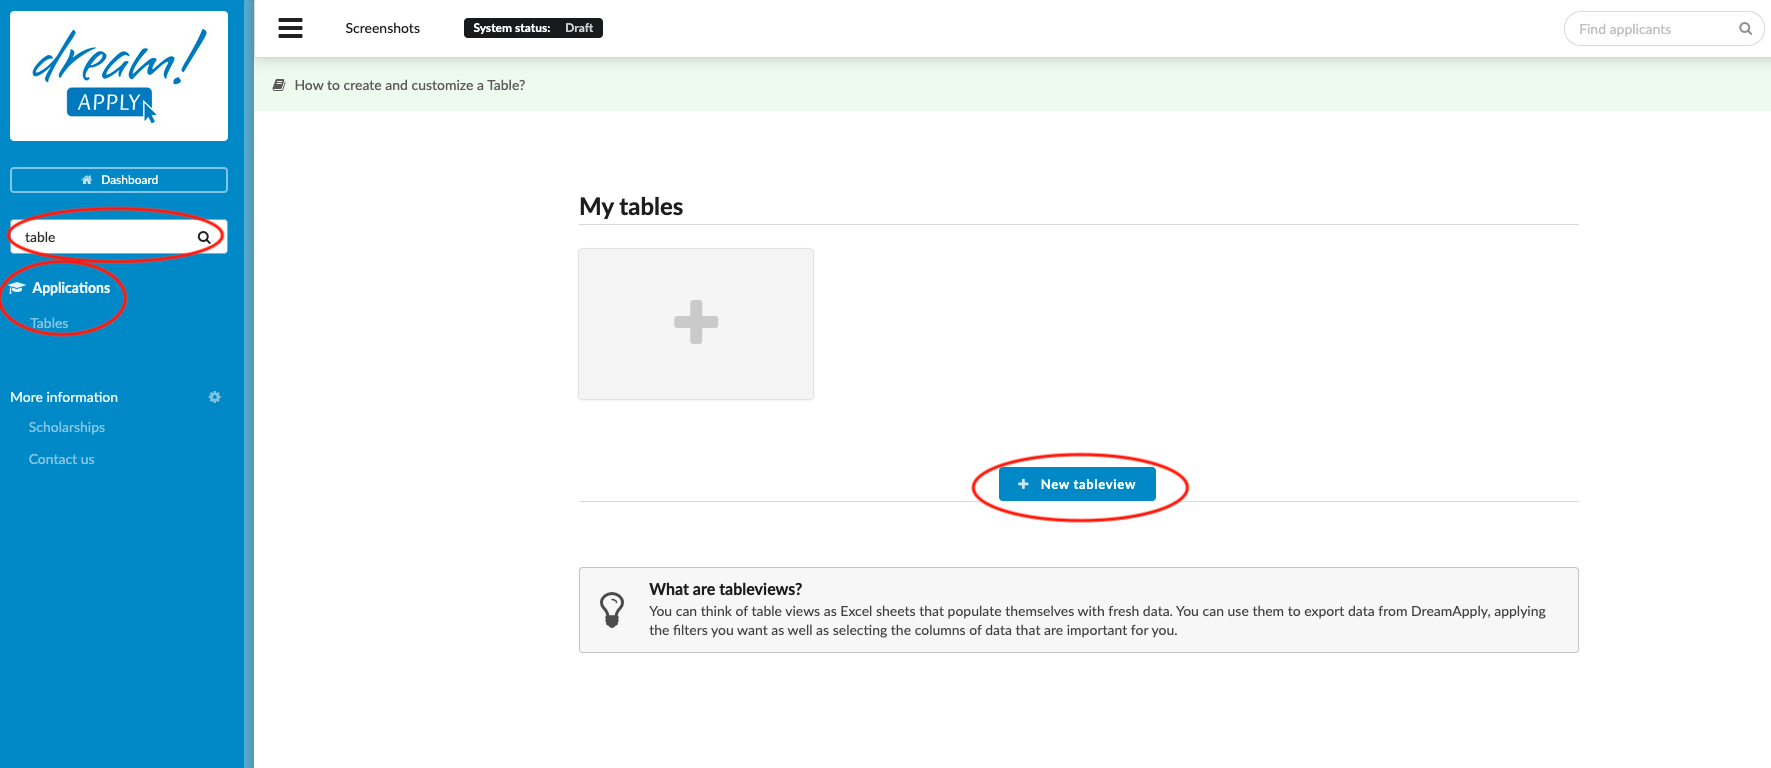
Log in as an administrator with the permissions “applications-find” and “applications-view” (these are included with the Roles “Admissions administrator” and “Academic supervisor” in addition to “Superuser”).
-
Go to Applications > Table.
-
Click on “New tableview”.
-
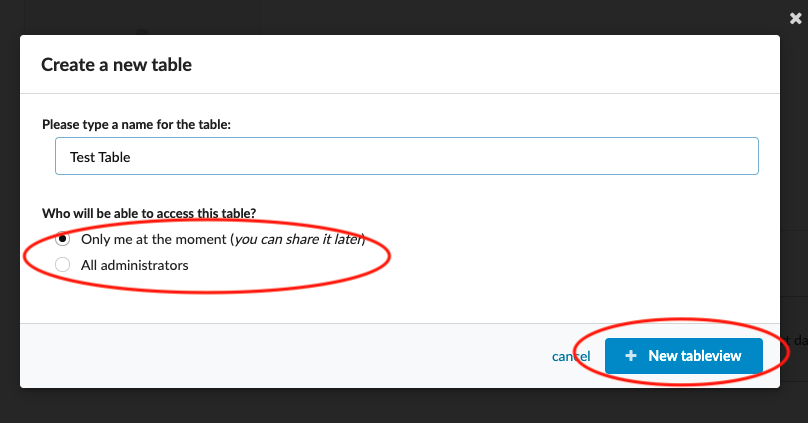
Give the Table a name for future reference.
-
Decide if the Table will be for your personal use, or for any other administrator with the proper level of permissions by selecting either:
-
“Only me at the moment (you can share it later)”
-
“All administrators”
-
-
Click on “+ New tableview” to create the Table.
-
The section at the top of the page with the grey filter symbol, is where the various filters can be enabled to help narrow in on the desired set of applicants.
-
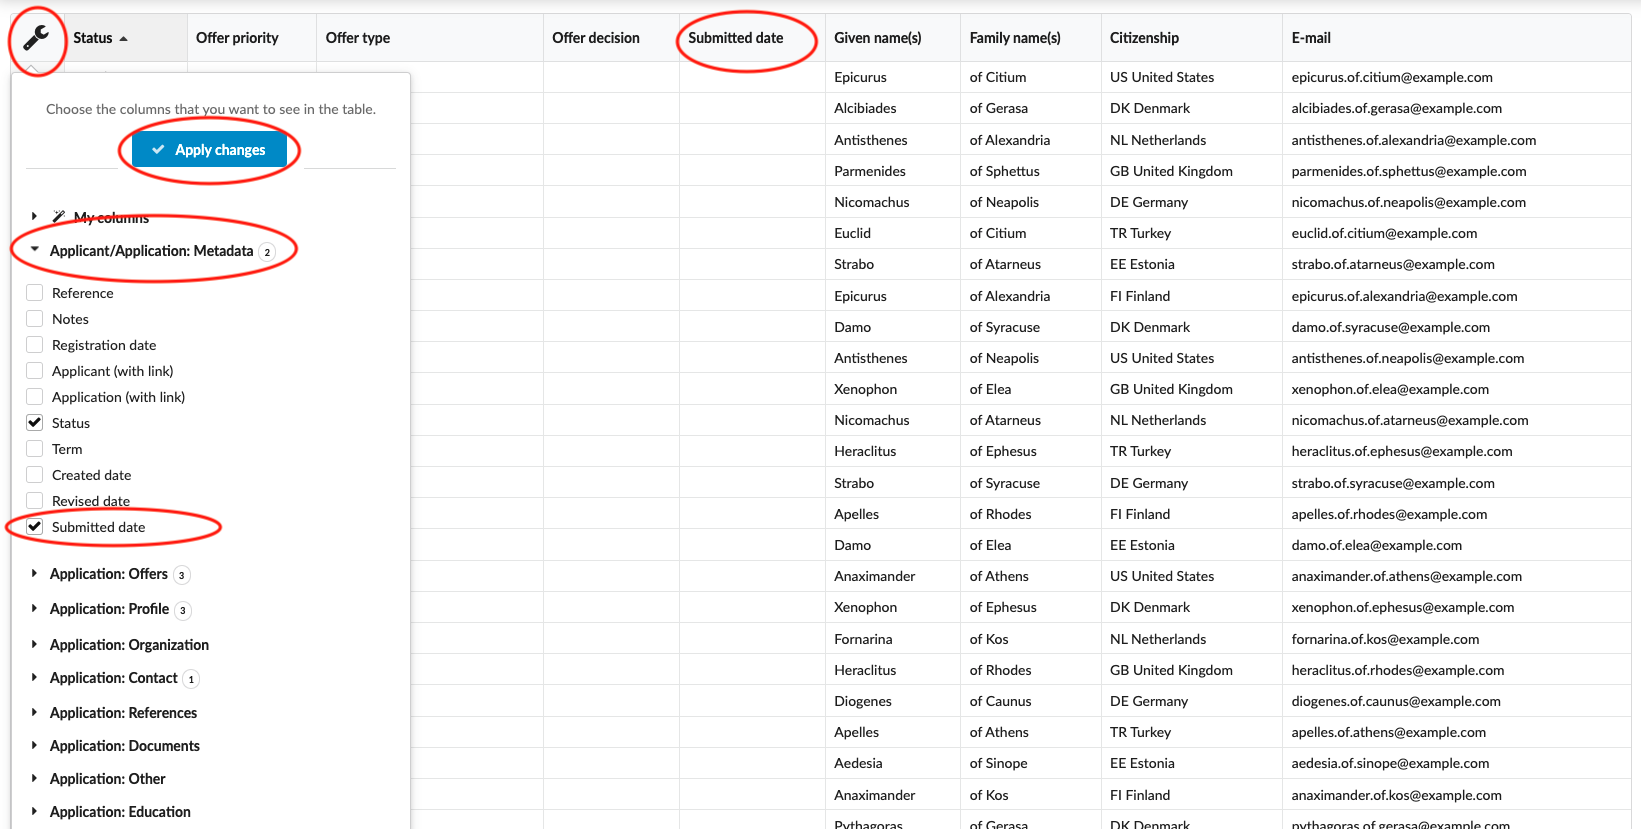
A Table contains nine columns by default.
-
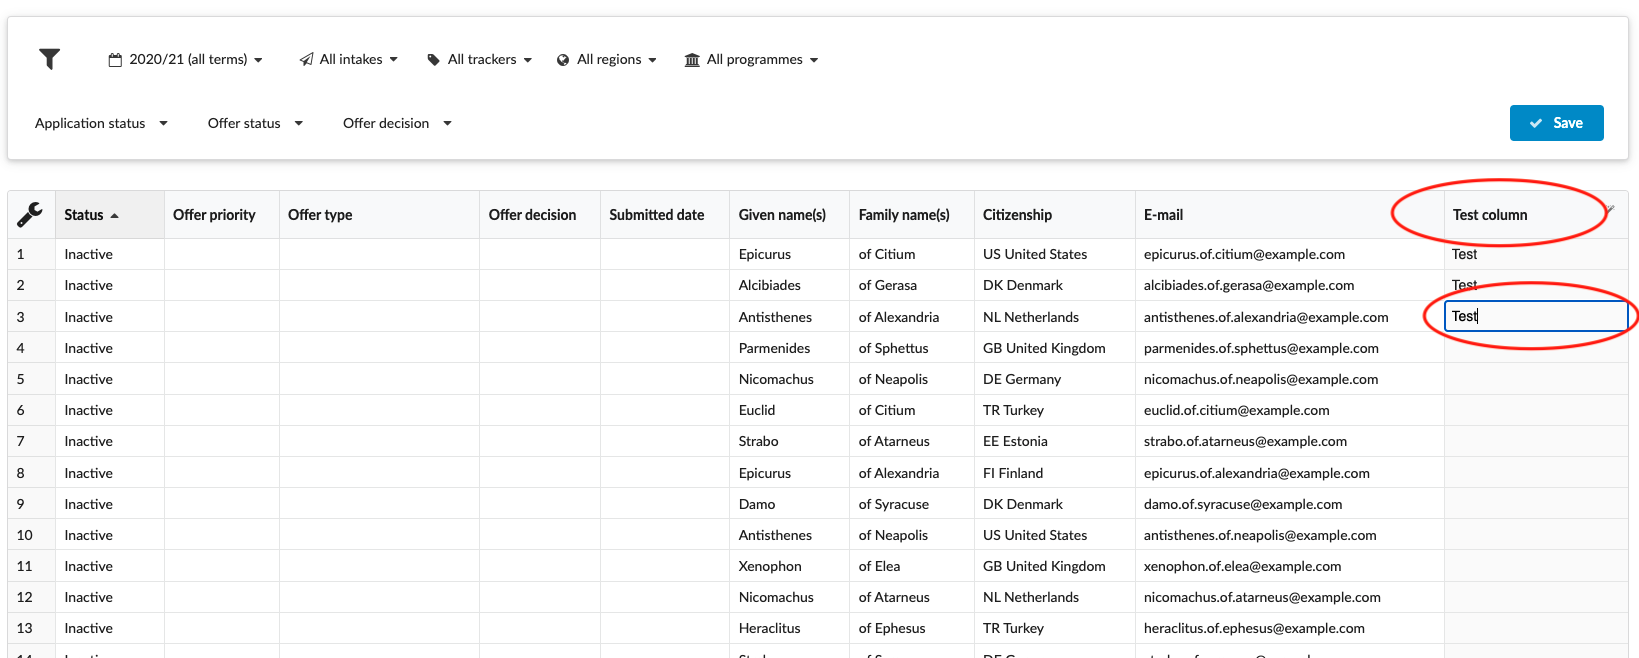
To add or remove columns, click on the black wrench at the top right-side of the Table (cell A1 in Excel):
-
Select a category and tick or untick the desired box to add or remove the indicated column.
-
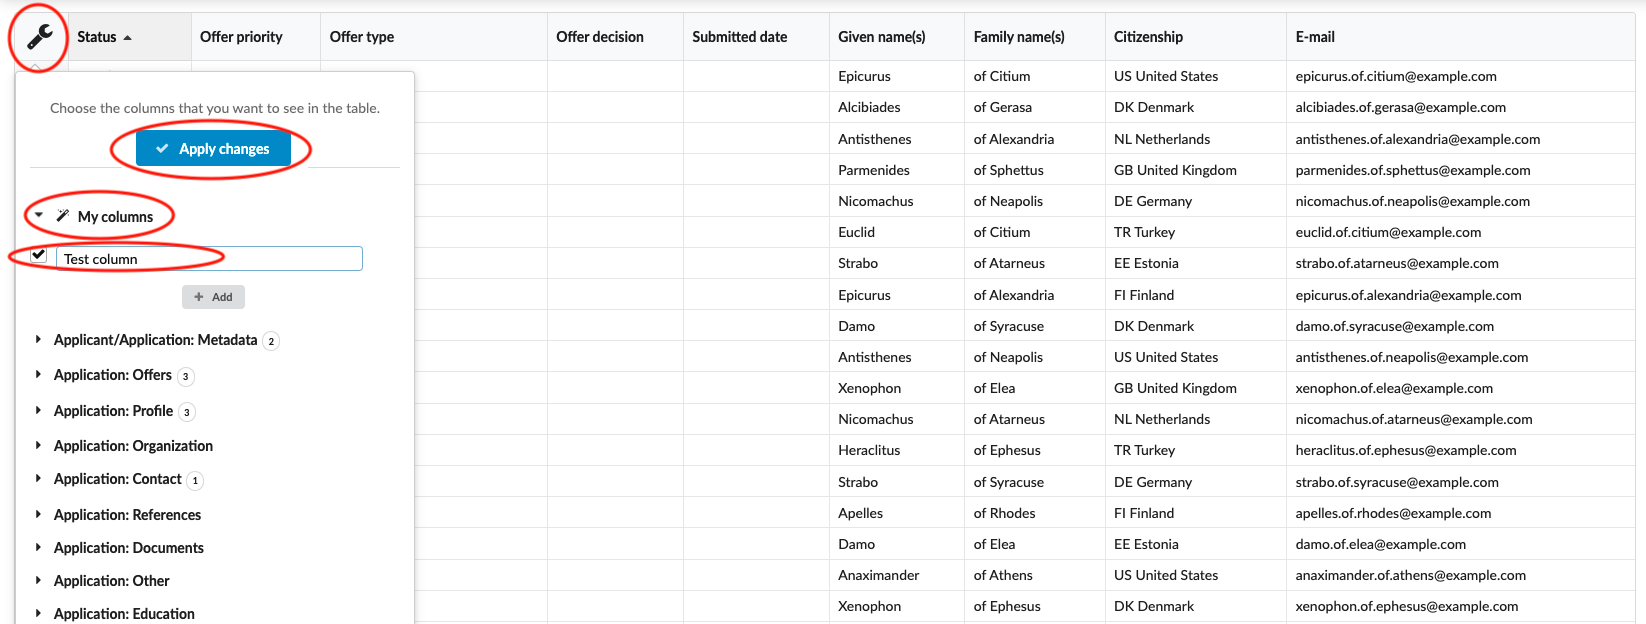
You can also create a customised column by Clicking on “My columns” > “Add” > and give the customised column a name.
-
After the desired column set has been ticked, click on the “Apply changes” button at the top of the list. The page will automatically be refreshed, and the new column set will appear in the Table.
-
Print - Print the Table directly from the system
-
Excel - export table in Excel sheet
- Note: If the column “Application” from the section “Application: Metadata” has been selected, an additional warning dialog will appear asking the user if they would like to export working links to the applications in the Table.
-
Access - Give full access of the Table to other administrators.
-
Share – Get a linkshare to the Table that can optionally be sent via email directly from the system. To learn more about how these linkshares can be destroyed see our article on Data Protection.
-
Delete – This is how a Table can be deleted from the system for all users with Access and anyone with whom it has been Shared.
To edit a Table that has already been created:
Please consider that the data seen in the Table has been taken automatically from application set created by the filters. With a few exceptions, this data cannot be manually edited directly in the Table. It is possible to do so with customized “My columns”, as well as the Offer status column.
The Following tools are located above the filter section:
Users should be able to take advantage of the Tables feature which is the best place to gather data of a group of applications filtered by a desired criterion, and then export the data in an excel sheet.