How to use content markers
This article explains how content markers can be used properly within the DreamApply system so they will dynamically fetch data and insert in templates.
Make sure you have:
-
the correct administrator permissions (“templates”, “letterheads” (optional with the Letterheads addon), or “instance”)
-
knowledge of where the data should be generated by the content marker
-
knowledge of what data should be fetched by the content marker
-
Log in as an administrator with the permission(s) “templates”, “letterheads”, or “instance” (included with the Role “Superuser”).
-
Decide where the Content marker should be added and continue in that section:
-
in task templates:
-
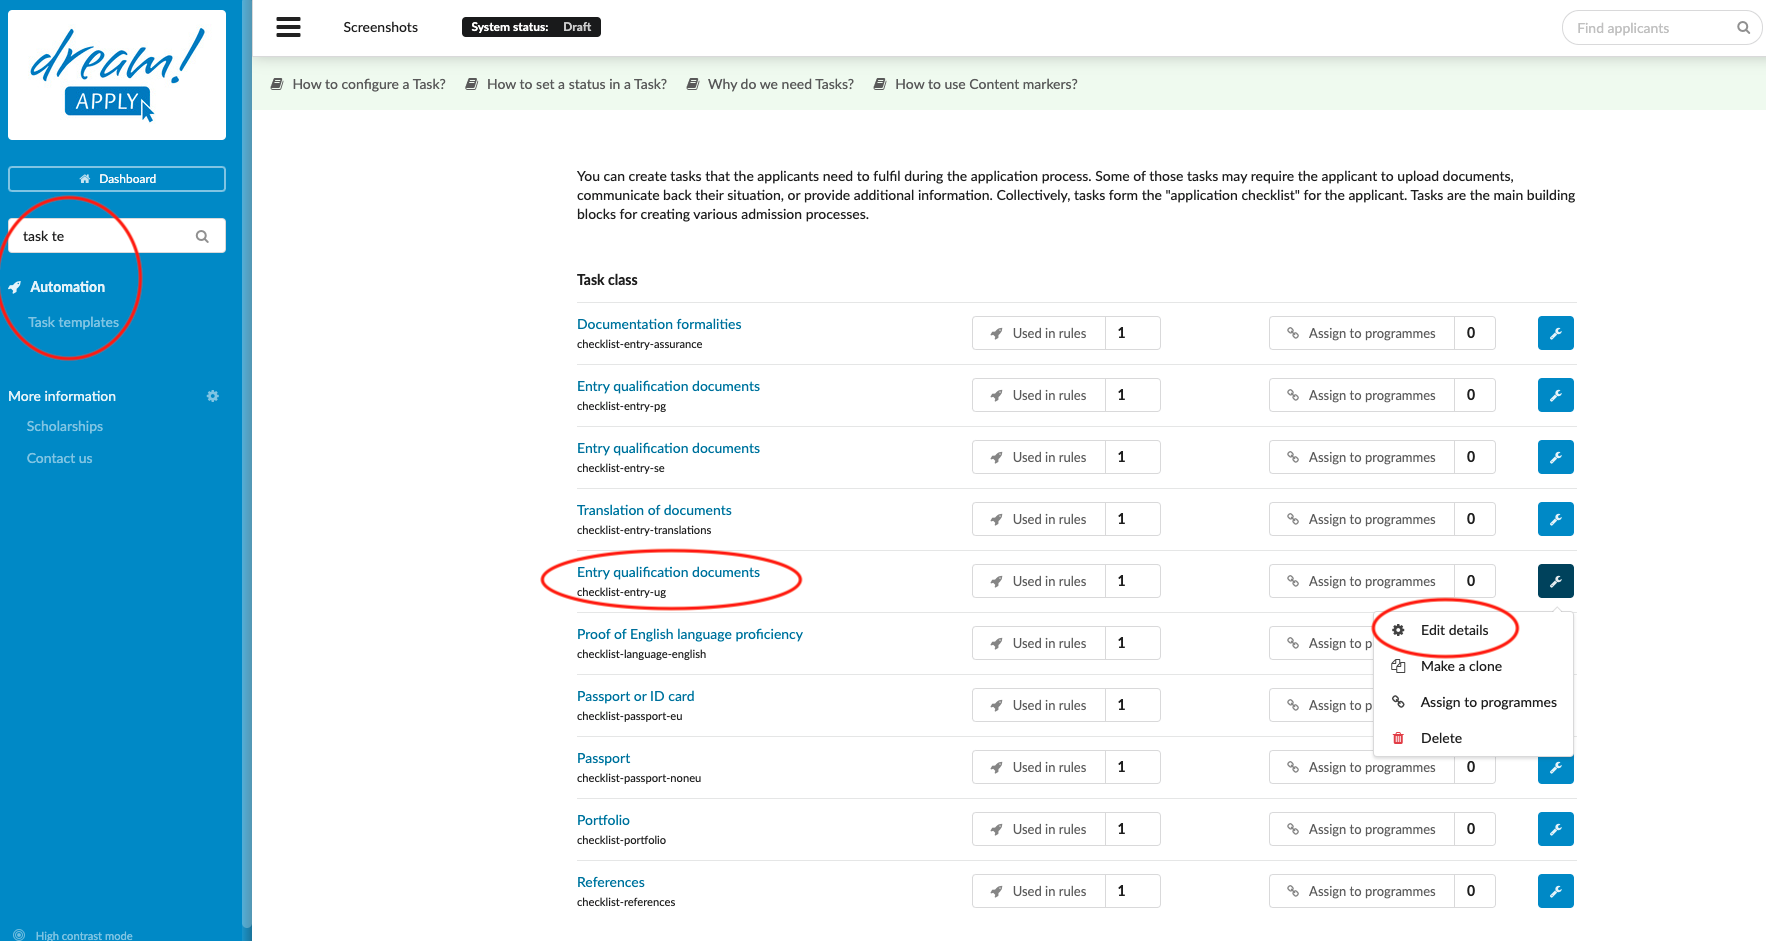
From the Main menu, go to: Automation > Task templates.
-
Create a new Task template or choose an existing Task to edit.
-
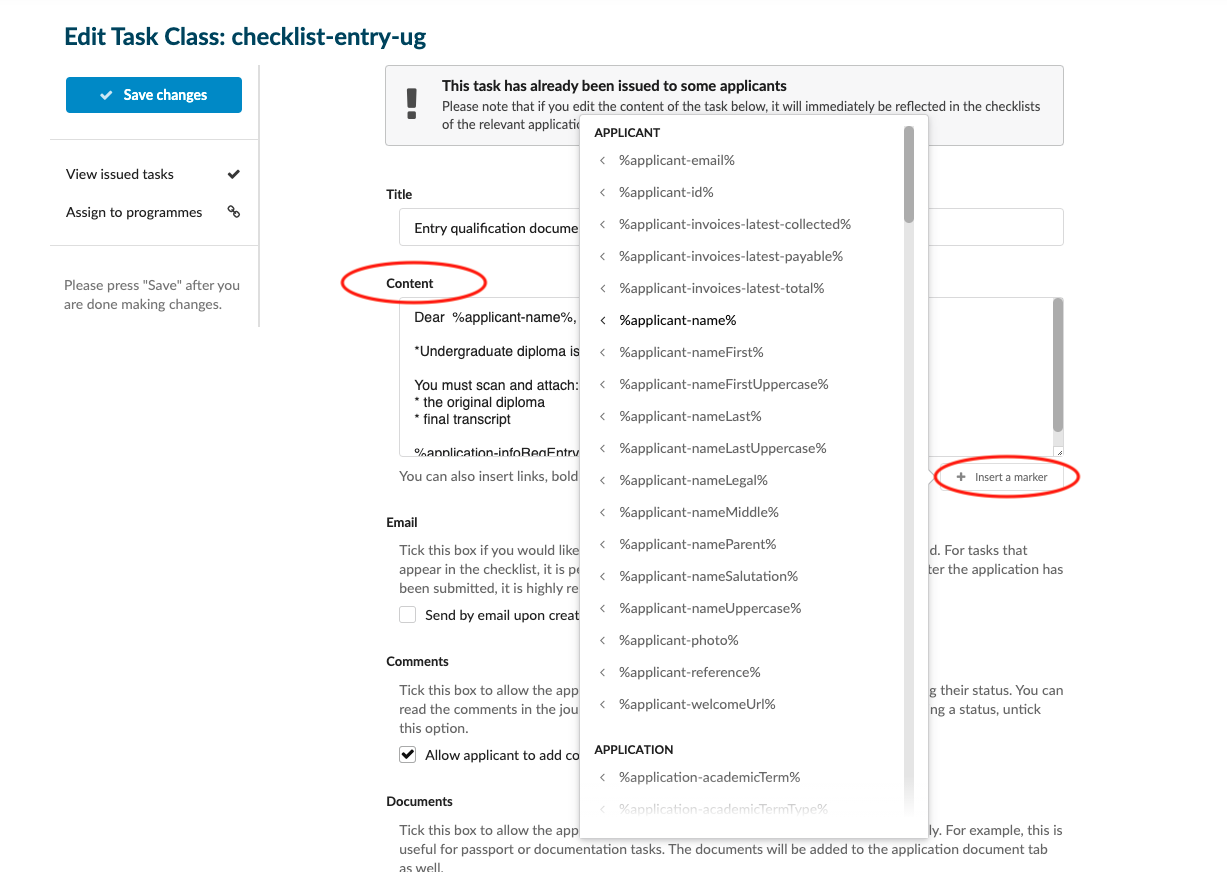
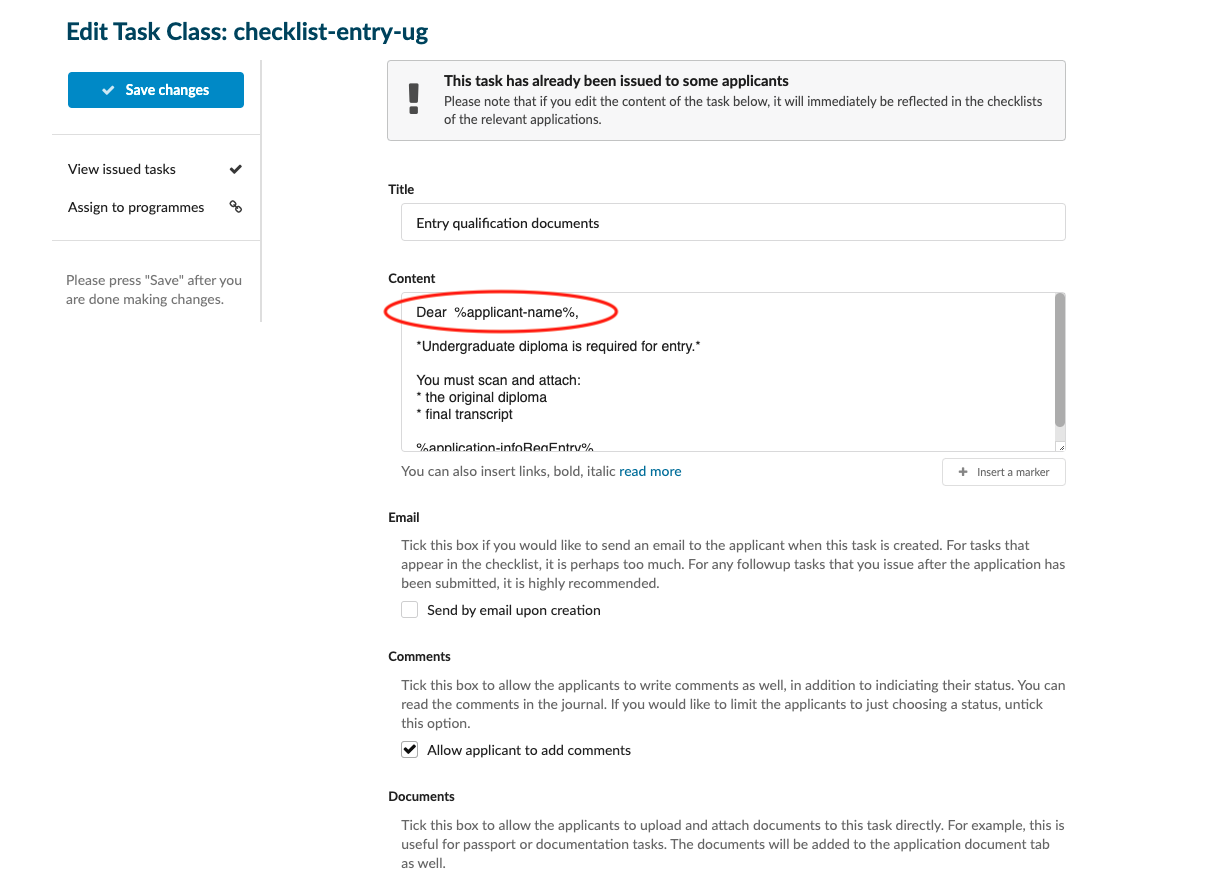
Position your text cursor where you would like to insert the Content marker.
-
Under the “Content” section, click on “Insert a marker”.
-
Choose a marker from the dropdown menu and click on it to have it added to the text.
-
-
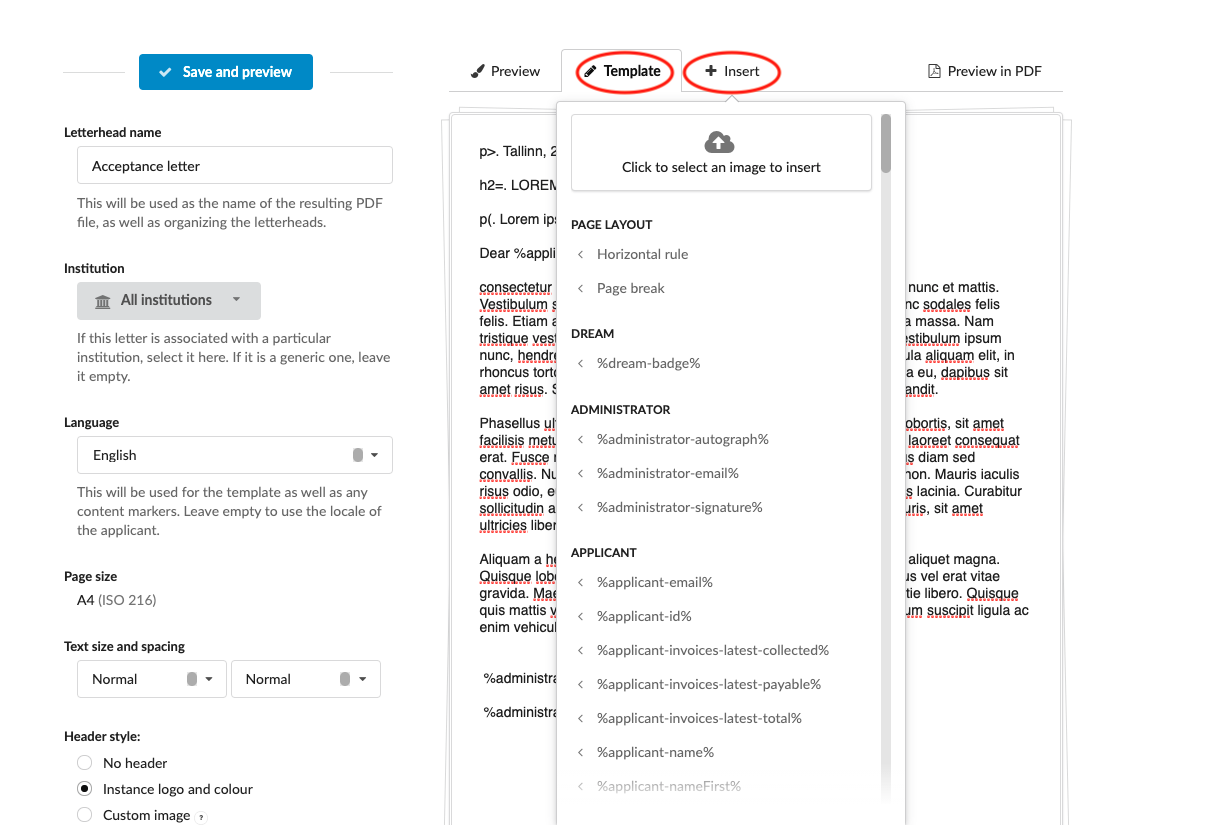
in Letterheads:
-
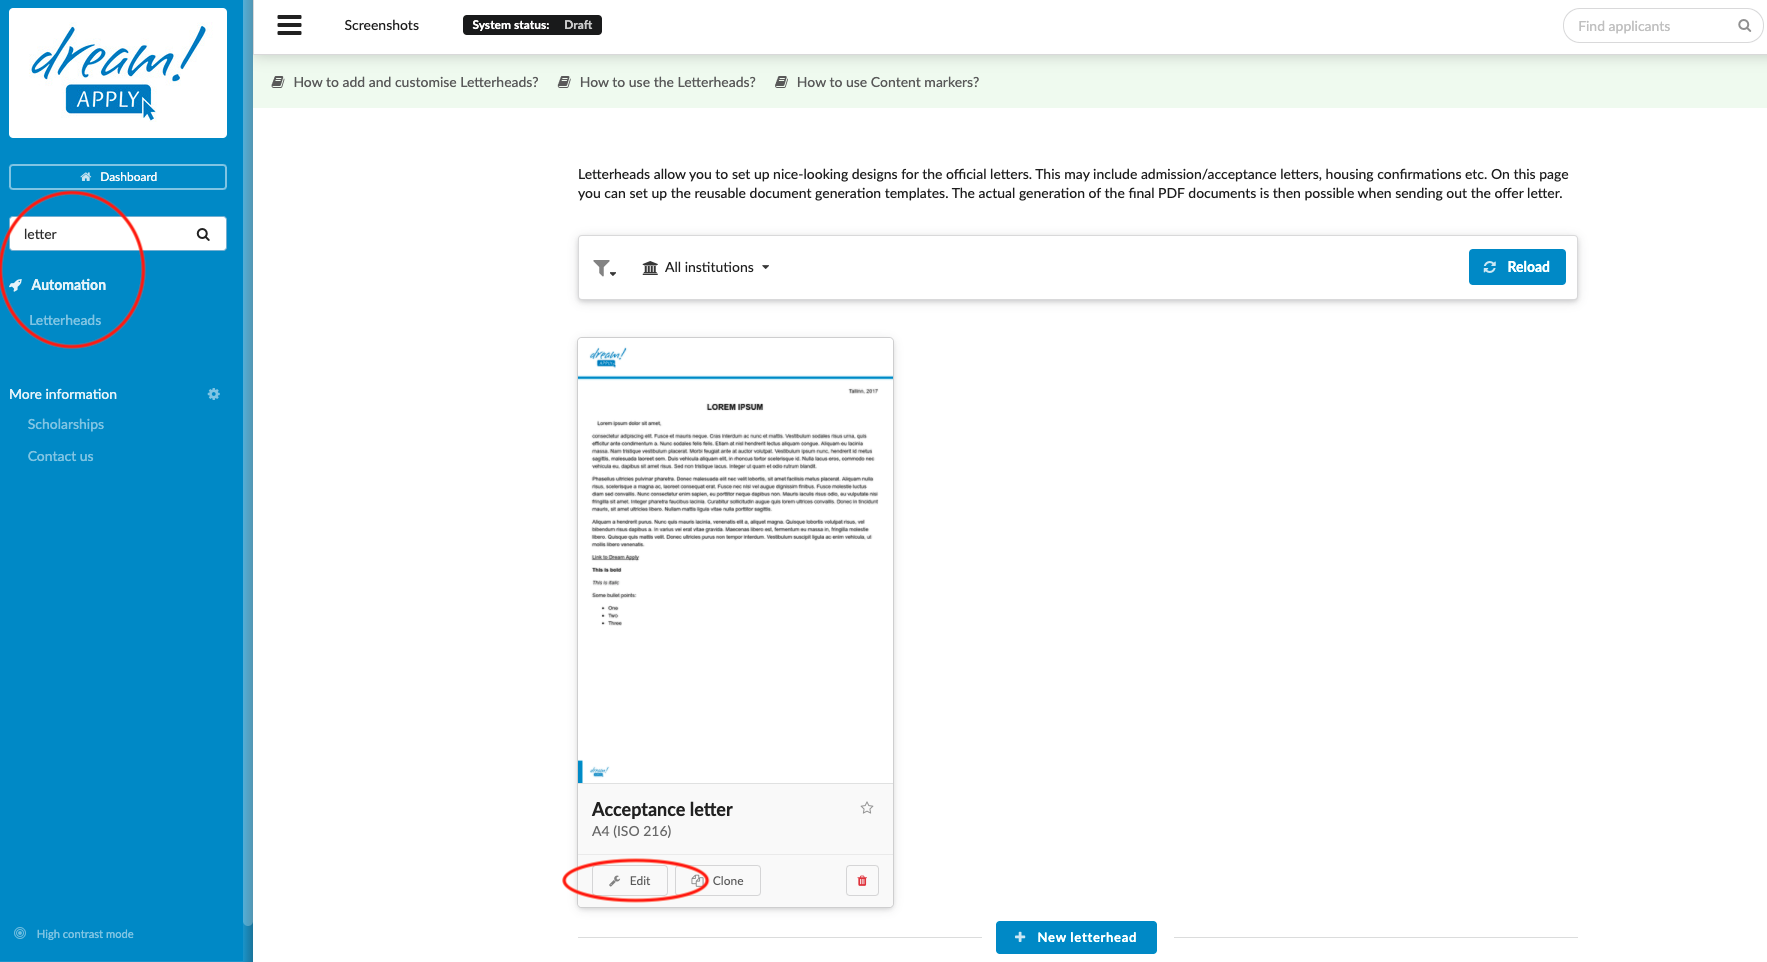
From the Main menu, go to: Automation > Letterheads.
-
Create new letterhead or choose an existing Letterhead to edit.
-
Select the “Template” tab.
-
Position your text cursor where you would like to insert the Content marker.
-
Click on “+ Insert a marker”.
-
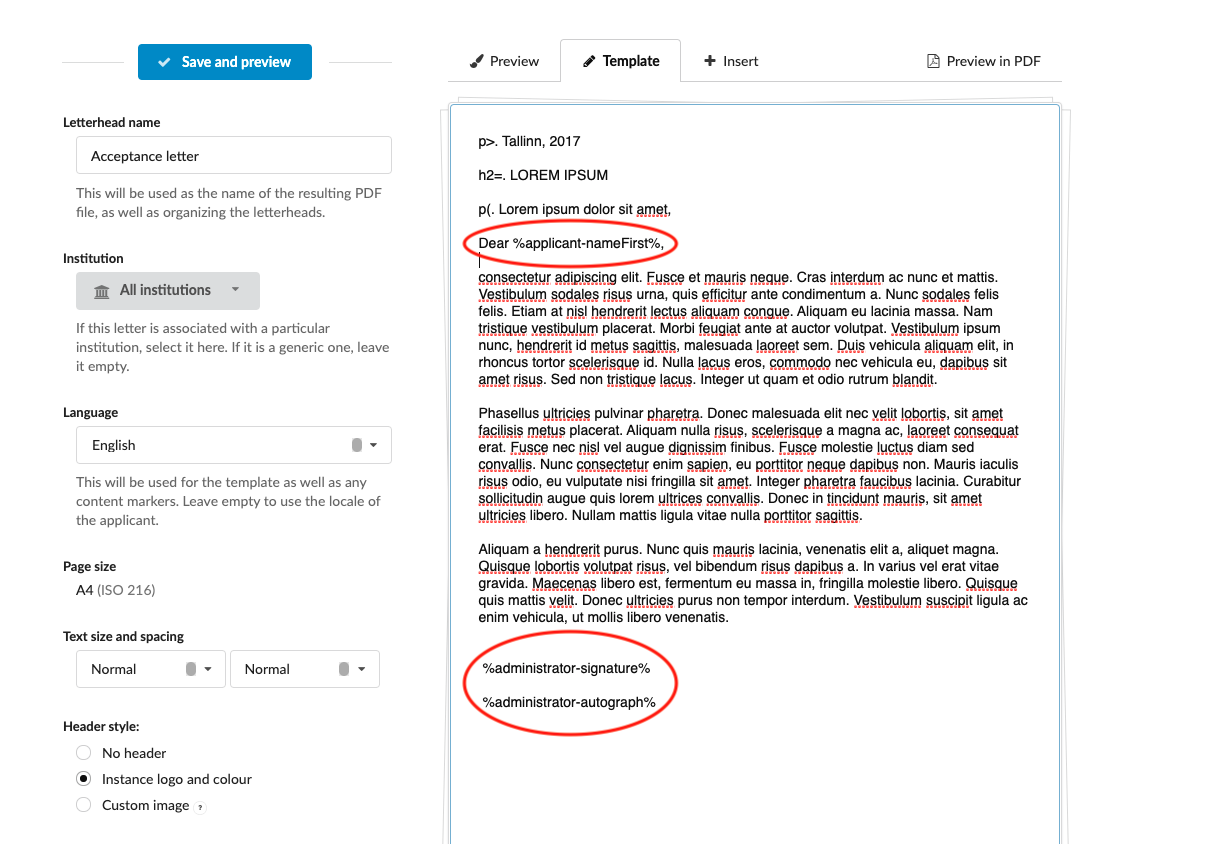
Choose a marker from the dropdown menu and click on it to have it added to the text.
-
-
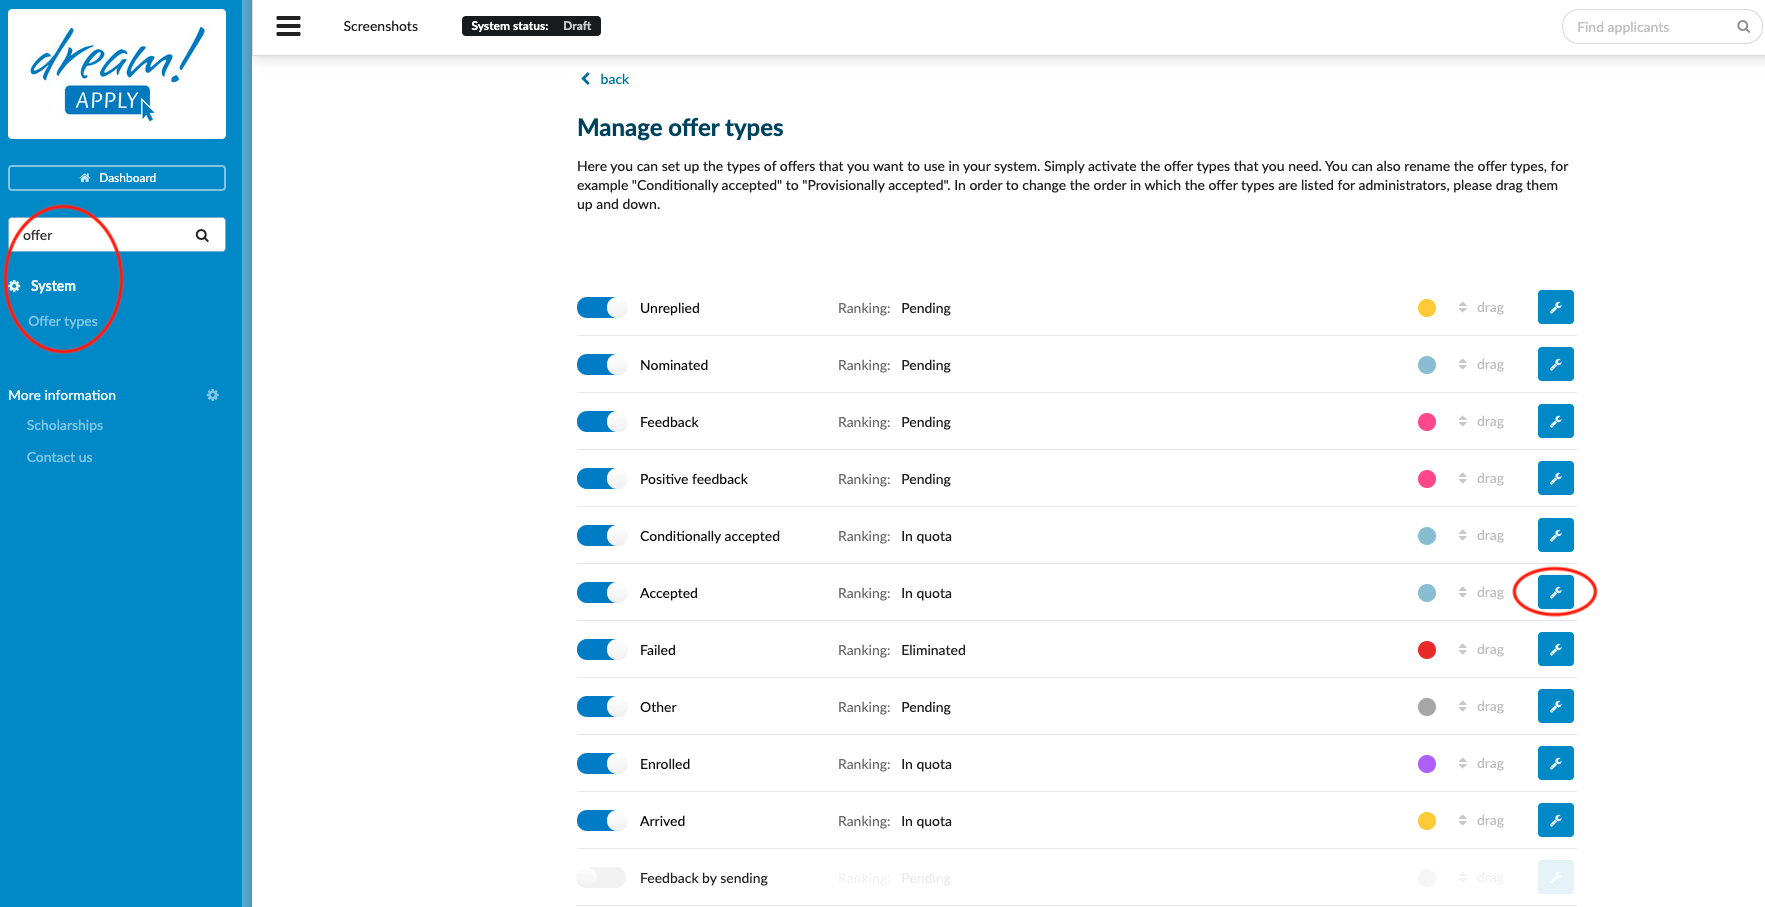
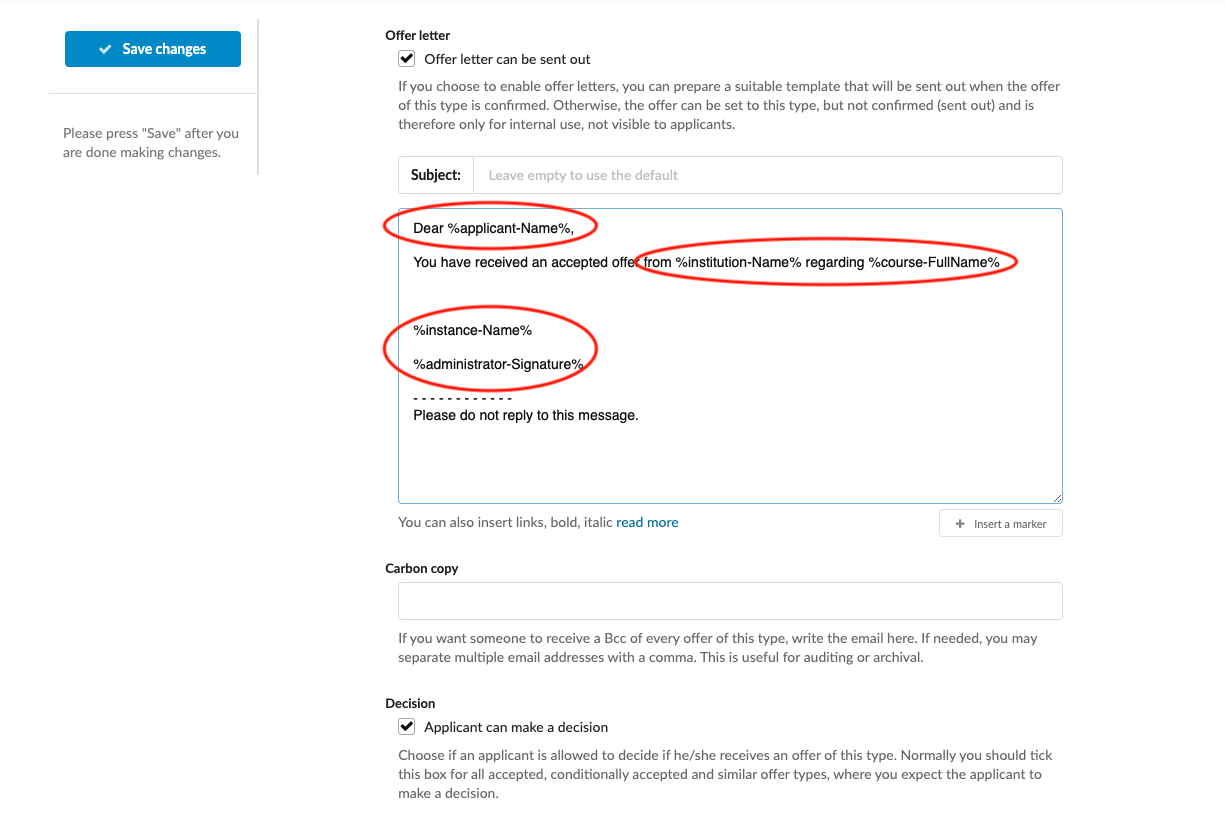
in Offer Type letter templates:
-
From the Main menu, go to: System > Offer types.
-
Choose an Offer type to be edited and click on the wrench button.
-
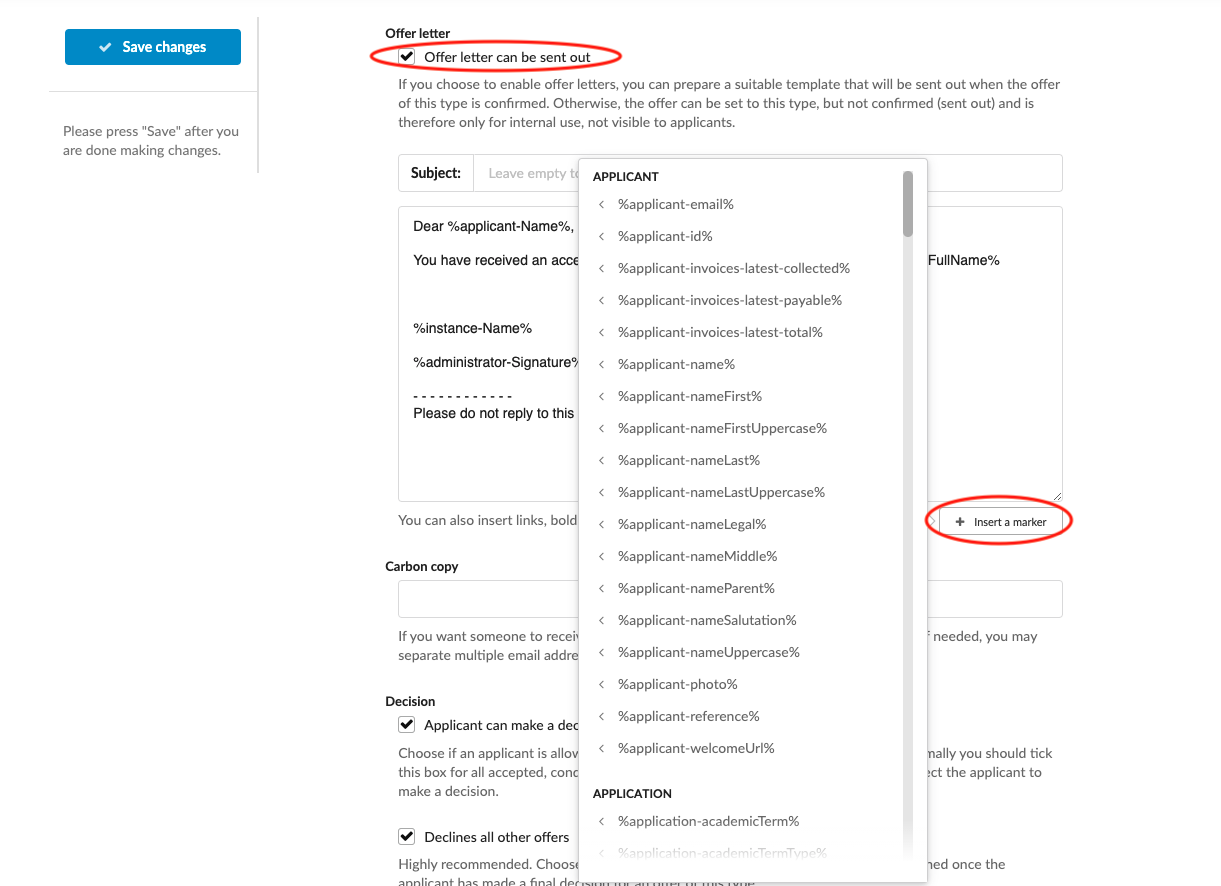
Tick the “Offer letter” box to enable the sending out of offer letters.
-
Position your text cursor where you would like to insert the Content marker.
-
Click on the “+ Insert a marker” button.
-
Choose a marker from the dropdown menu and click on it to have it added to the text.
-
-
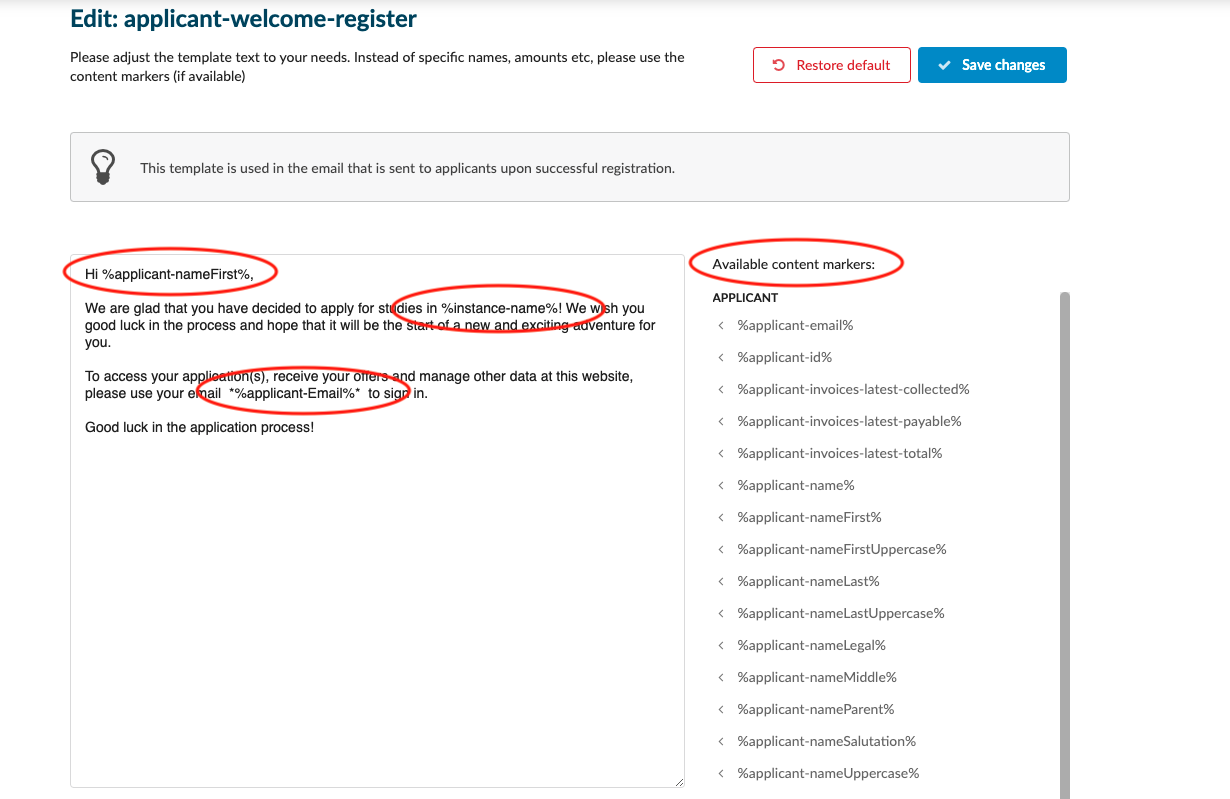
In Templates
-
From the Main menu, go to: System > Templates.
-
Choose a template and click on Edit button
-
Choose an available content marker, given to the right side.
-
Insert the marker in the content
-
-
Always remember to save your changes by clicking on the “Save changes” button!
Once the marker is inserted into the content, it will fetch the data from the system and insert it in place of the content marker.