Home › Start here › Automation › Rules › Rule engine ›
Rule engine
This article explains how to create, configure, and delete Rules from system to give you control over the automation of various functions of the DreamApply system.
-
the correct administrator permissions (“instance”)
-
read the Trigger event article
-
read the Condition article
-
read the Action article
-
understood what type of action you would like to automate in your DreamApply system
-
gathered data such as:
-
what the “Trigger(s)” for your Rule will be
-
what the “Condition(s)” for the Rule to run after being triggered are
-
what “Action(s)” will be taken automatically by the DreamApply system when all the conditions have been met
-
Add a new Rule engine:
-
Log in as an administrator with the permission “instance” (included with the Role “Superuser”).
-
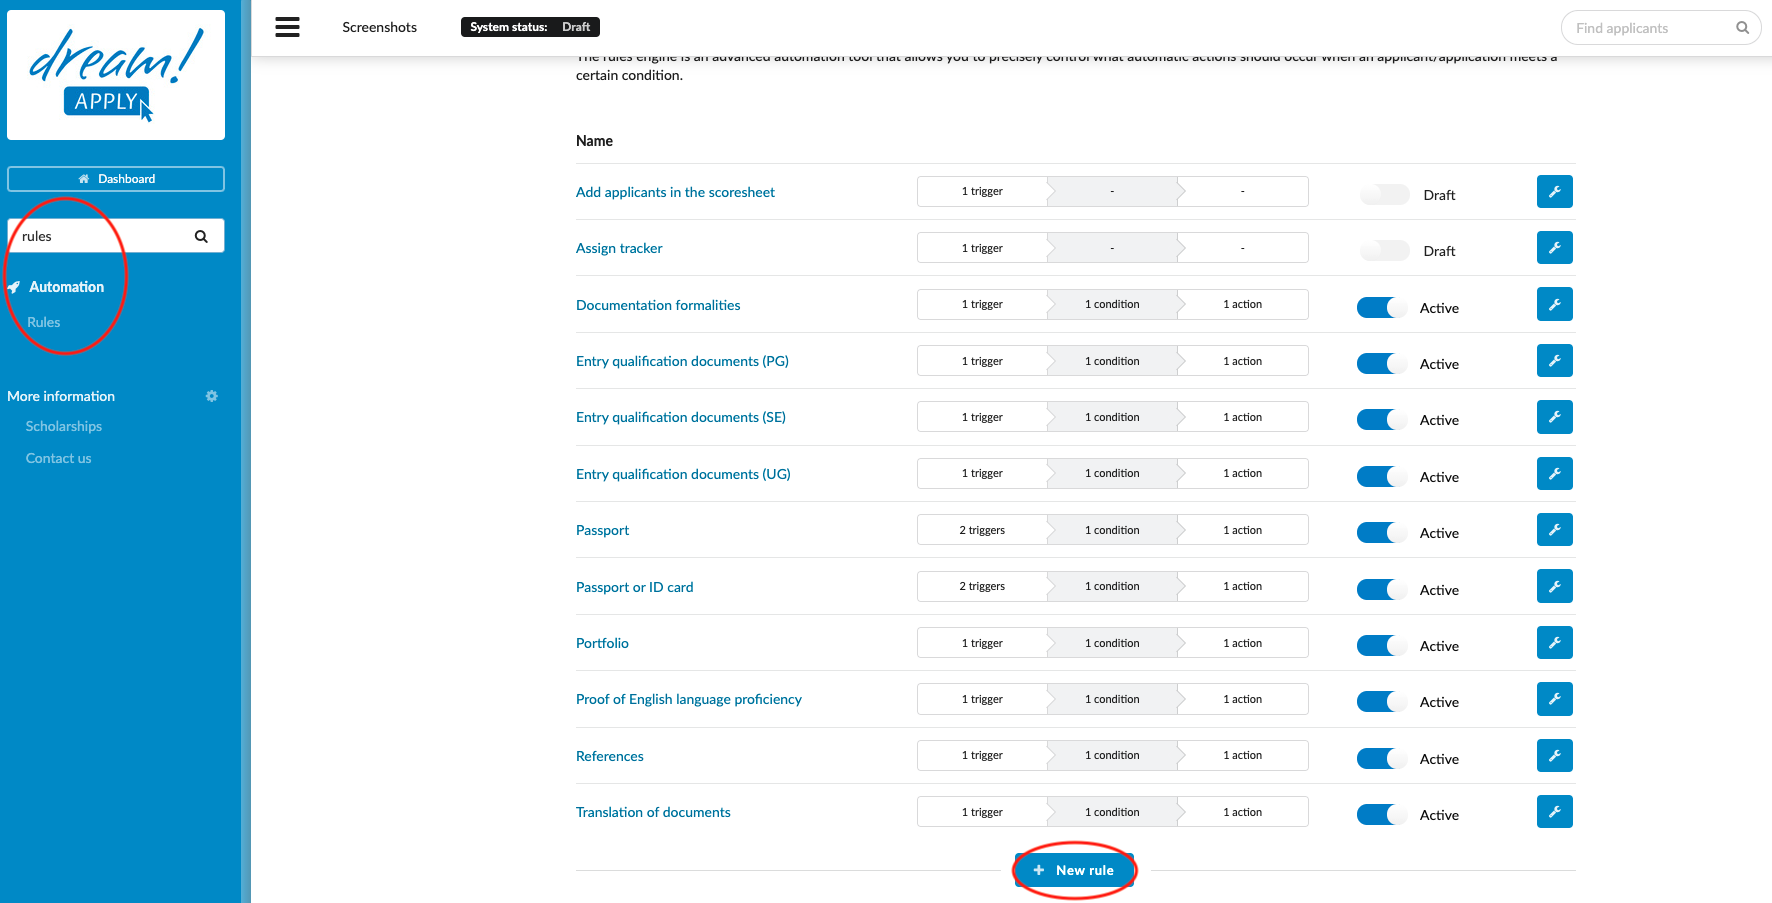
From the Main menu, go to: Automation > Rules.
-
Click on “+ New rule”.
-
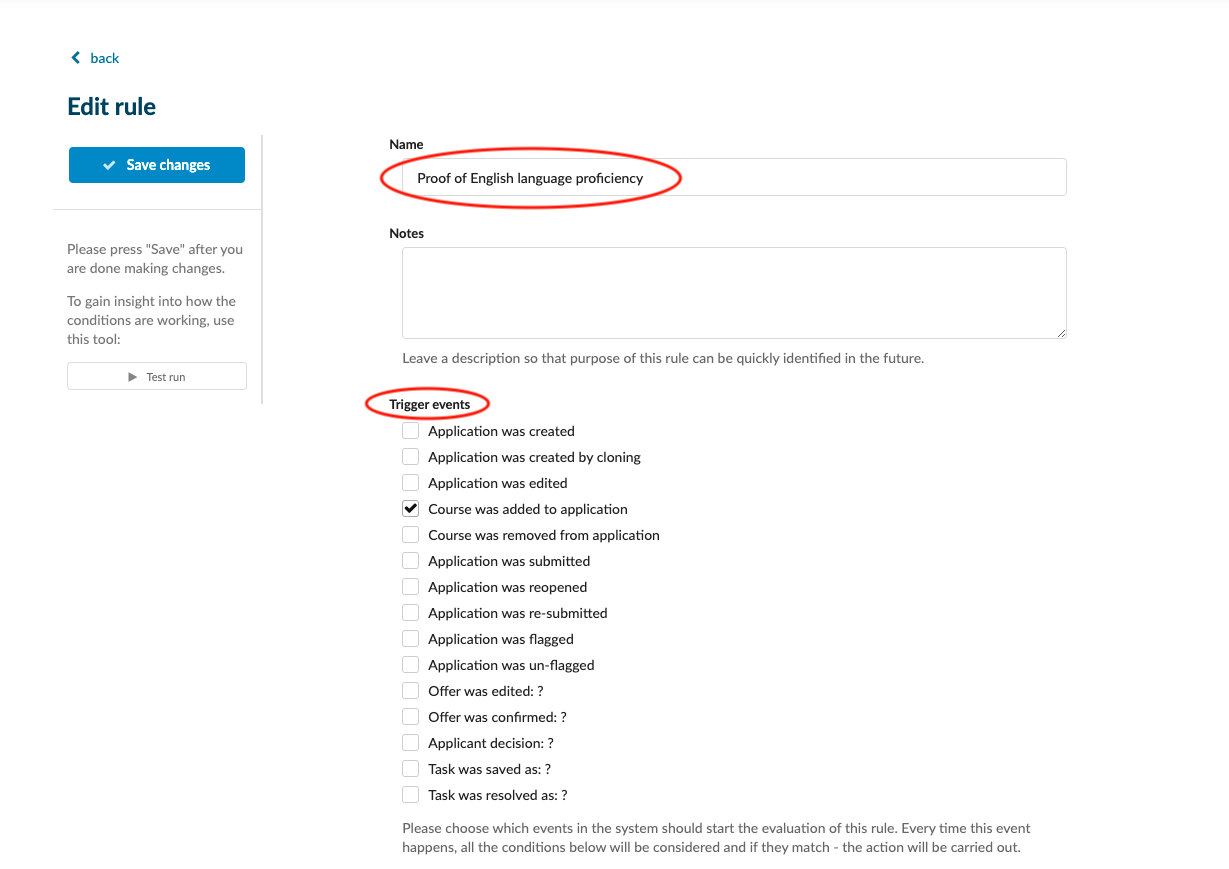
Enter a name for the Rule – it is advisable to use a naming convention that will help make it obvious what the purpose of the Rule is. For example, a Rule that will create an English language Task, can be named “Task: English language”. This way it will be easy to find all Rules that are designed to create Tasks convienently grouped together.
- It is also advisable to enter some information in the “Notes” section to help preserve the information of why the Rule was created.
-
From the “Trigger events” section, tick the box(es) of when the Rule should be triggered - this is the point of the application process when the DreamApply system will check the Rule’s conditions before carrying out the selected Action.
-
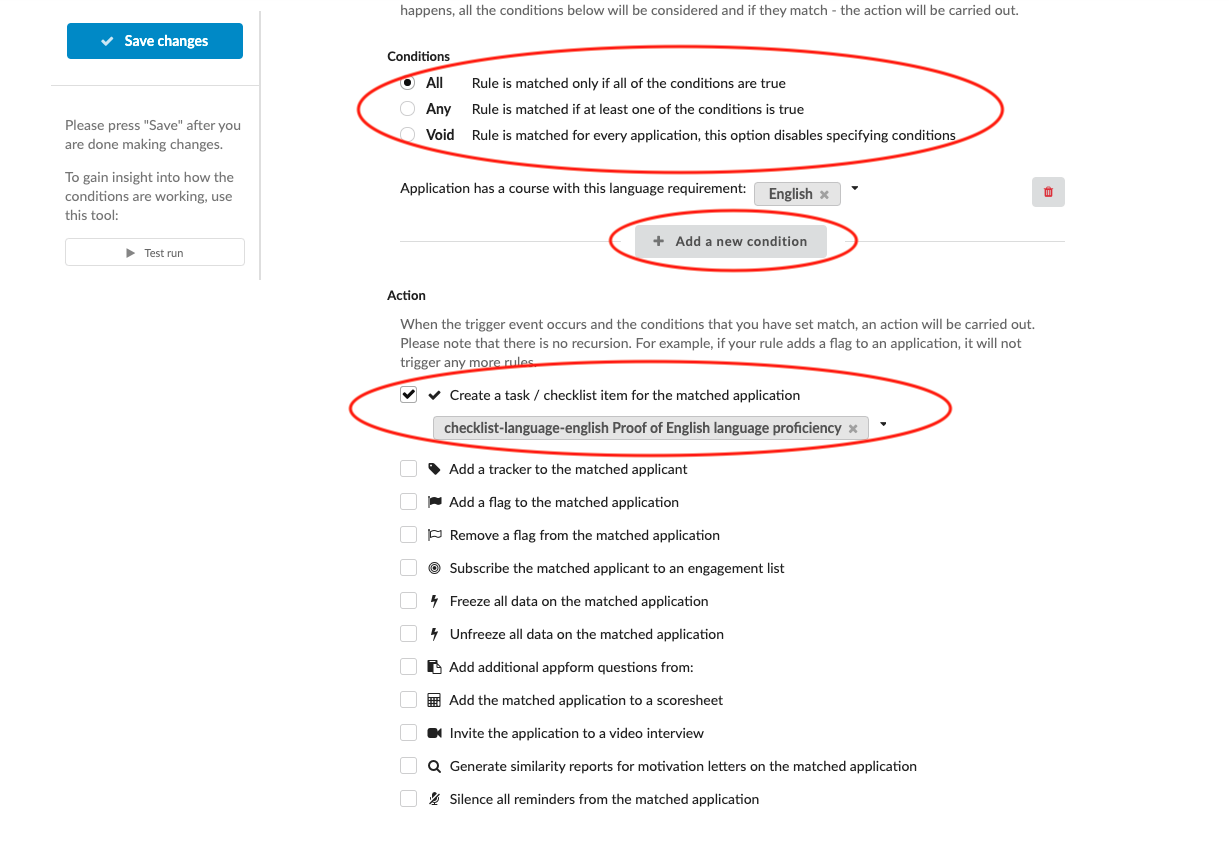
From the “Conditions” section, Choose a condition between
-
All - all of the selected Conditions must be matched
-
Any - at least one of the Conditions must be matched
-
Void - no Conditions are required
-
-
Choose a condition (ex: Applicant has a course with the language requirement: English).
-
Tick the box next to the Action(s) which you would like to be taken. For example:
- Tick the “Create task / checklist item for the matched application”. (ex. Task: English language requirement)
-
Click on “Choose a task class” and select the Task(s) to be assigned.
-
-
Always remember to save your changes by clicking on the “Save changes” button!
-
Click on “< Back” to return to the Rules page.
-
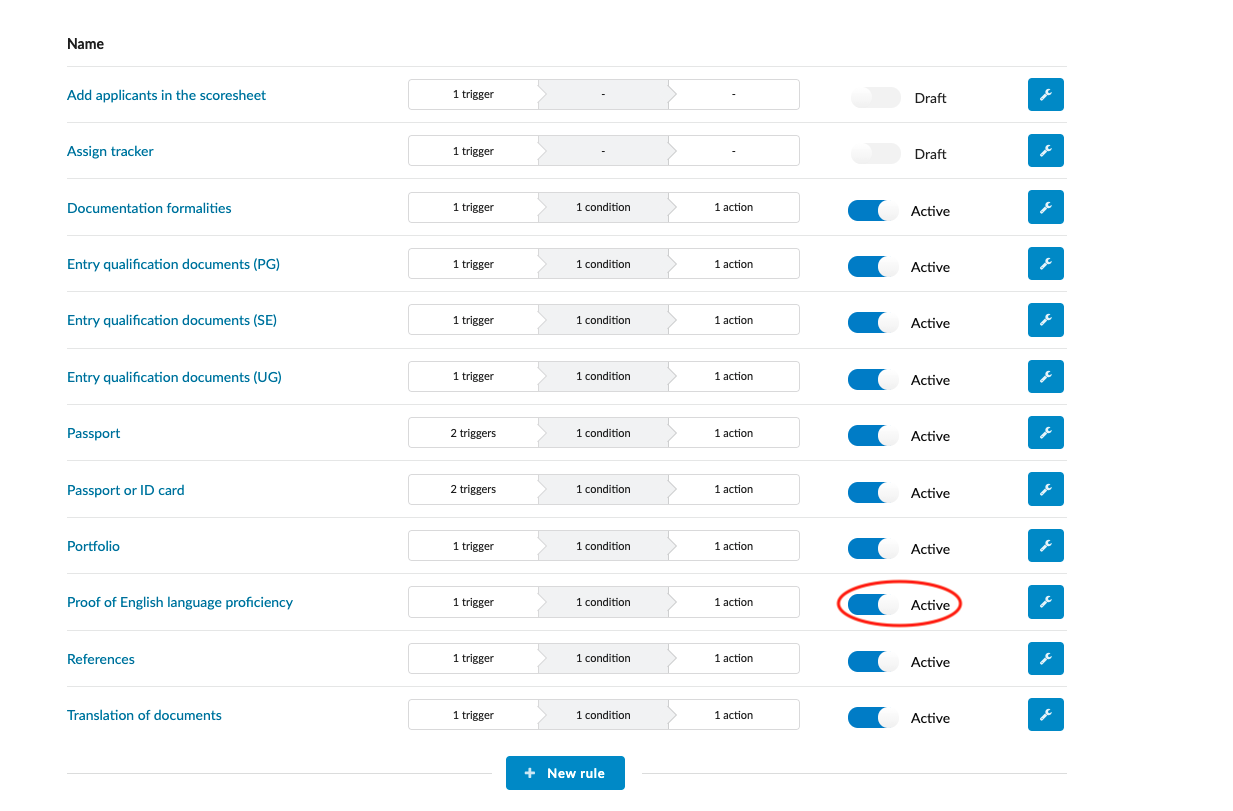
Activate recently created “Rule” by toggling the switch next to it.
After creating and activating a Rule, the DreamApply system will automatically perform the selected Action(s) on every application that, at the time of the Triggering event, met the Conditions.
In our example, whenever a programme with an English language requirement is added to an application, the DreamApply system will automatically assign the checklist Task asking for an English language certificate to the application.