Home › Start here › Intelligence › Data cross-checks ›
Data cross-checks
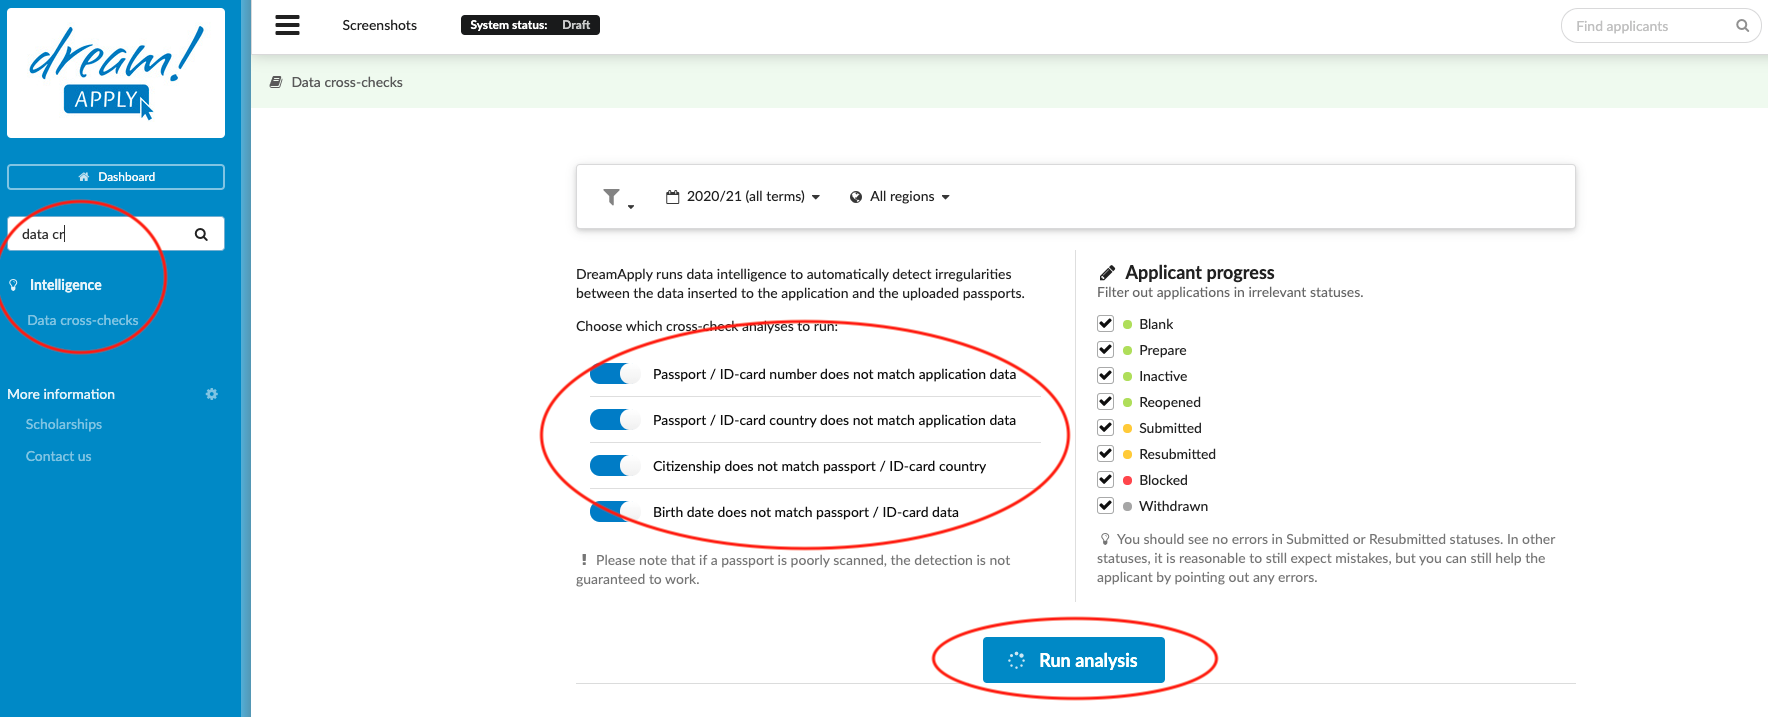
DreamApply offers the Intelligence addon which uses machine vision to automatically extract the machine-readable data from any uploaded passports. This article teaches users how to use the Intelligence tool to automatically identify any irregularities between the data entered by applicants and the data extracted from their uploaded passports.
-
the Intelligence addon enabled (please feel free to contact [email protected] if you would like more information on enabling this addon)
-
the correct administrator permissions (“passports”)
-
some applications in the system which have an uploaded passport/ID
-
understood that poorly scanned passports and IDs are not guaranteed to be recognized by the machine vision, and it cannot be guaranteed that there are no undetected invalid passports or IDs in the system
-
Log in as an administrator with the permission “passports” (included with the Role “Admissions administrator” in addition to “Superuser”).
-
From the Main menu: go to Intelligence > Data cross-checks
-
(optional) Set a Filter:
-
Academic term – if needed, from the Filter bar, select one or more Terms (from the same academic year), to see that set of expired passports
-
Region – if needed, from the Filter bar, select one or more regions to see only the expired passports from applicants with certain citizenships.
-
Select one or more Data cross-check to run to find irregularities between the following data on the applicant’s application and the uploaded passport/ID:
-
number
-
country
-
citizenship
-
birth date
-
-
Applicant progress – if needed, below the Filter bar, deselect one or more Applicant progress statuses to filter out applicants with irrelevant statuses
-
Click on the “Run analysis” button.
-
-
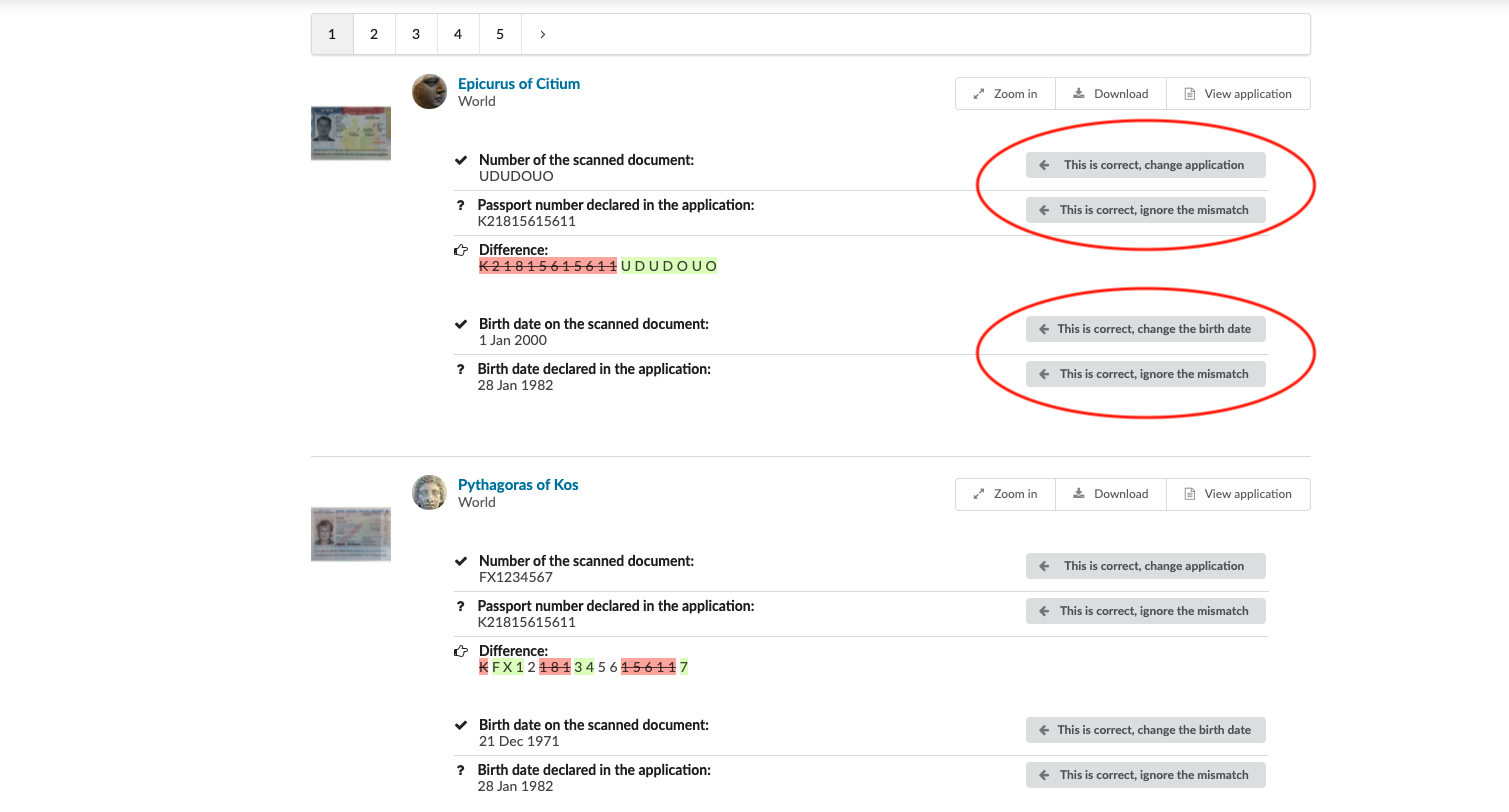
Inspect the set of applicants whose passports/ID have inconsistent data with the application.
-
Notice that the system shows three different notifications:
-
the data on a scanned passport/ID
-
the data entered in the applications
-
the difference between the scanned passport/ID and what was entered in the application
-
-
take one of the following actions to resolve the mismatch (or not). In the case:
-
the Data on the scanned document is correct, then click on the button “This is correct, change application”.
-
the data appears to be correct on the application, then click on “This is correct, ignore the mismatch.”
-
The Data cross-checks feature helps you to quickly identify differences between an applicant’s uploaded passports and the information they entered on their application manually. By using the Data cross-check tool, you can efficiently identify and adjust the data in the application form with the click of a button!
How to use expired passport checker?