Home › Start here › Marketing › Import leads ›
Import leads
Teaches how to import collected leads from an Excel table into DreamApply. Importing leads will allow for the creation of many registered Applicants with a single action.
-
the Marketing addon enabled (please feel free to contact [email protected] if you would like more information on enabling this addon)
-
the correct administrator permission (“import-applicants”)
-
gathered the applicant’s necessary information in an Excel sheet. The information should be organized in individual columns containing the following:
-
Applicant name
-
Applicant last name
-
Applicant Email address
-
(optional) Applicant citizenship (must be in the format of upper case 2-letter country codes – see more about ISO 3166-1 Alpha-2 codes)
-
(optional) Telephone number
-
(optional) Notes
-
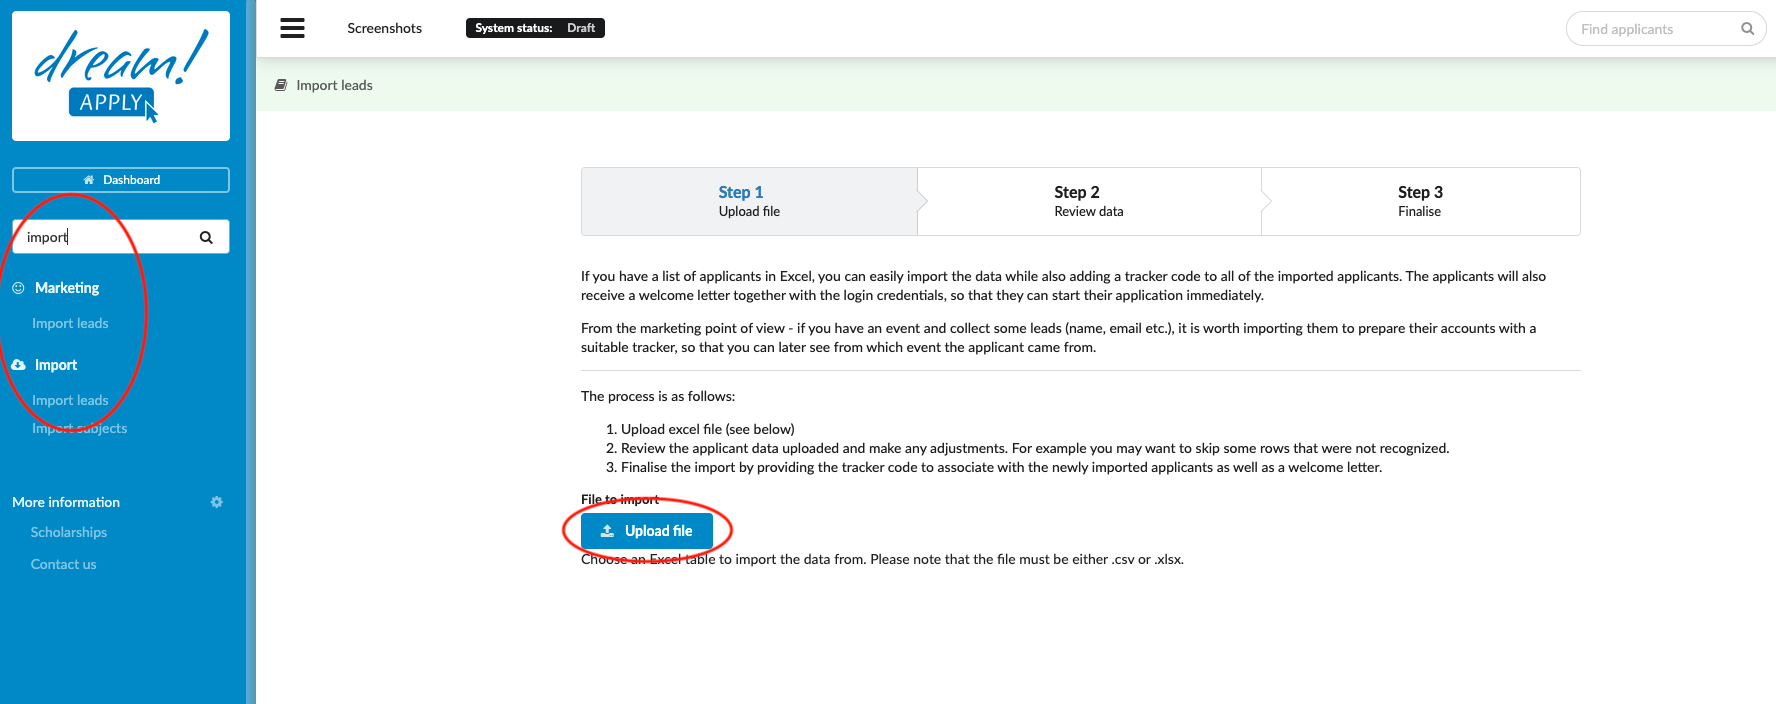
Import leads:
-
Log in as an administrator with the permission “import-applicants” (included with the Roles “Admissions administrator”, and “Marketing administrator” in addition to “Superuser”).
-
From the Main menu, go to either:
-
Marketing > Import leads
-
Import > Import leads
-
-
Click on the “Upload file” button.
-
Choose the Excel sheet containing Leads to upload it in the system.
-
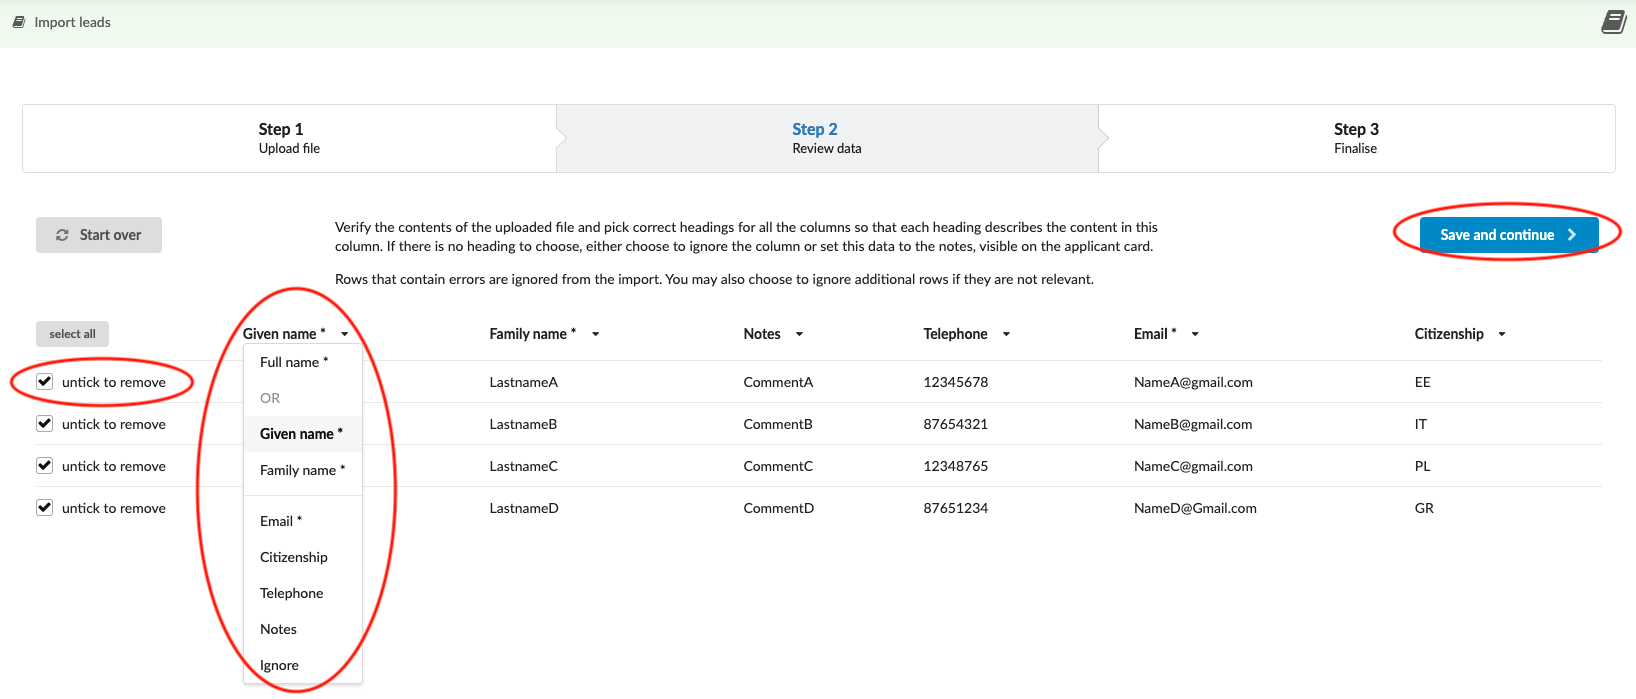
Select the correct column headers for each of the columns.
-
(optional) Assign the “Ignore column” as the column header for irrelevant columns as needed.
-
(optional) You can skip certain rows by un-ticking the box beside it.
-
Click on the “Save and continue” button.
-
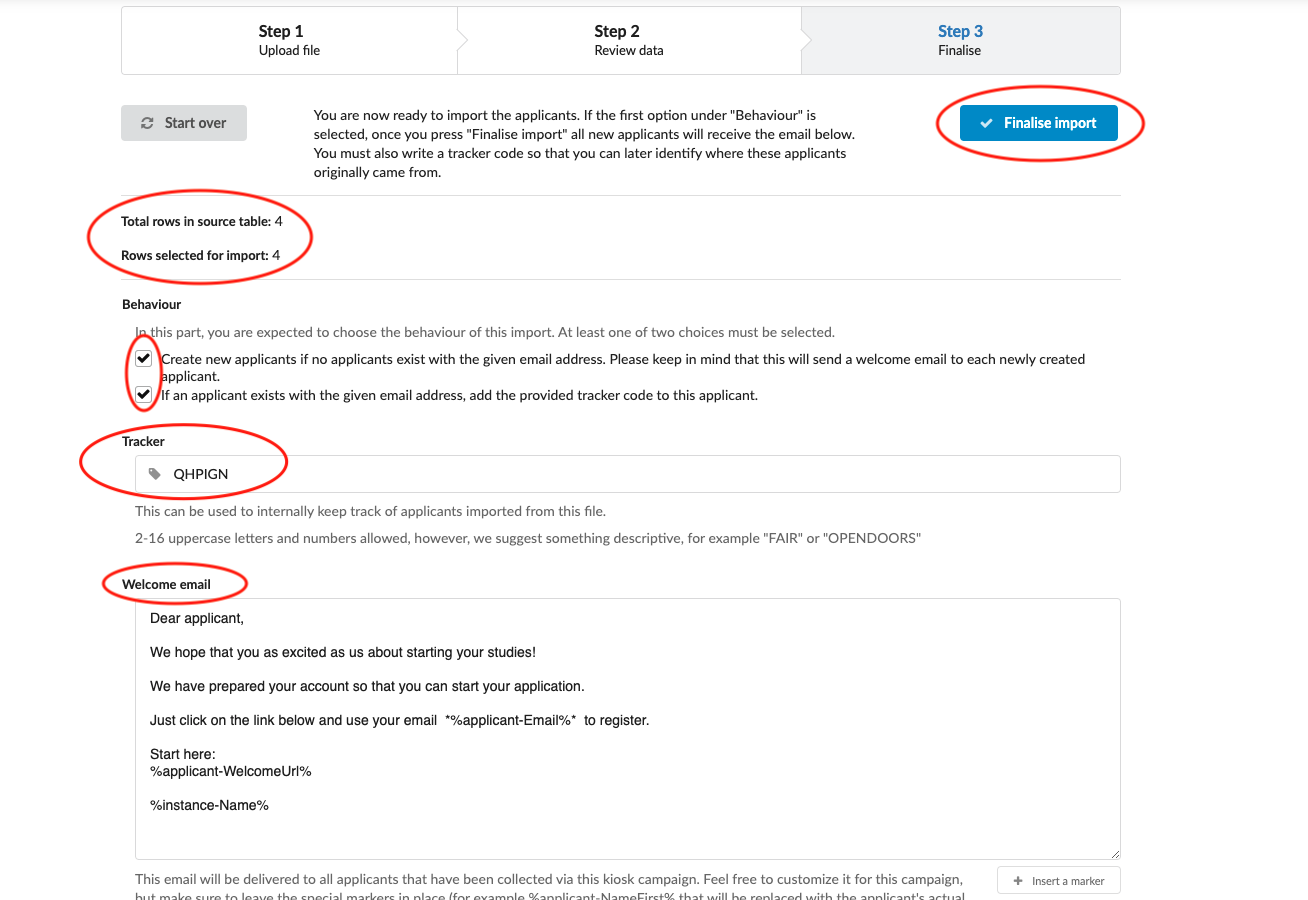
Choose at least one Behaviour as desired:
-
Decide whether to have the system create a new account if one with the same email address does not already exist. This will send a welcome email.
-
Decide whether to have the system add a tracker code if an account with the provided email address already exists in the system.
-
Choose a tracker which will be assigned to the imported Leads.
-
-
(optional) Edit the welcome letter as desired.
-
Click on the “Finalize import” button.
After importing Leads, the system will either register a new account or assign the specified Tracker to the existing accounts, or both depending on the selected Behaviour(s). If a new account has been created, a welcome email with access credentials will be sent to the provided email address. All Leads created with this action will have the attached Tracker.