Home › Start here › System › Translations ›
Translations
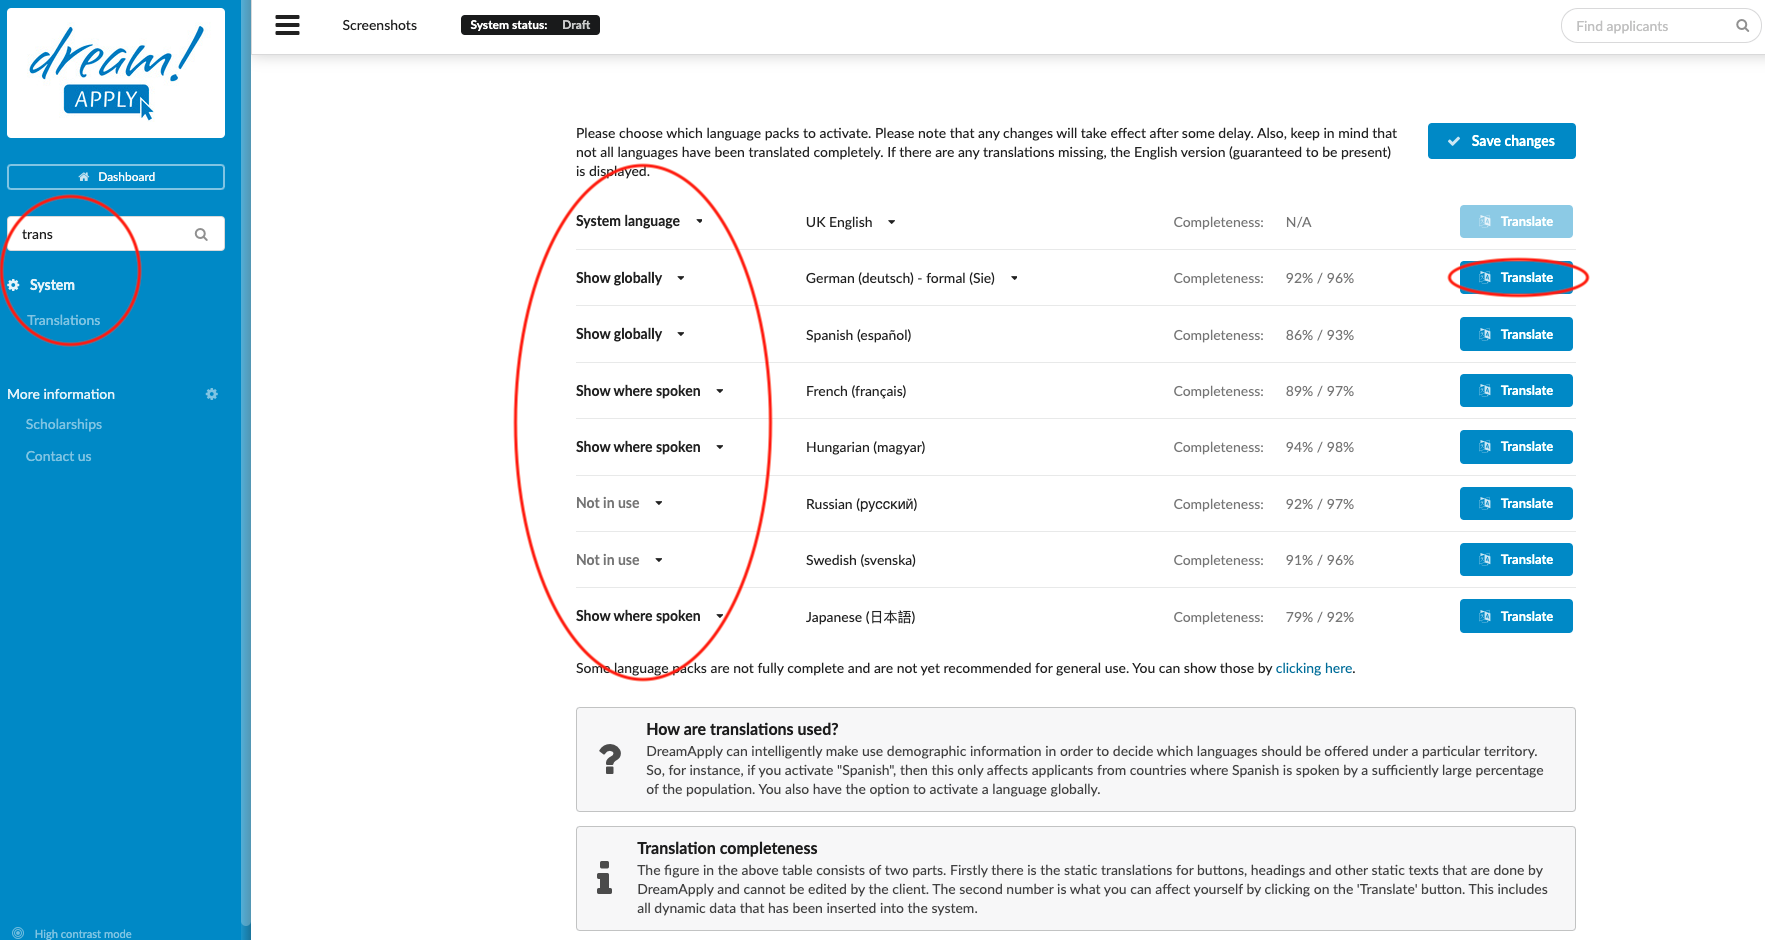
DreamApply can intelligently make use of demographic information in order to decide which languages should be offered. This article explains how it is possible to use the system’s translation feature. When “Spanish” is activated, it is possible to have it affects applicants from countries where Spanish is spoken by a large percentage of the population. The option to activate a language globally.
-
the Translations addon enabled (please feel free to contact [email protected] if you would like more information on enabling this addon)
-
the correct administrator permission (“instance”)
-
Log in as an administrator with the permission “instance” (included with the Role “Superuser”).
-
From the Main menu, go to System > Translations.
-
In the first column you can specify the usage of language:
-
System language – this will be the default language of the system when a visitor arrives.
-
Show where spoken – when an applicant from a region that speaks this language, it will offer this language as an option.
-
Show globally – the language will be offered as an option no matter the region of the applicant.
-
Not in use – the language will not be offered as an option.
-
-
Click on the “Translate” button to add or modify to the translations in the DreamApply system.
-
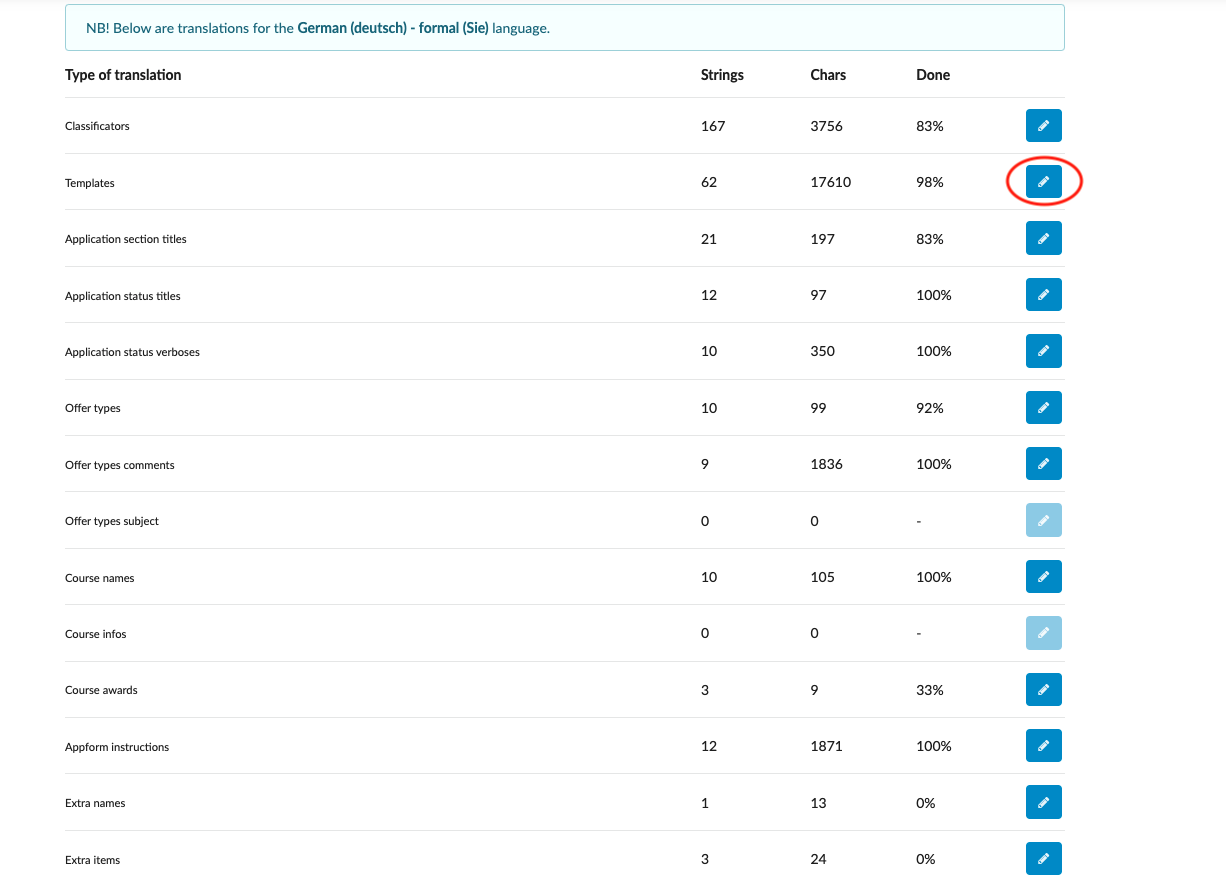
Locate the relevant section and click on the button with a pencil icon.
-
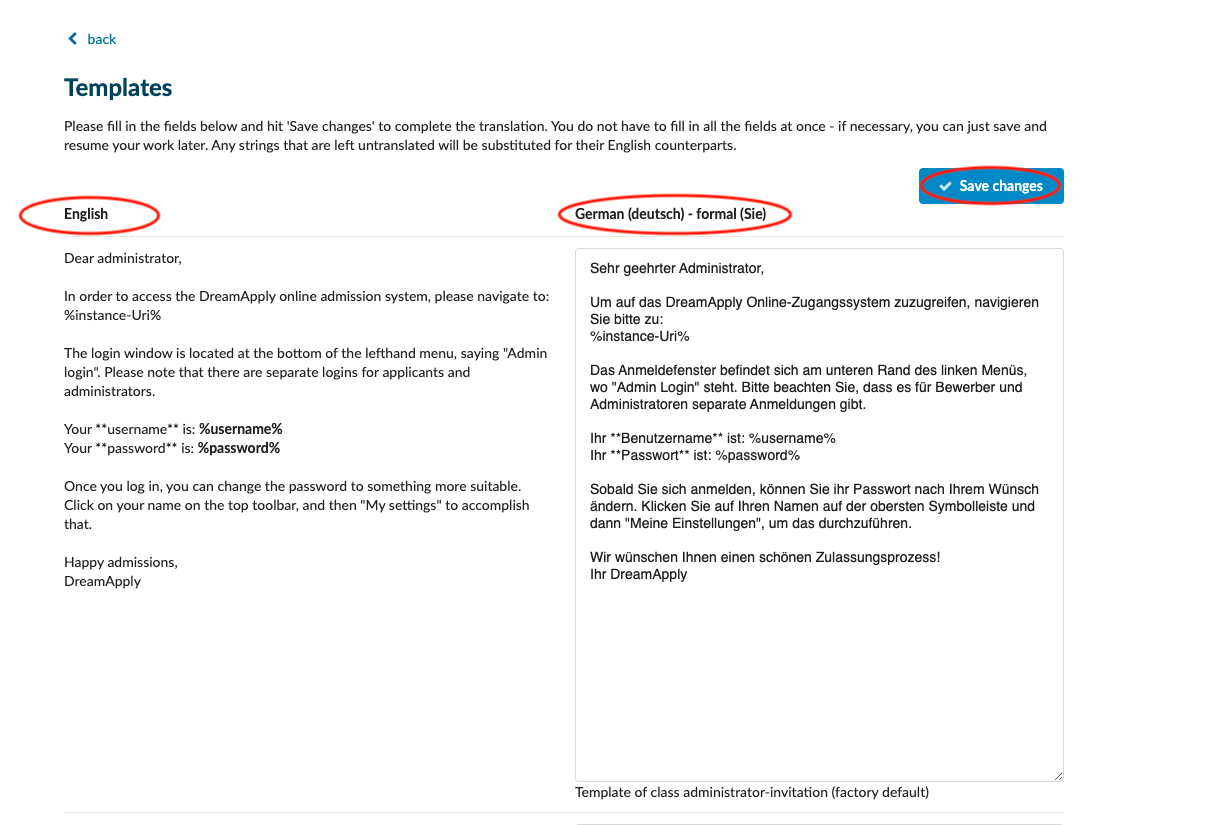
Fill or edit the necessary fields.
-
Always remember to save your changes by clicking on the “Save changes” button.
Users will be able to activate translations that are important for their system to offer as an option and will be able to modify those translations accordingly.