How do we identify visitors?
Teaches how to track the traffic in your DreamApply system using “Entry points”.
Make sure that you have
-
the Marketing addon enabled (please feel free to contact [email protected] if you would like more information on enabling this addon)
-
the correct admin permission (“entry-points”)
-
prepared a place (Ex: a banner ad, or an “Apply now!” button) to insert the link, which will navigate visitors to your platform.
Create a new entry point:
-
Log in as an administrator with the permission “entry-points” (included with the Role “Marketing administrator” in addition to “Superuser”).
-
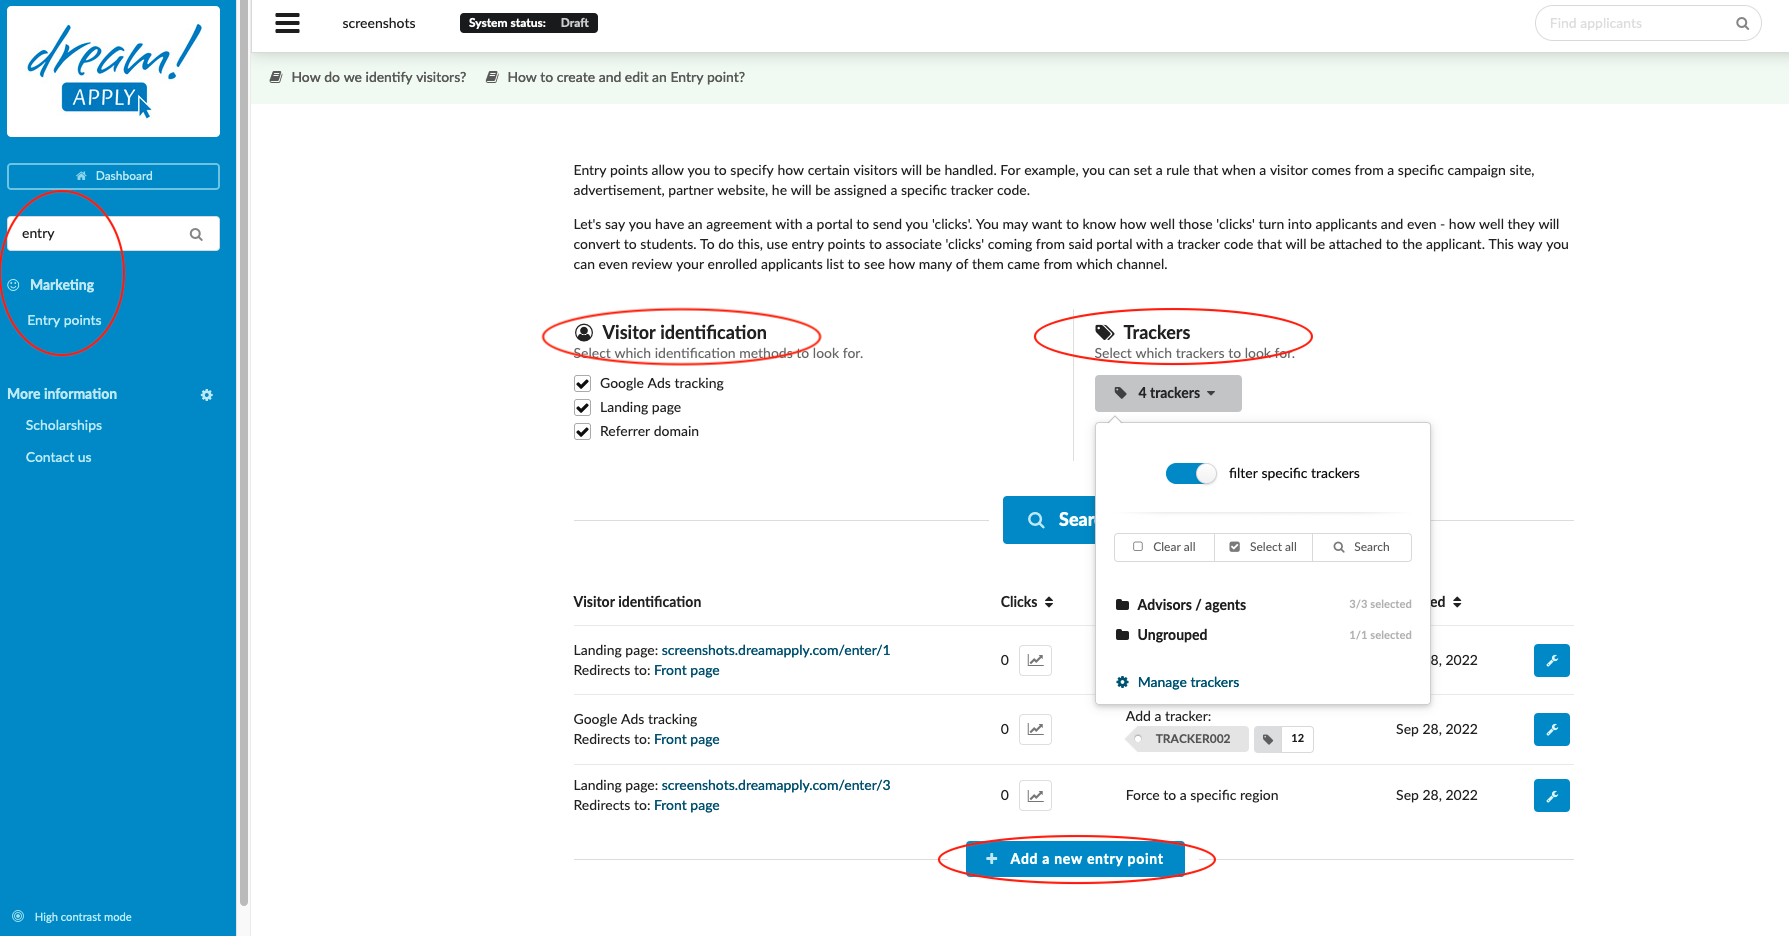
From the main menu, go to Marketing > Entry points.
-
You can filter existing Entry points by a different criterion.
-
Click on “+ Add a new entry point”.
-
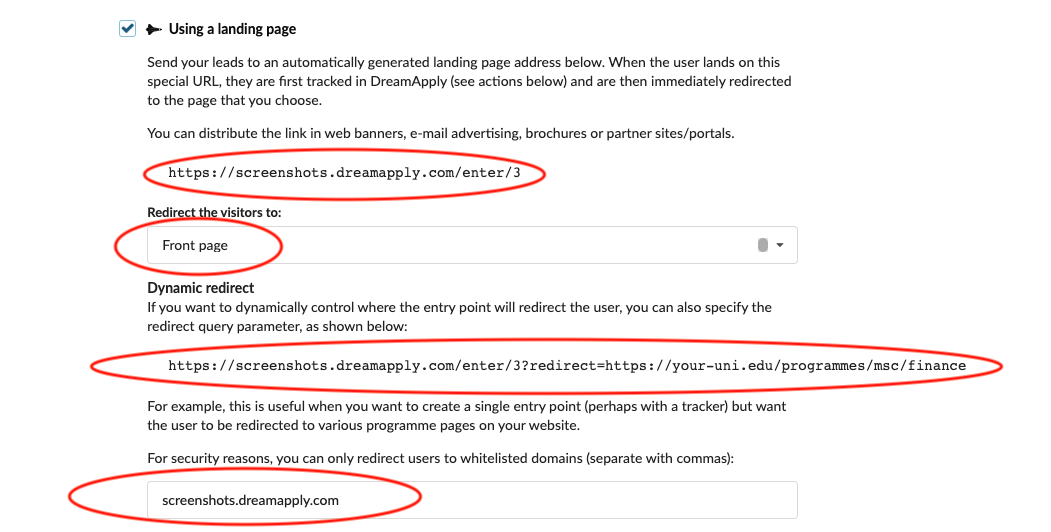
Tick the box next to “Using a landing page”.
-
Read the instructions that appear.
-
Copy the link that has been generated. This is the “landing page”. After embedding this link in the banner ad (for example) for your marketing campaign, the visitors will briefly be directed to this URL before the specified actions (more on actions below) are performed and then the visitor will be redirected to the specified redirect page (next step).
-
From the drop-down menu choose which page you would like the visitors to be redirected to.
-
Front page – this will redirect the visitor to the normal landing page as if the visitor organically came to the site from the results of a search engine.
-
Course search – this will redirect the visitor to the course search from where they can search your DreamApply system for the course they are interested in.
-
Additional suggestions will come from the system’s custom Main menu items.
-
Or enter a different URL. To use this feature copy and paste the URL in the system (or just the file name and path).
-
-
(optional) Read and follow the instruction for the Dynamic redirect feature. This is useful for when you would like to use a single entry point, but have the visitor redirected to different pages depending on what they clicked on.
- When redirecting users to a URL, the domain must be whitelisted (your DreamApply domain will be filled automatically).
-
Embed the link in your digital marketing material including but not limited to web banners, e-mail advertising, brochures, or partner sites/portals.
-
-
In the following field, choose a place where you would like to redirect traffic.
-
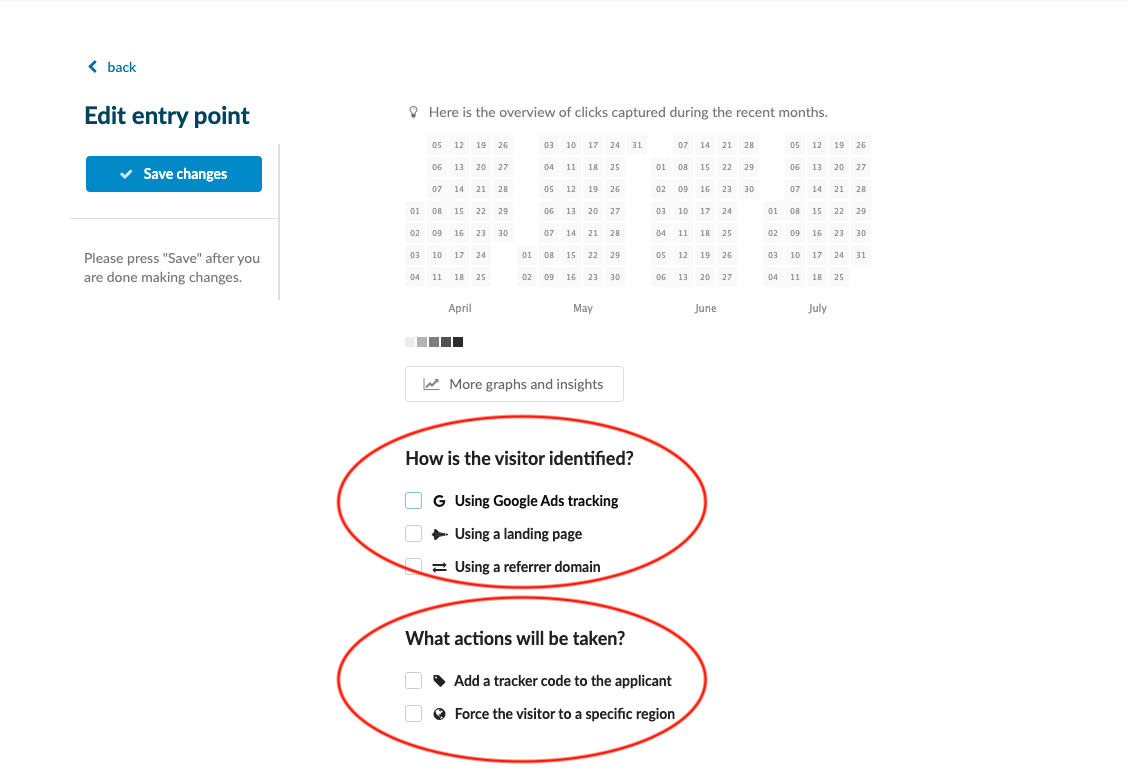
Choose what action you would like to be taken.
-
Add a tracker code to the applicant – this will add the specified Tracker code to the Applicant once they register an account in your DreamApply system.
-
Force the visitor to a specific region – this will assign the applicant to the specified region once they decide to register.
-
-
Users know how to create an Entry point and will understand what is to be done with the unique link that is generated by the system and what actions can be taken by the system after a visitor comes to the page from the unique entry point.
How to the the action for entry point