Administrator Permissions
This article explains how to add and edit an administrator’s permissions.
-
the correct administrator permission (“administrators”)
-
knowledge about which administrator(s) should be added, changed, or removed
-
knowledge about which permission(s) these (administrator(s) should or shouldn’t have
- Log in as an administrator with the permission “administrators” (included with the Role “Superuser”).
Add an administrator
-
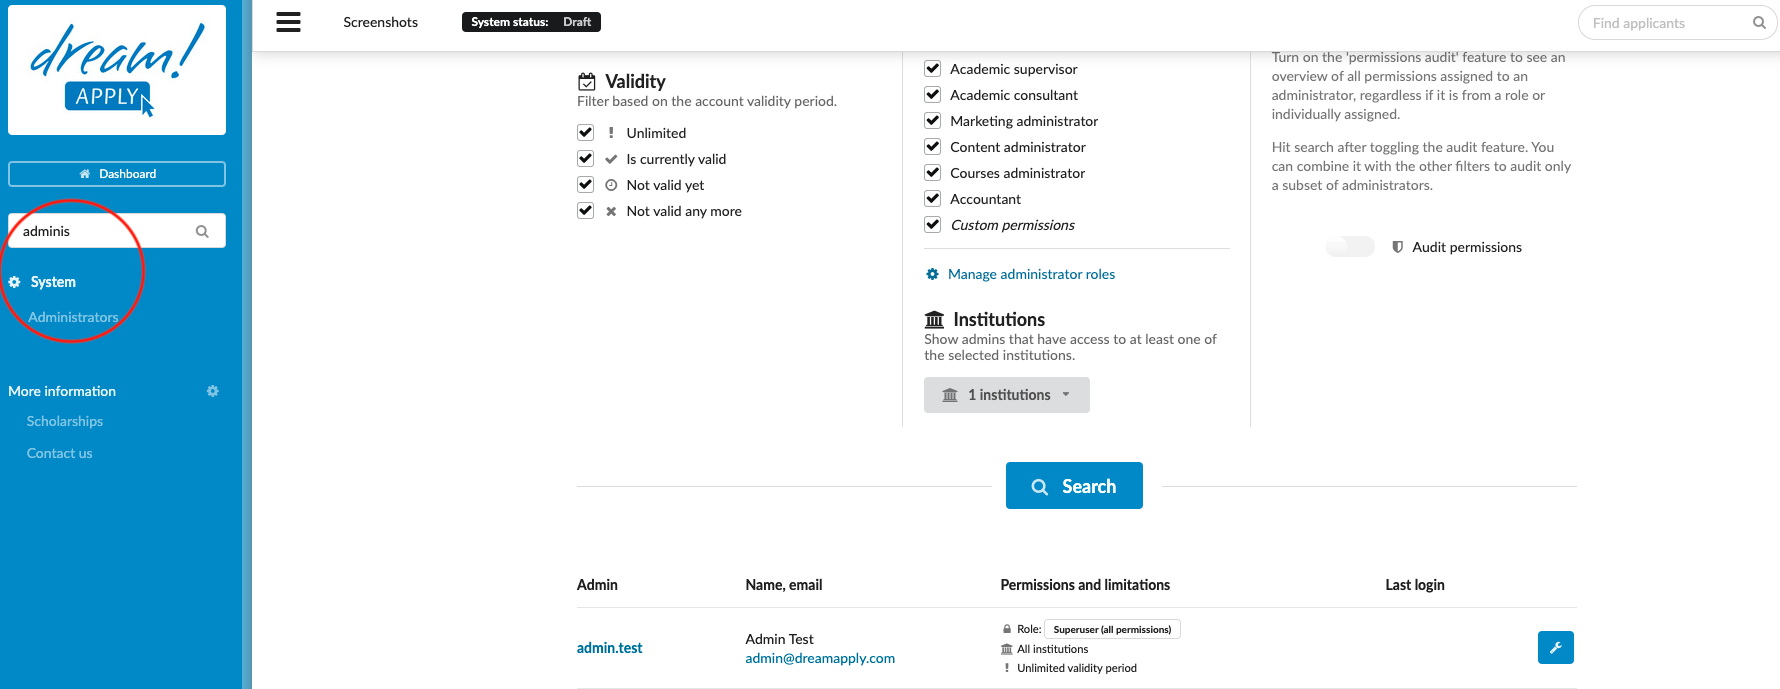
From the Main menu, go to System > Administrators.
-
Click on the “+ New administrator” button.
-
Enter the administrator’s name and click “OK”.
-
Enter the administrator’s email address.
-
After editing the administrator’s set of Limitations and Permissions (for more details, see below), click on the “Send out password” button.
Edit the administrator’s Limitations and Permissions
-
Locate the administrator account to be edited.
-
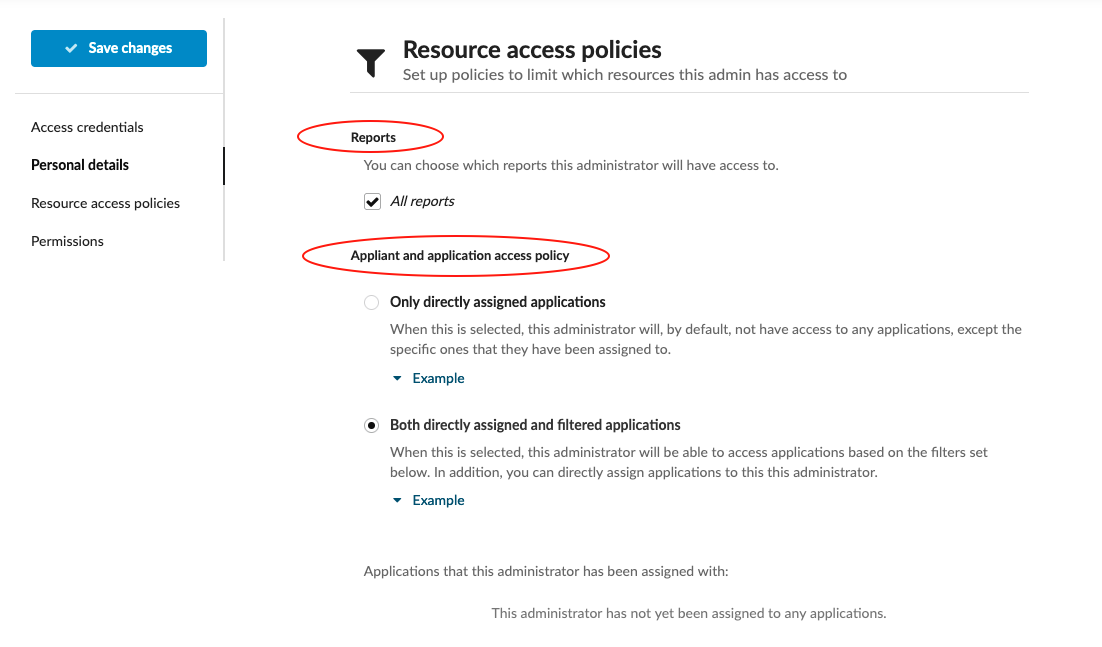
Navigate to the “Limitations” section of the page – this is where it is possible to limit the scope of which applicants and applications an administrator will be able to use their permissions on.
-
Reports – this is where administrators can have their access limited to all, some, or none of the system Reports.
-
Applicant and application access policy - You can limit administrator’s access on the applications based of following criteria: 1. Have an access only on directly assigned applications (commonly used with “Director” feature) 2. Have an access on all applications, including directly assigned and filtered applications.
-
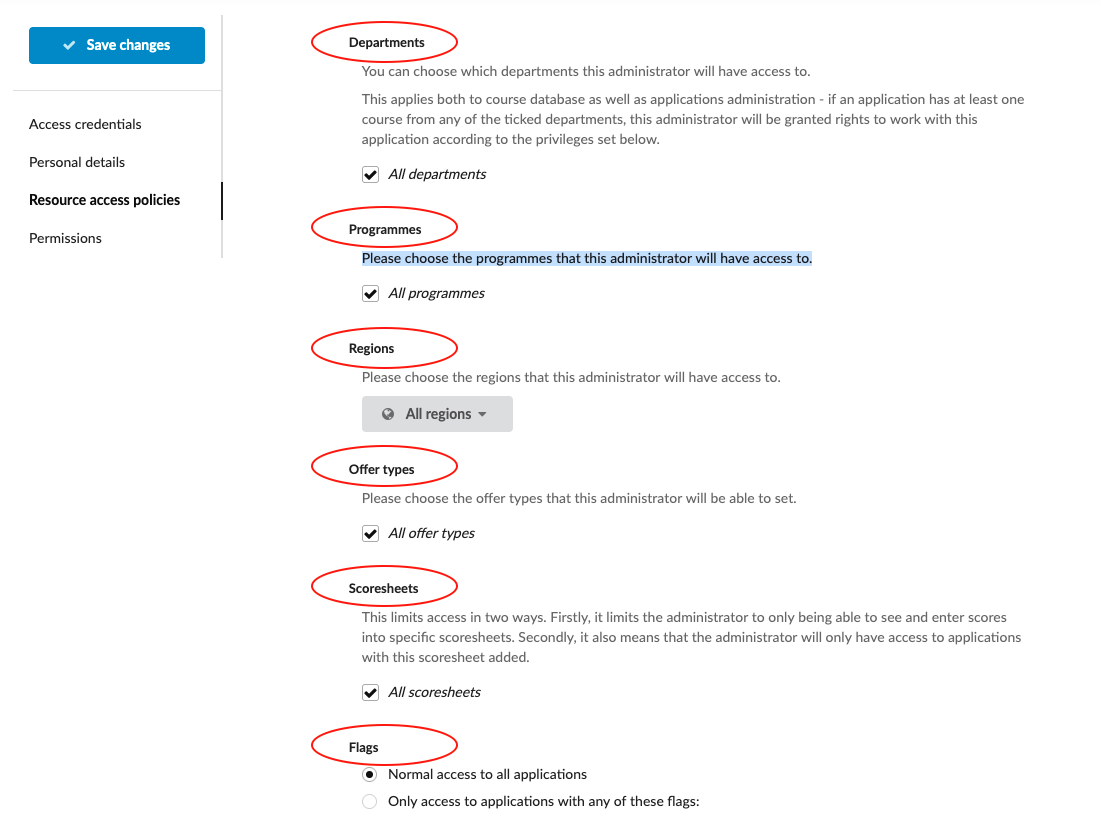
Department - You can choose which departments this administrator will have access to. This applies both to course database as well as applications administration - if an application has at least one course from any of the ticked departments, this administrator will be granted rights to work with this application according to the privileges set below.
-
Programmes - You can choose the programmes that this administrator will have access to.
-
Regions – this is where administrators can have their access limited to all, some, or none of the Regions in the system - useful for administrators who are responsible for specific regions or countries of the world.
-
Offer types - this is where administrators can have their access limited setting all, some, or none of the Offer types in the system – useful for when only certain administrators should be sending certain offers that have greater significance than others. For example, “Accepted” or any offer that allows for a decision to be made.
-
Scoresheets - this is where administrators can have their access limited working with all, some, or none of the Scoresheets in the system.
-
Flags - this is where administrators can have their access limited to only applications that contain a certain flag – useful, in tandem with Rules, for creating a set of applications that only certain admins have access to. Administrator’s permission can be limited by multiple flags.
-
-
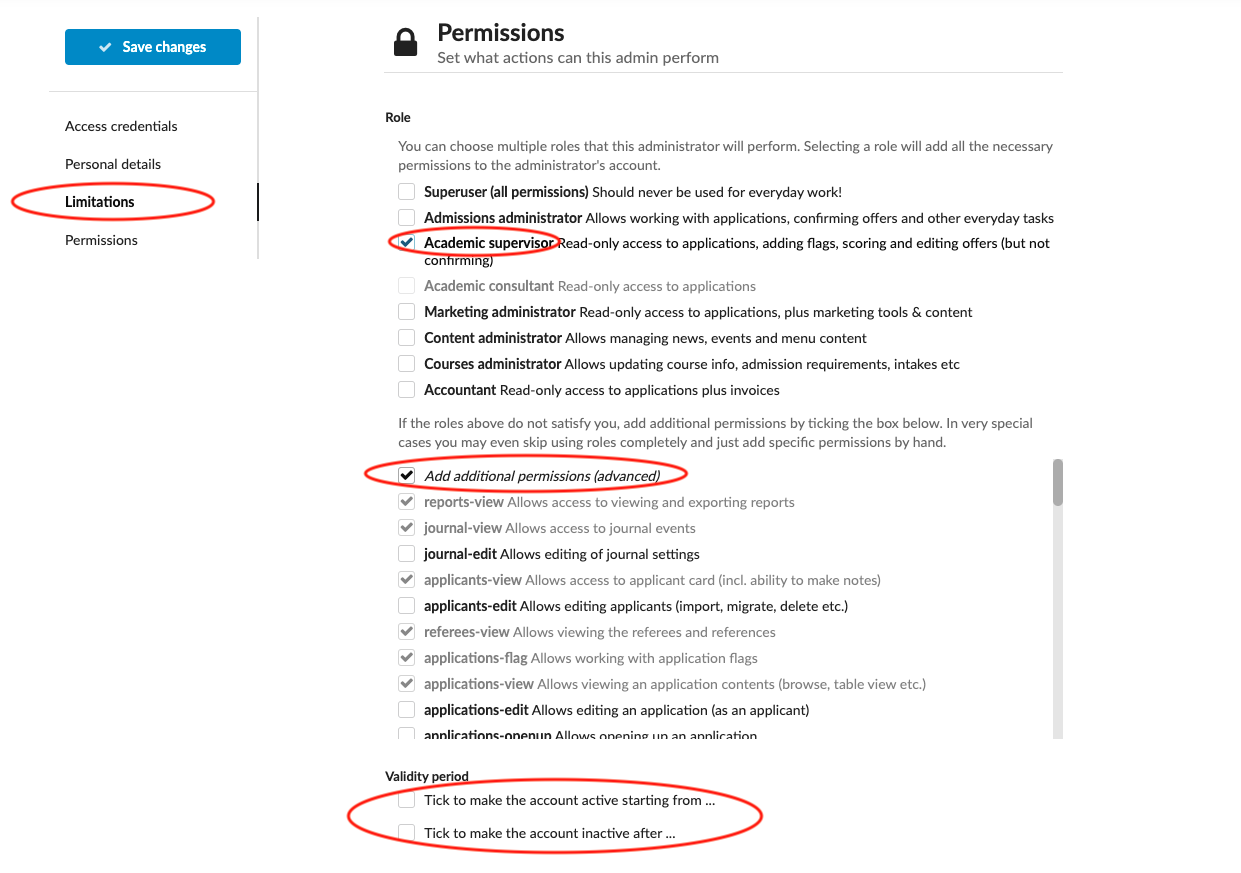
Navigate to the “Permissions” section of the page – this is where it is possible to limit the range of activities an administrator has the permission to perform.
-
Role - An Administrator can have more than one role assigned to them; this means they have the combined permissions of these roles.
-
There are eight pre-set administrator Roles, each with their own set of permissions:
-
Superuser – this Role is best reserved for a small set of administrators that are responsible for controlling systemwide settings.
-
Admissions administrator – this Role is useful for administrators that should have control over the admissions process by sending out offers to applicants.
-
Academic supervisor – useful for administrators that evaluate applications and help move applications through the process but should not be able to confirm offers.
-
Academic consultant – useful for administrators that evaluate applications but should not be able to make any changes within the system.
-
Marketing administrator – useful for administrators that will not be working with applications in the evaluation process but need enough access to data for marketing purposes and the ability to work with marketing content within the system.
-
Content administrator – useful for administrators that only need access for working with a subset of the Marketing administrator’s content permissions.
-
Courses administrator – useful for administrators that will be making working with the data that is related to institution(s) or courses/programmes, but should not have access to applications.
-
Accountant – useful for administrators that will be sending out invoices and marking them as collected.
-
-
Tick the “Add additional permissions (advanced)” box just below the list of roles to see and edit the set of permissions to be given to the administrator.
- Scroll up and down the list of additional permissions to select and deselect permissions according to your needs. If a Role is assigned, it will not be possible to remove a permission that is included with that Role.
-
-
Always remember to save your changes by clicking on the “Save changes” button!
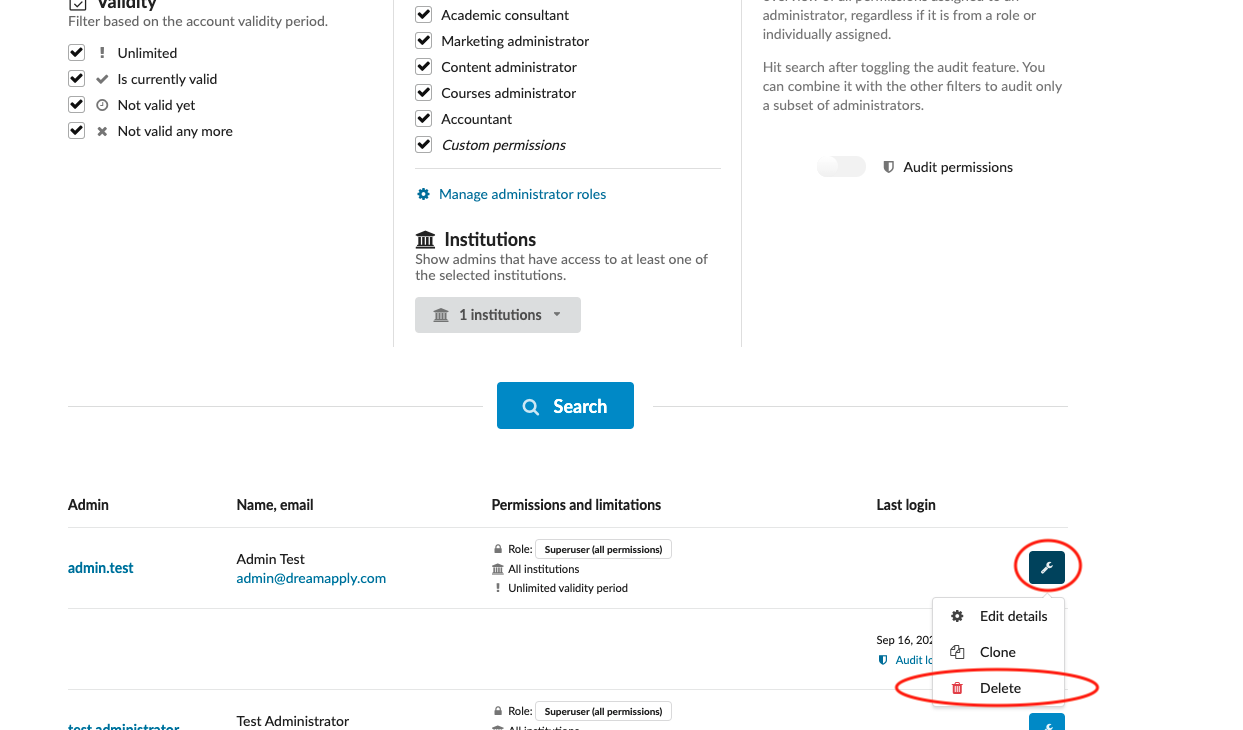
Delete an administrator’s account
-
Locate the administrator’s account to be deleted.
-
Click on the tools button.
-
Select the “Delete” option from the dropdown menu.
-
Click on the “Sure” button.
You will understand how add a new administrator, edit administrator permissions, and delete administrator accounts.
How to add administrator signature and autograph?
How to add a new administrator?
How to change administrator password?