How to configure classificators?
Teaches how to edit and add new classificators
Gather institution specific data including:
-
Education levels
-
Course types
-
Education modes
-
Course mode
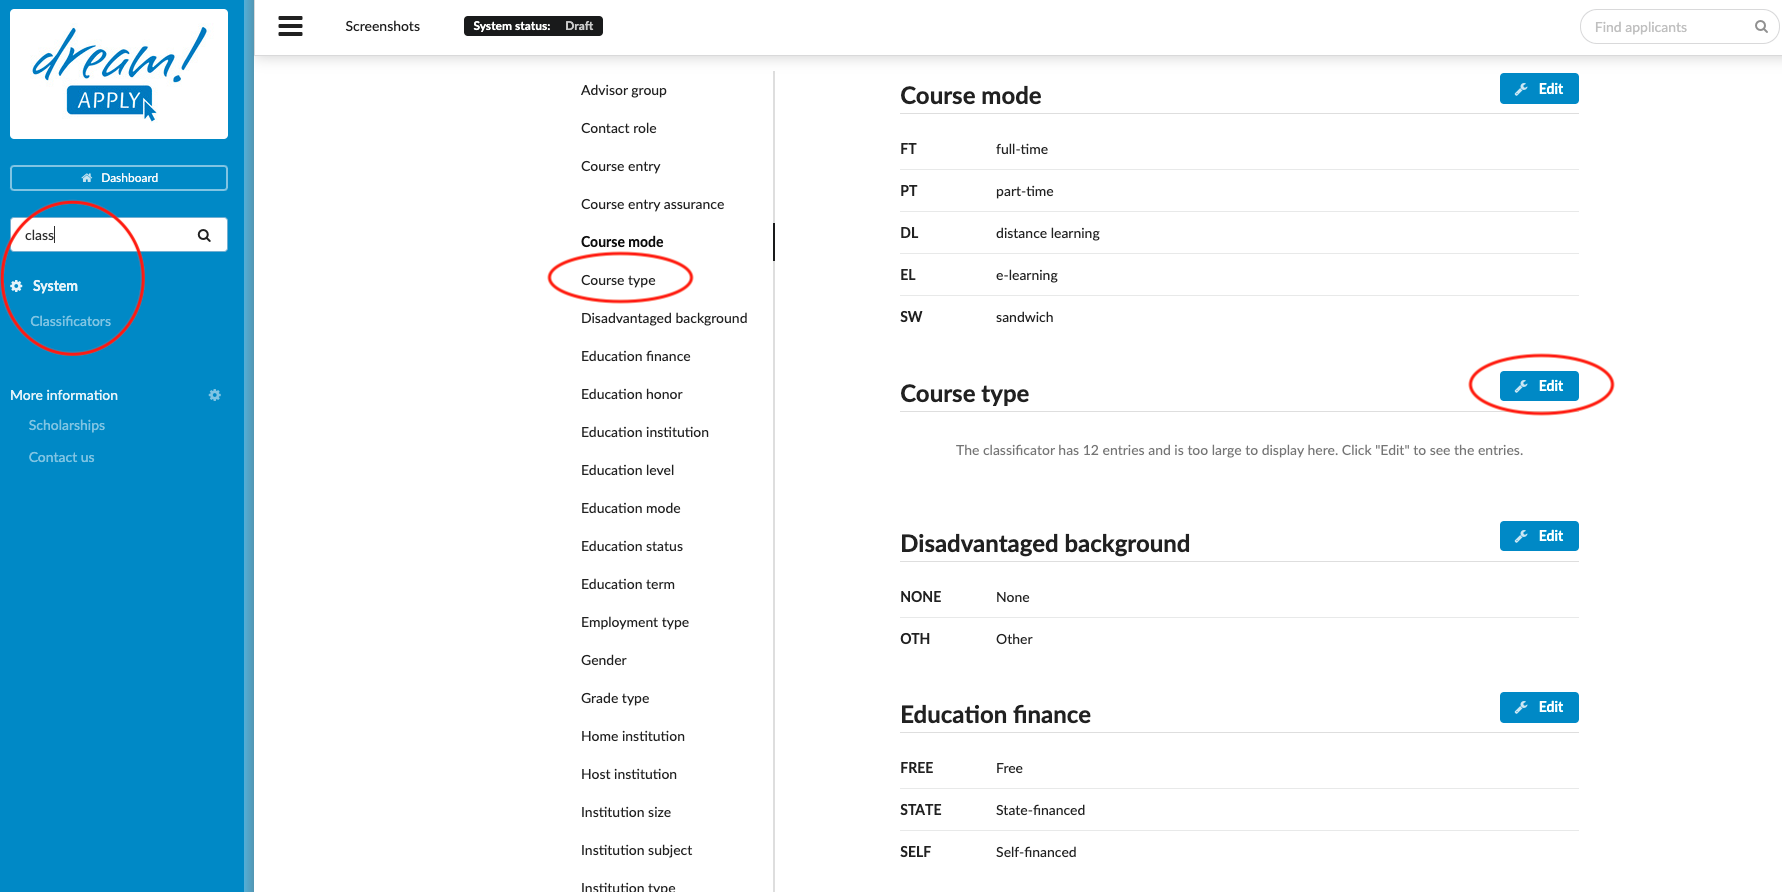
Edit Classificators:
-
Log in as an administrator with the permission “instance” (included with the Role “Superuser”).
-
From the Main menu, go to System > Classificators.
-
From the list of Classificators, locate the Classificator you would like to edit.
-
To the right of the Classificator’s title, click on the “Edit” button.
-
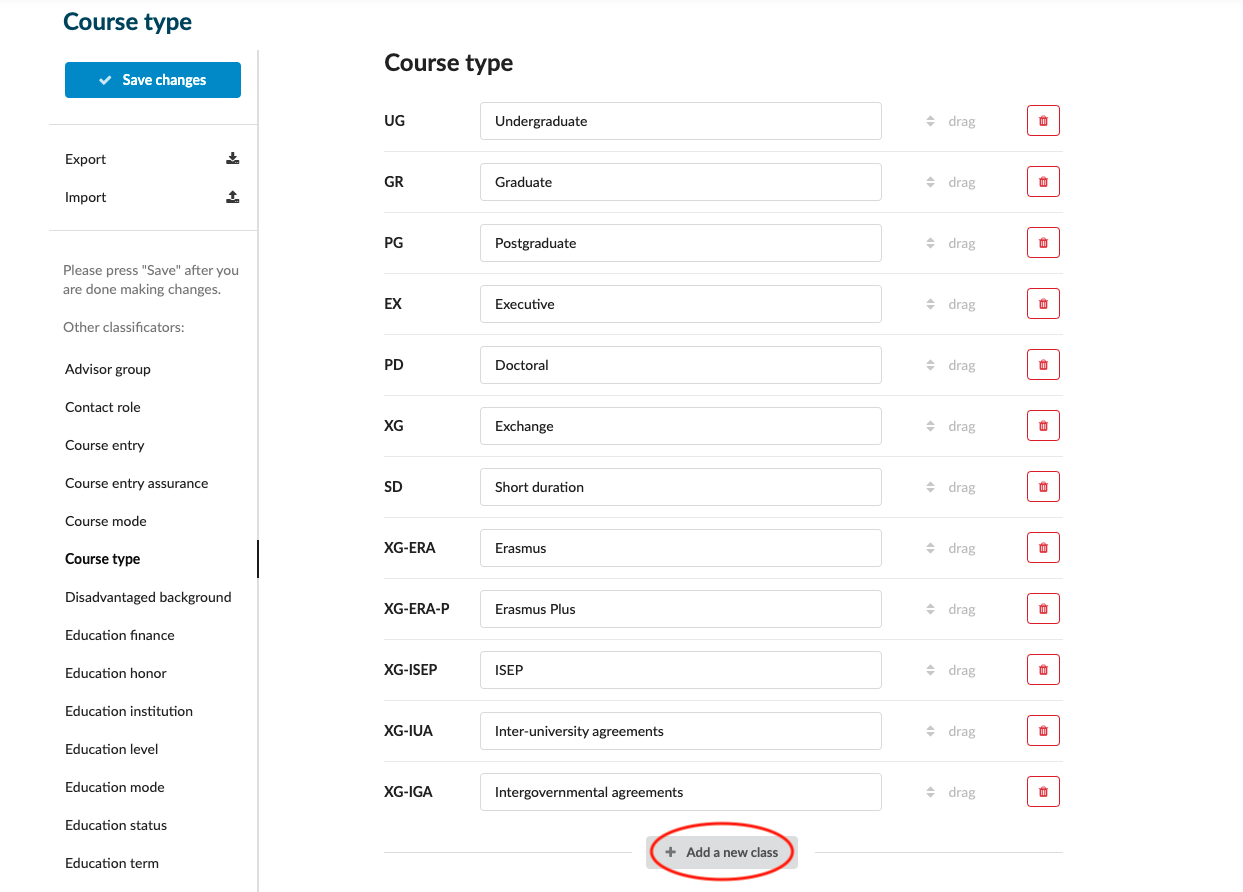
Add a new Classificator class
-
Click on the “+ Add a new class” button.
-
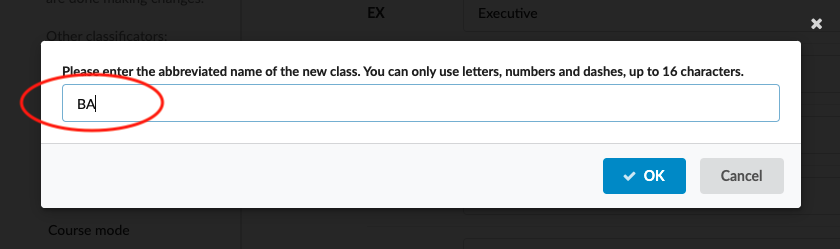
Enter an abbreviated name for the new class. These abbreviated Classificators names, or “Class” are used by the system and aren’t visible for the administrators or applicants.
-
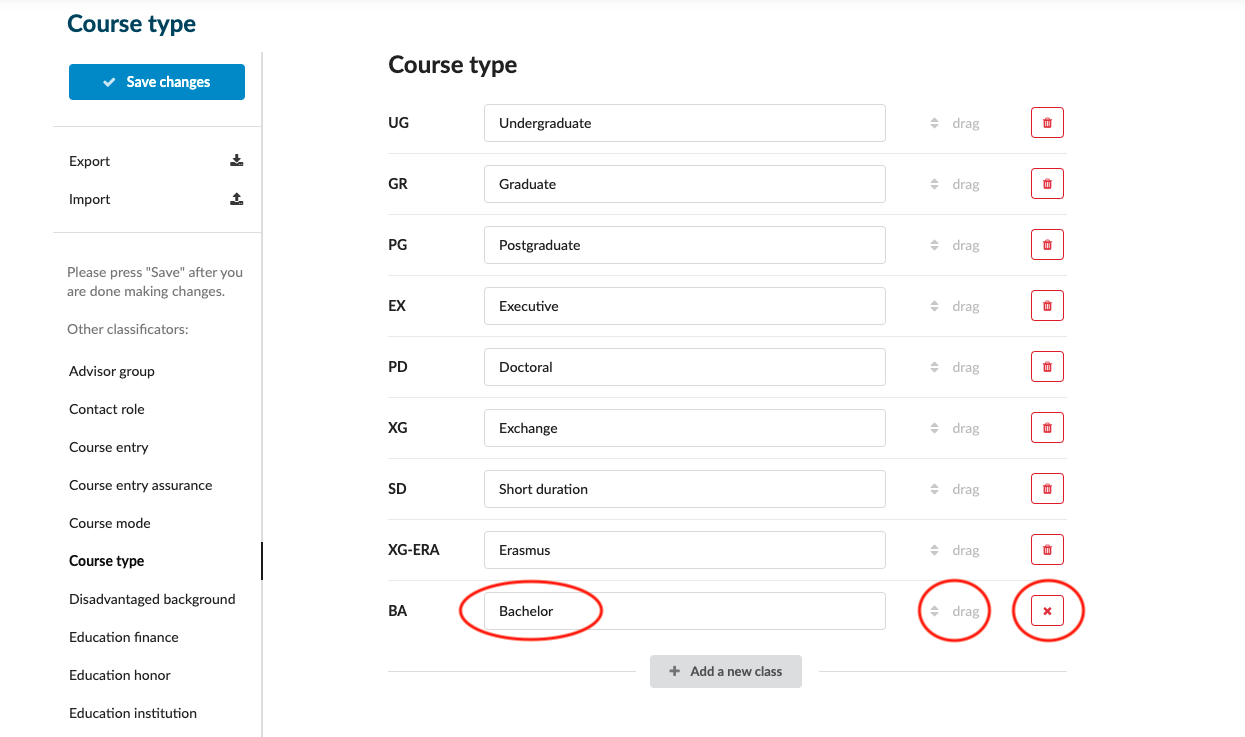
Replace the “…” with the description of what you would like to appear in the list associated with the Classificator. This description text will
-
-
Reorder the Classificator classes.
- Drag and drop the Classificator’s classes into the desired order. The Classificator descriptions will be visible in the system from the various dropdowns in the chosen order.
-
Delete a Classificator class
-
Locate the Classificator class to be deleted.
-
Click on the red “X” button to the right of the Classificator class.
-
-
-
Always remember to save your changes by clicking on the “Save changes” button!
New classificator will create a new option in the system. For example new course type, new study degree, new study mode, etc.
The most useful classificators