How to create an invoice template?
This article teaches you how to create, edit, and delete invoice templates. To edit automatic invoice templates, please contact [email protected]
Make sure you have:
-
the Finance addon enabled (please feel free to contact [email protected] if you would like more information on enabling this addon)
-
the correct administrator permissions (“instance”)
-
knowledge of what invoices will be generated regularly
-
Decide what type of invoice templates you need to create, set up invoice series under Finance >
Create a new invoice template:
-
Log in as an administrator with the permission “instance” (included with the Role “Superuser”).
-
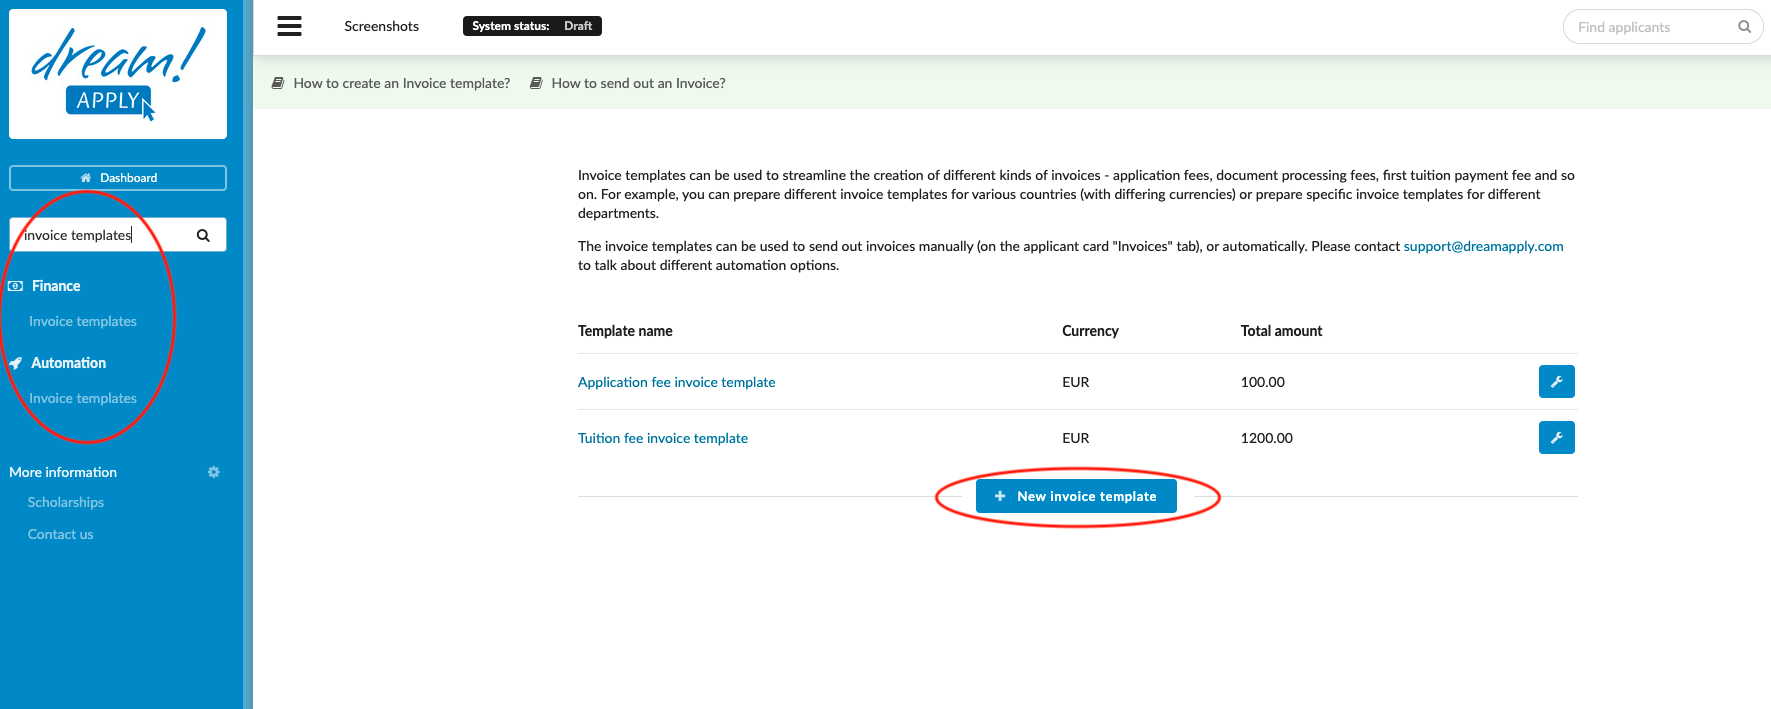
From the Main menu, go to: Automation > Invoice Templates.
-
Click “+ New invoice template”.
-
Configure the Invoice template as needed. (See the “Configure existing Invoice templates” section below.)
Configure existing invoice template (except automatic invoices):
-
Click on the wrench icon next to the target Invoice template and click “Edit details”.
-
Name the Invoice template (you can edit the name later) and click “OK”.
-
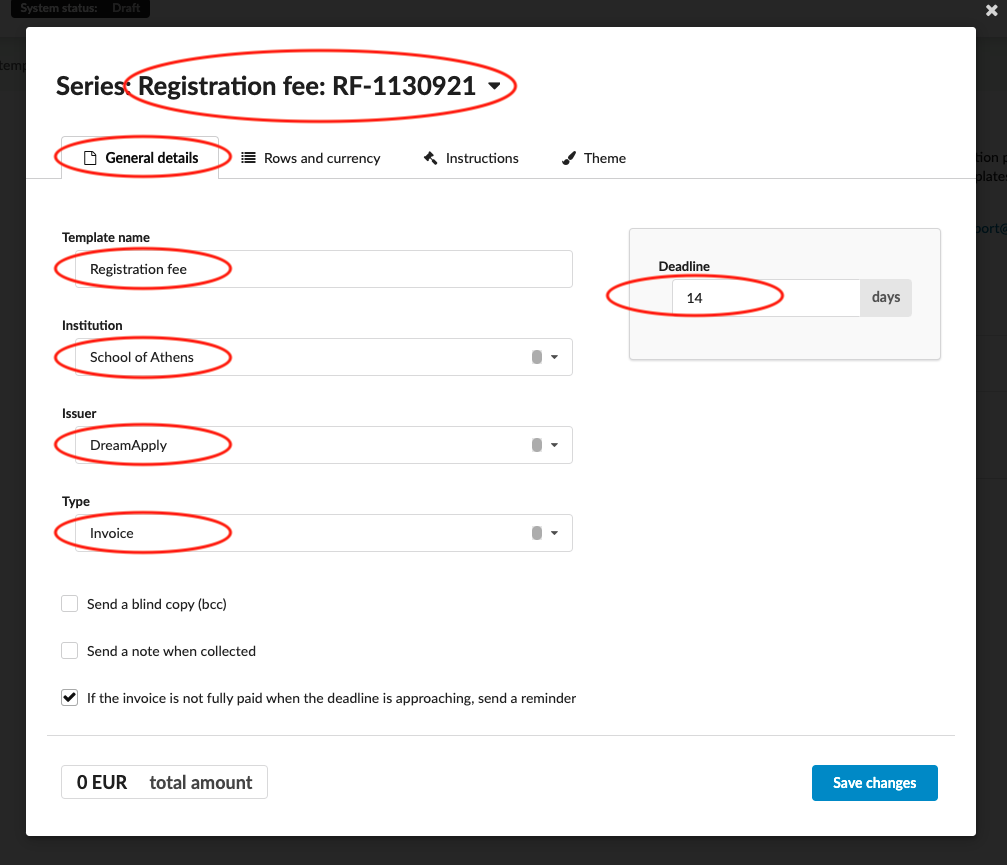
Add a Series number by choosing a pre-created Series number. (For more information on creating a custom Series number, see the “Create a custom Invoice Series.)
-
Navigate between “General details”, “Rows and currency” and “Instructions & small print” tabs by clicking on the names.
-
From the “General Details” tab:
-
(optional, if in a multi-institution system) Choose an Institution name.
-
(optional) Issuer – whose name and signature (if added to the administrator profile) will be automatically shown on the invoice.
-
Choose the invoice “type” from the drop-down list.
-
Tick/ untick additional options.
-
Set a deadline.
-
-
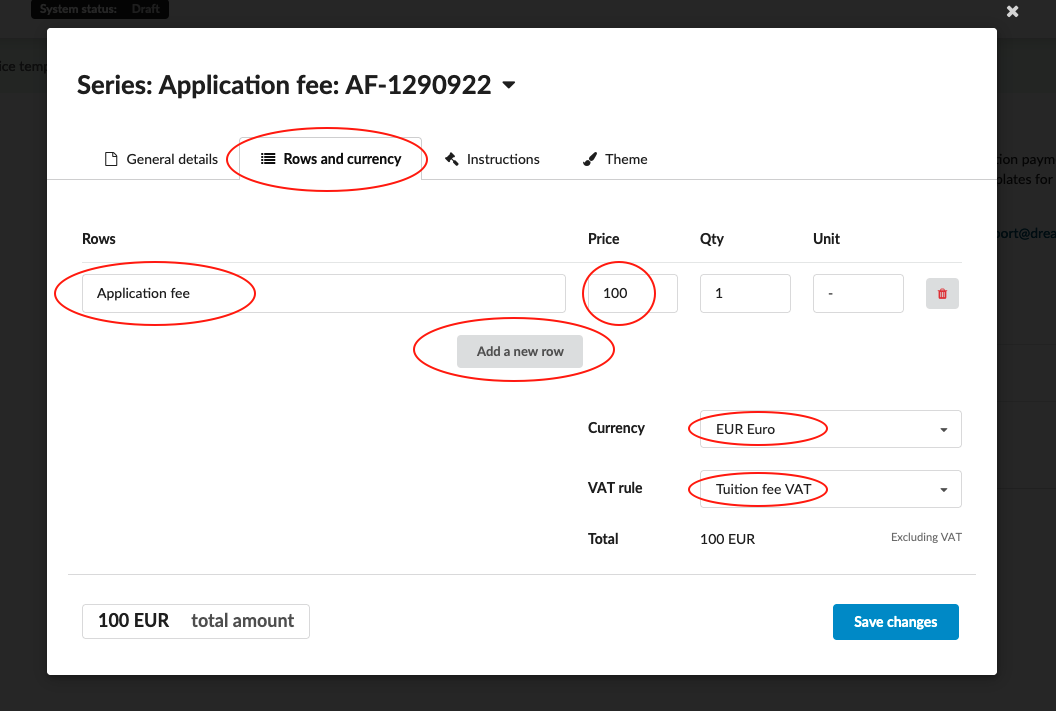
From the “Rows and currency”:
-
Fill in the Row with an item name, price, quantity, and Unit as needed.
- Add additional Invoice rows if needed.
-
Select the appropriate currency.
-
Select the appropriate VAT rule. It will be added to the total sum.
-
-
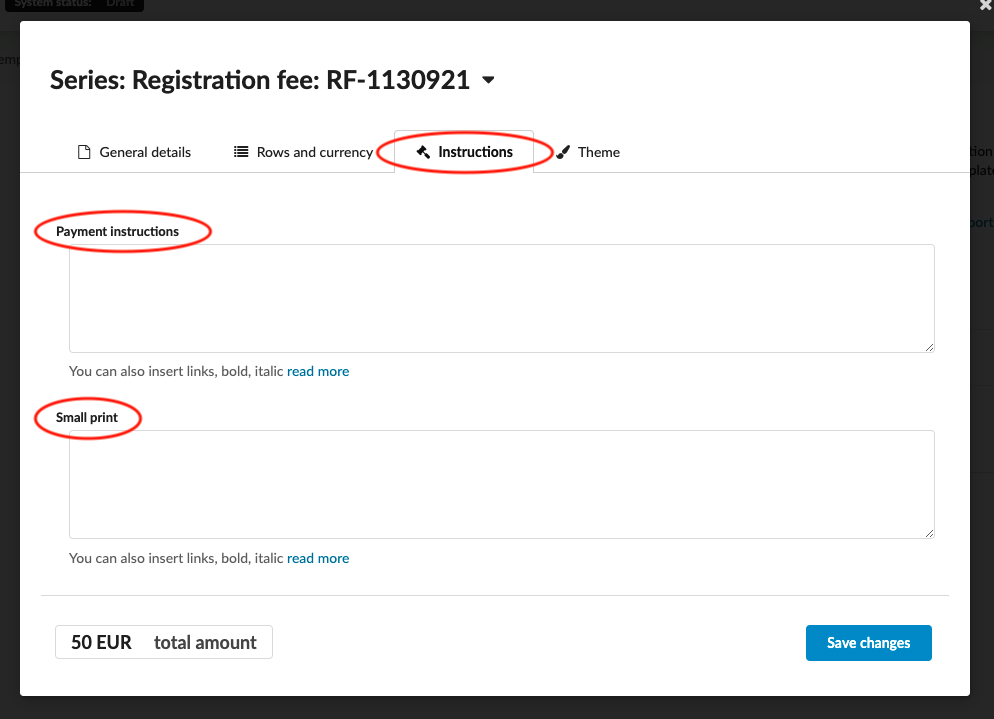
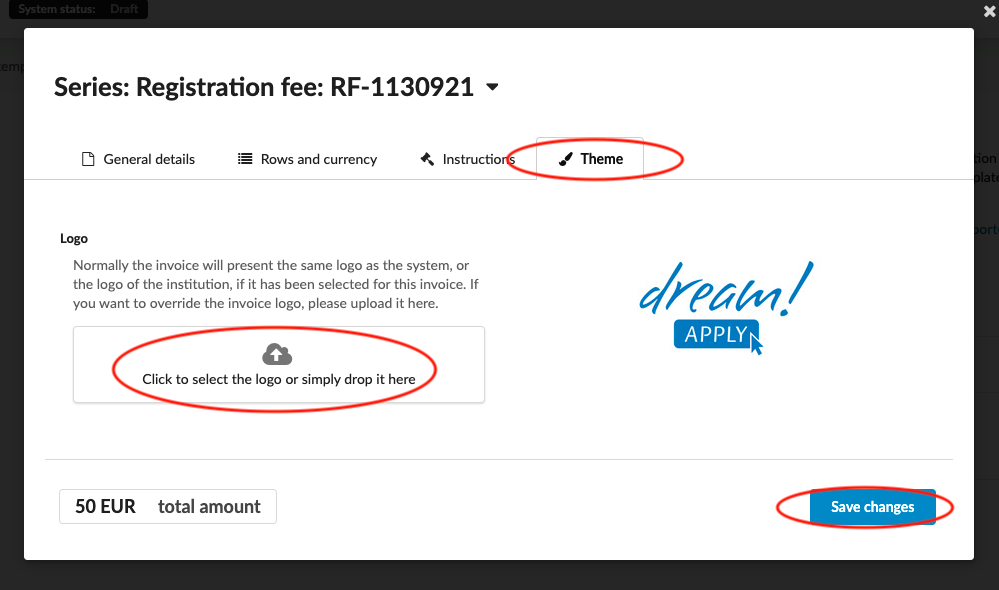
From the “Instructions and small print” tab:
- Add any necessary payment instructions and small print to appear on all invoices made using this template.
-
Always make sure to save your changes by clicking on the “Save” button!
Configure Invoices to send out automatically:
-
If you want this invoice to be sent to applicants automatically, please contact [email protected].
-
To edit an existing Invoice template, go to Automation > Invoice Templates on the left side menu.
-
Click on the little tool icon next to the template and click “Edit details”.
-
Remember to save changes after you are done.
Delete existing invoice template (except automatic invoices):
-
To delete an existing Invoice template, go to Automation > Invoice Templates on the left side menu.
-
Click on the wrench icon next to the template and click “Delete”.
-
Cofirm by clicking on “Sure”.
Users will be able to create, edit, and delete Invoice templates. These templates can be reused to send invoices to applicants to avoid manually filling in the data each time.
How to send a manual invoice to applicant