How to set the statuses in the task?
Explains the steps needed to create the statuses in the task/checklist.
Make sure you have:
-
the correct administrator permissions (“advisors”)
-
created a task. (For more information read the how to create the task article)
-
Log in as an administrator with the permission “instance” (included with the Role “Superuser”).
-
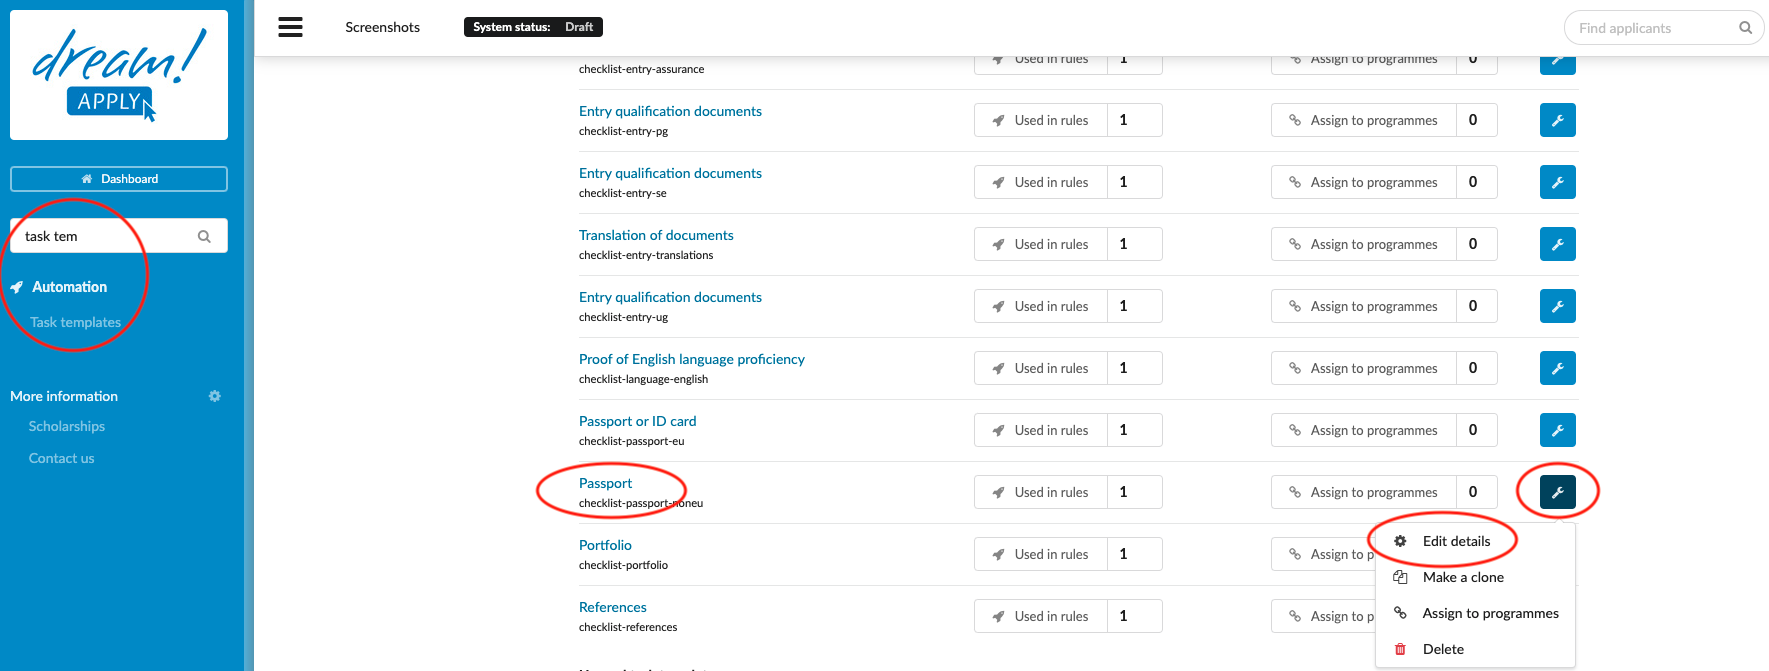
From the Main menu, go to: Automation > Tasks templates
-
Locate the target Task template and click on the wrench icon beside it.
-
Choose “Edit” from the dropdown menu.
-
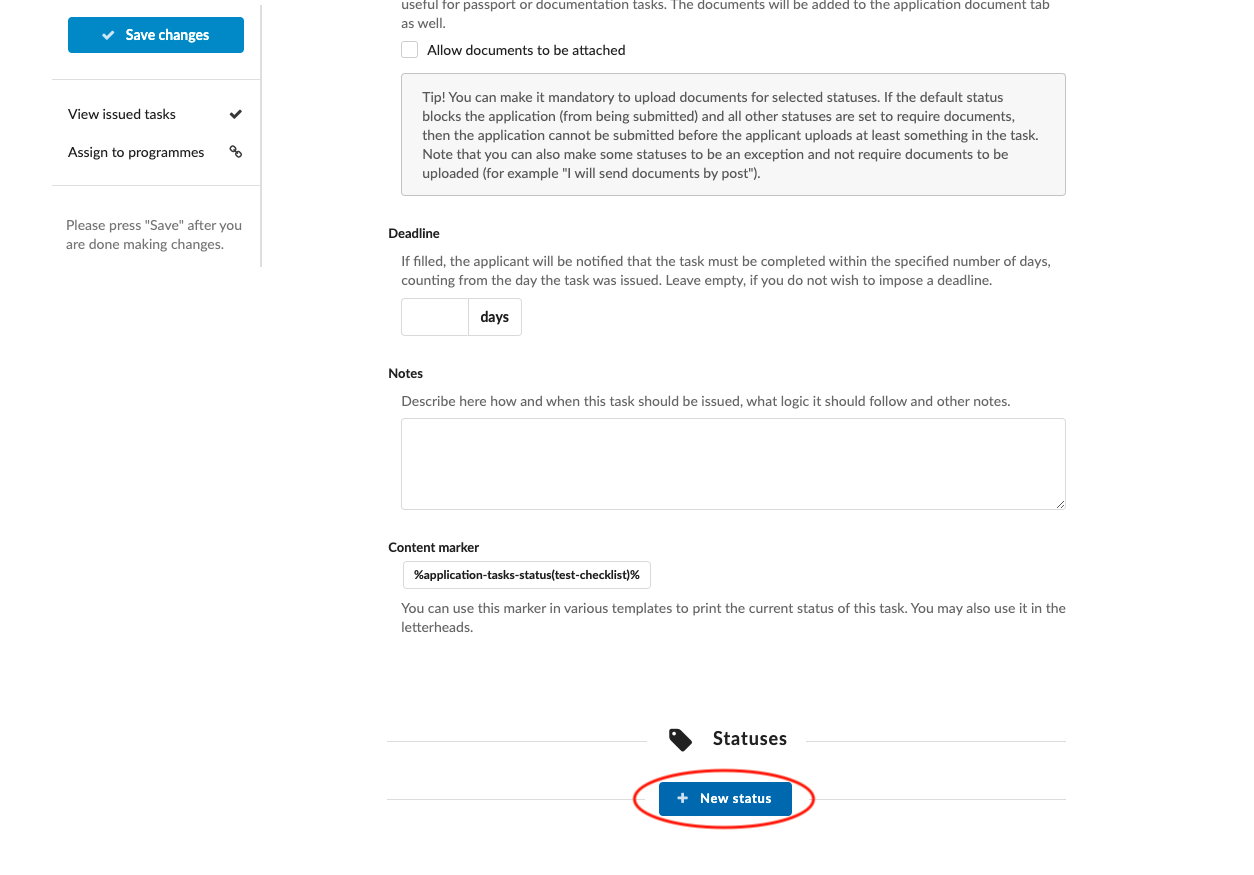
Navigate to the “Statuses” section.
Add a new Task status:
-
Click on the “+ New status” button.
-
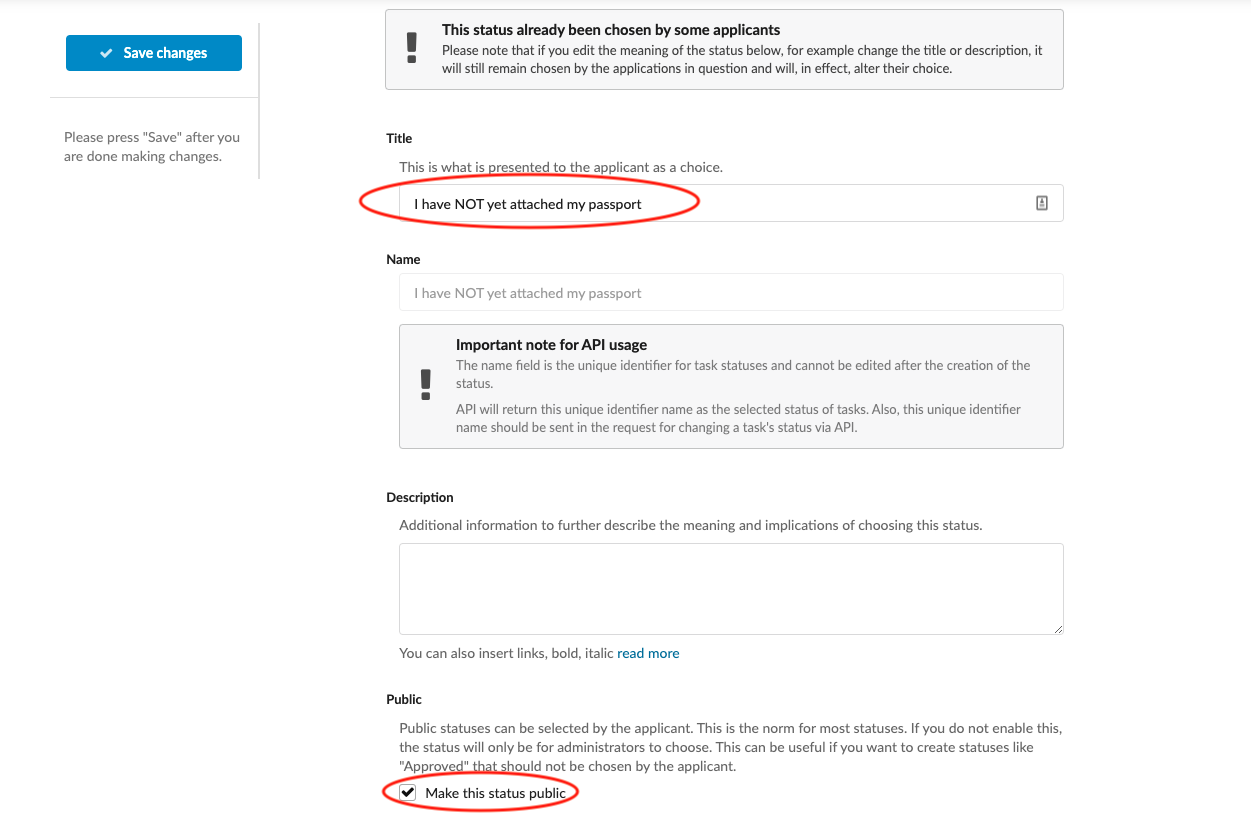
Enter a name for the Task status.
-
Continue configurating the Task status as necessary (See the “Configure a Task status” section below.)
Configure a Task status
-
Enter a description of the status in the “Description” section – this can help provide context to the Task status.
-
Tick the “Make this status public” checkbox to make it visible for the applicant if an applicant should be able to see and select the Task status. Non-public Task statuses (Ex: Approved) are visible only for administrators (until they have been selected by an administrator, at which time they become visible but unclickable for applicants).
-
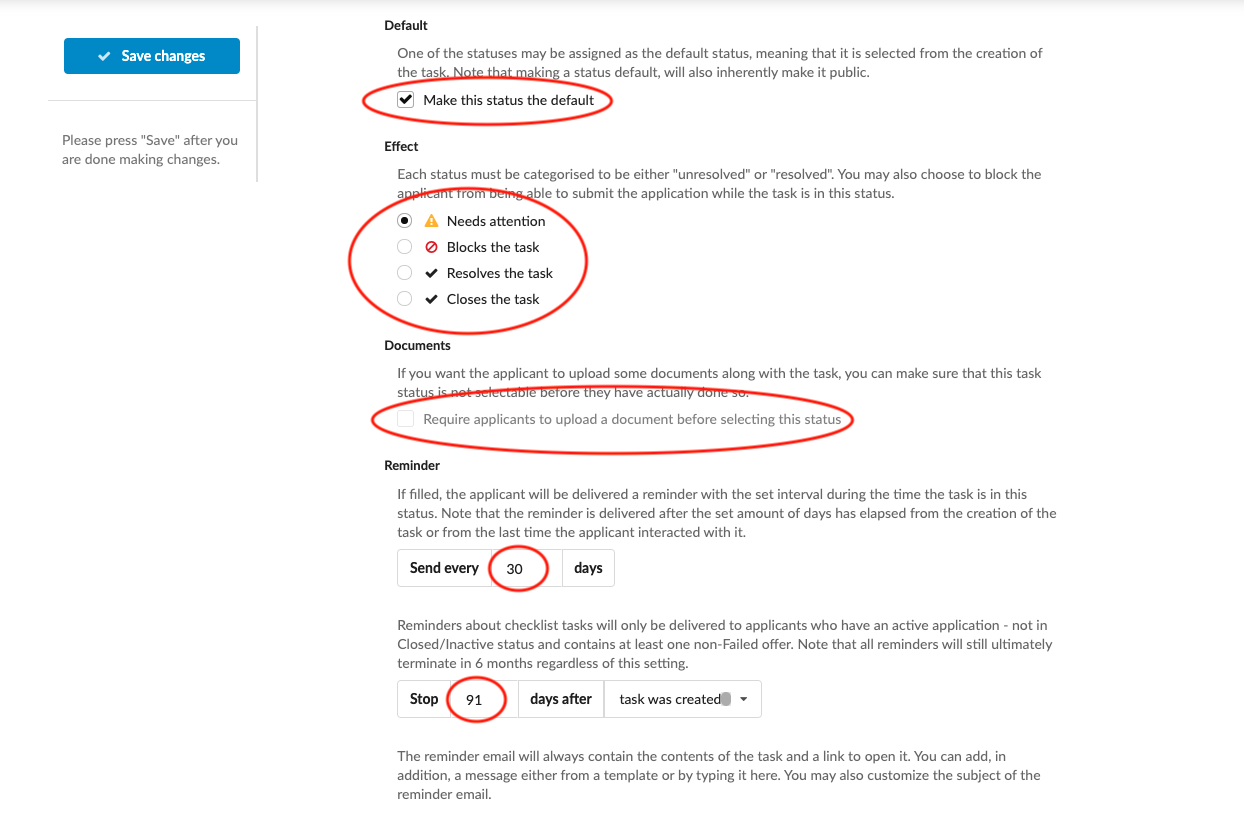
If the Task status should be the default that all applicants begin with, then tick the box next to “Default”.
-
Choose the effect of the Task status:
-
Needs attention – Applicants can submit an application but are made aware that they still have something additional to do before being ready for evaluation.
-
Blocks the task - Applications are blocked from being submitted. Useful for Task statuses for screening applicants out before they even submit an application.
-
Resolves the task - Task is resolved, the applicant can submit an application.
-
Closes the task - Administrator can confirm the task and make it impossible for the applicant to alter it any further. Useful for with non-public Task statuses, for example after a document has been verified.
-
-
Tick the “Require applicants to upload a document before selecting this status” if it should be impossible for an applicant to choose a Task status without first uploading a document.
-
(optional) Set a reminder.
-
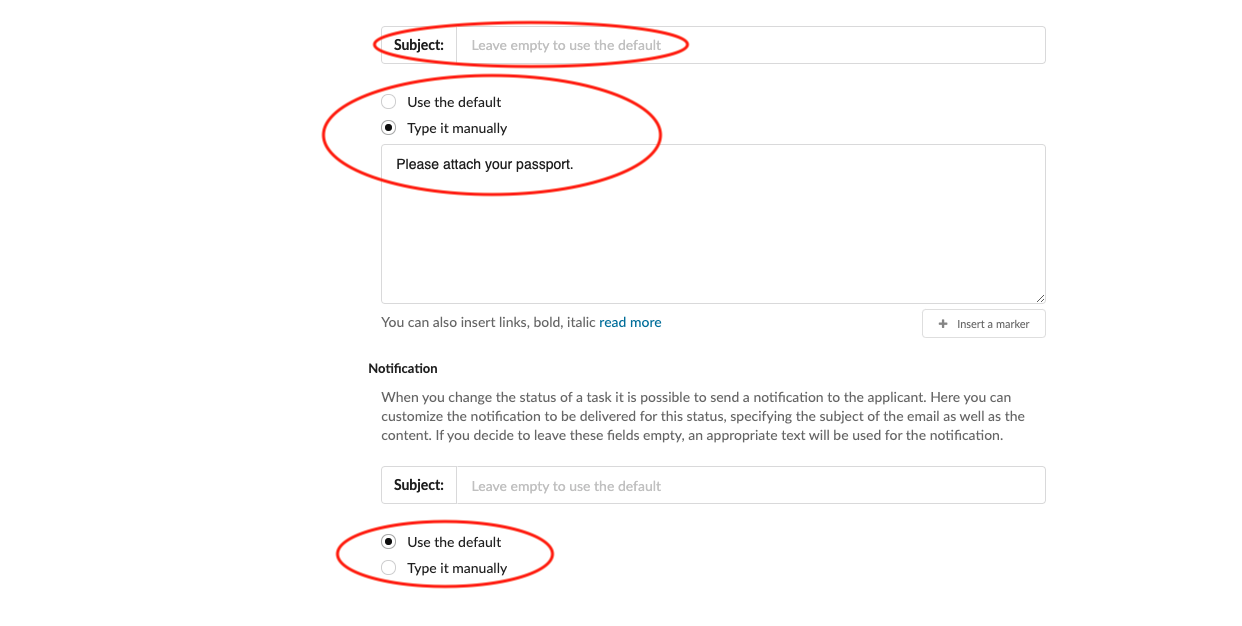
(optional) Edit the Notification email and its subject line that will be sent to the applicant.
-
Always remember to save your changes by clicking on the “Save changes” button!
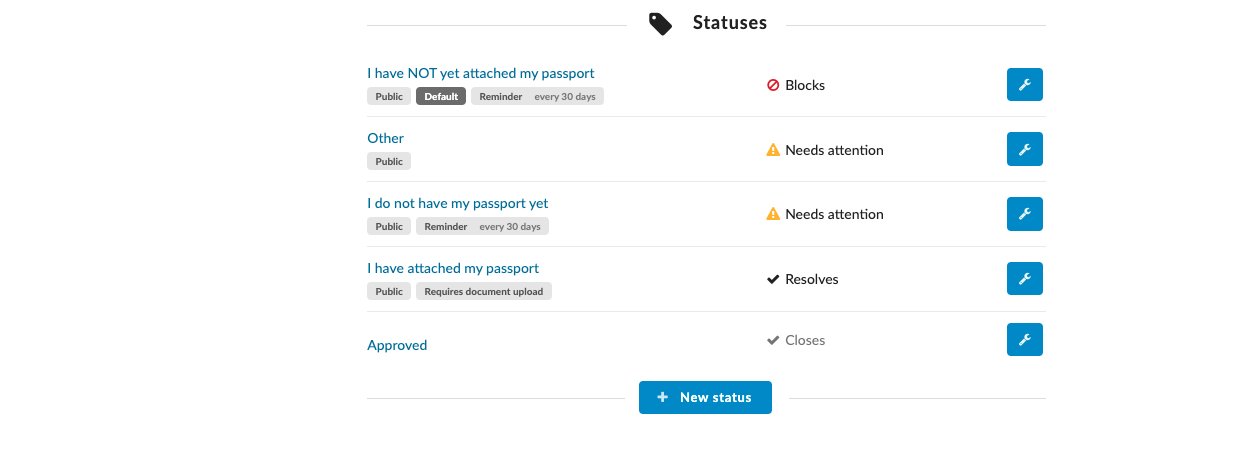
Users will be able to configure their Task’s Task statuses. It is typically useful to create at least 3 status for each task: Negative (public, default, blocks the task), Positive (public, resolves the task), Approved (unpublished, closes the task).