Home › Start here › Automation › Tasks › How to configure the tasks? ›
How to configure the tasks?
This article explains the steps needed to create template for a Task (checklist item), its functions, and various options.
-
the correct administrator permissions (“instance”)
-
decided what documents a candidate needs to be evaluated
-
knowledge of what documents need to be uploaded
-
knowledge of what likely feedback options the applicants might be
-
knowledge of the Task’s success criteria
-
Create a new task:
-
Log in as an administrator with the permission “instance” (included with the Role “Superuser”).
-
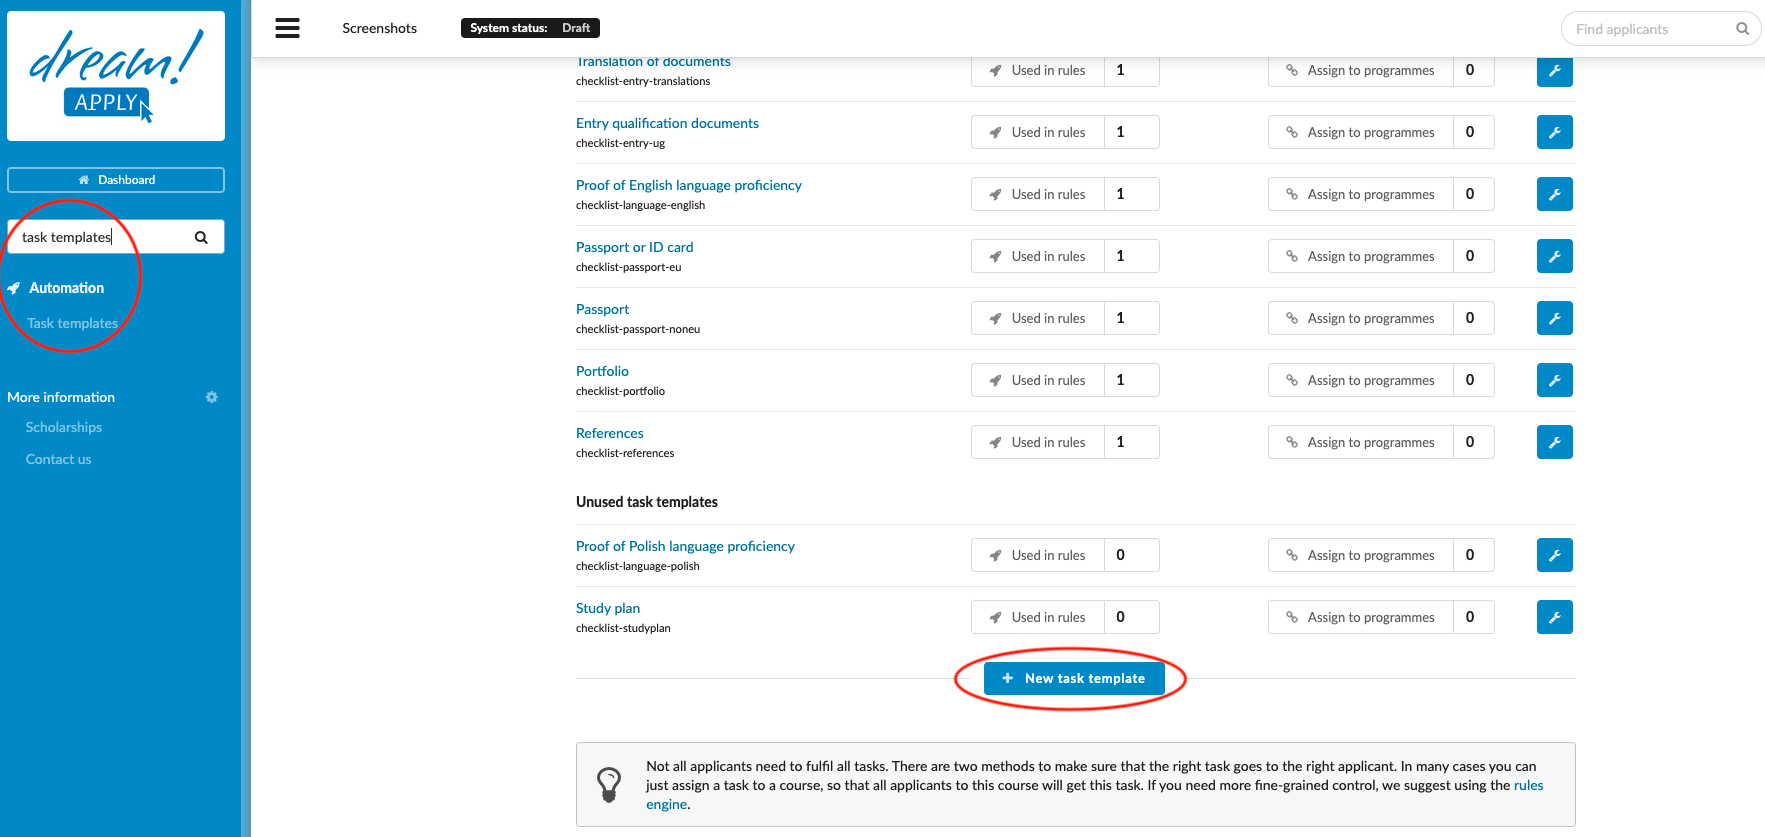
From the Main menu, go to: Automation > Tasks templates.
-
At the bottom of the page press the “+ New task template” button.
-
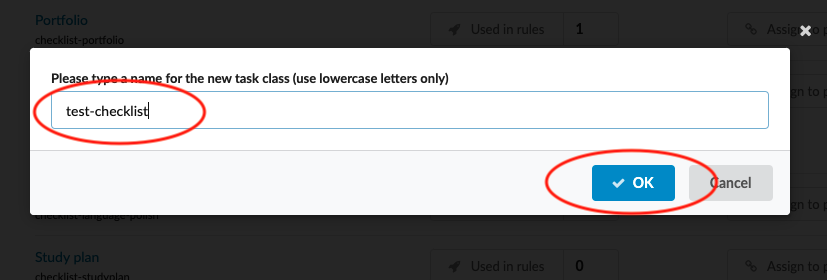
Enter a name for the Task class - It is useful to use a naming convention that will be helpful later when setting up a Rule to add the Task automatically. For example, “task-passport” will be helpful to remember a Task that asks for the applicants to upload a copy of their passport.
-
Click the “OK” button.
-
Continue editing the Task as necessary (see “Edit a Task” below).
Configure a Task:
-
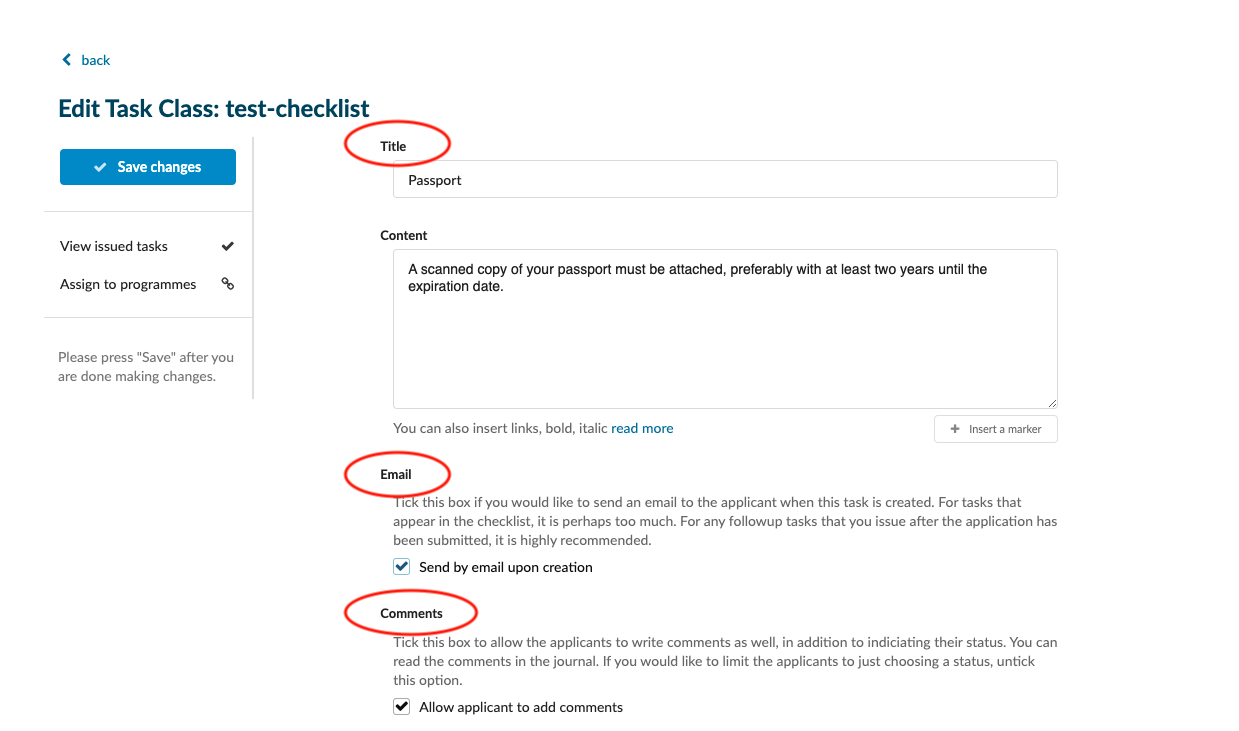
Enter a title for the Task – it is useful to give the Task a name that will be meaningful for the applicants as they will be able to see this title.
-
Enter content for the Task – this is where you can add instructions and context to the Task. In this field it is possible to use both the Textile markup syntax and Content markers.
-
Tick the “Send by email upon creation” checkbox if the applicant should get an email when the Task is attached to their application. This is useful for Tasks that will occur during the evaluation process, well after the application has been submitted.
-
Tick the “Allow applicant to add comments” checkbox if the applicant should add a comment other than the pre-defined Task statuses, thereby creating their own custom Task statuses.
-
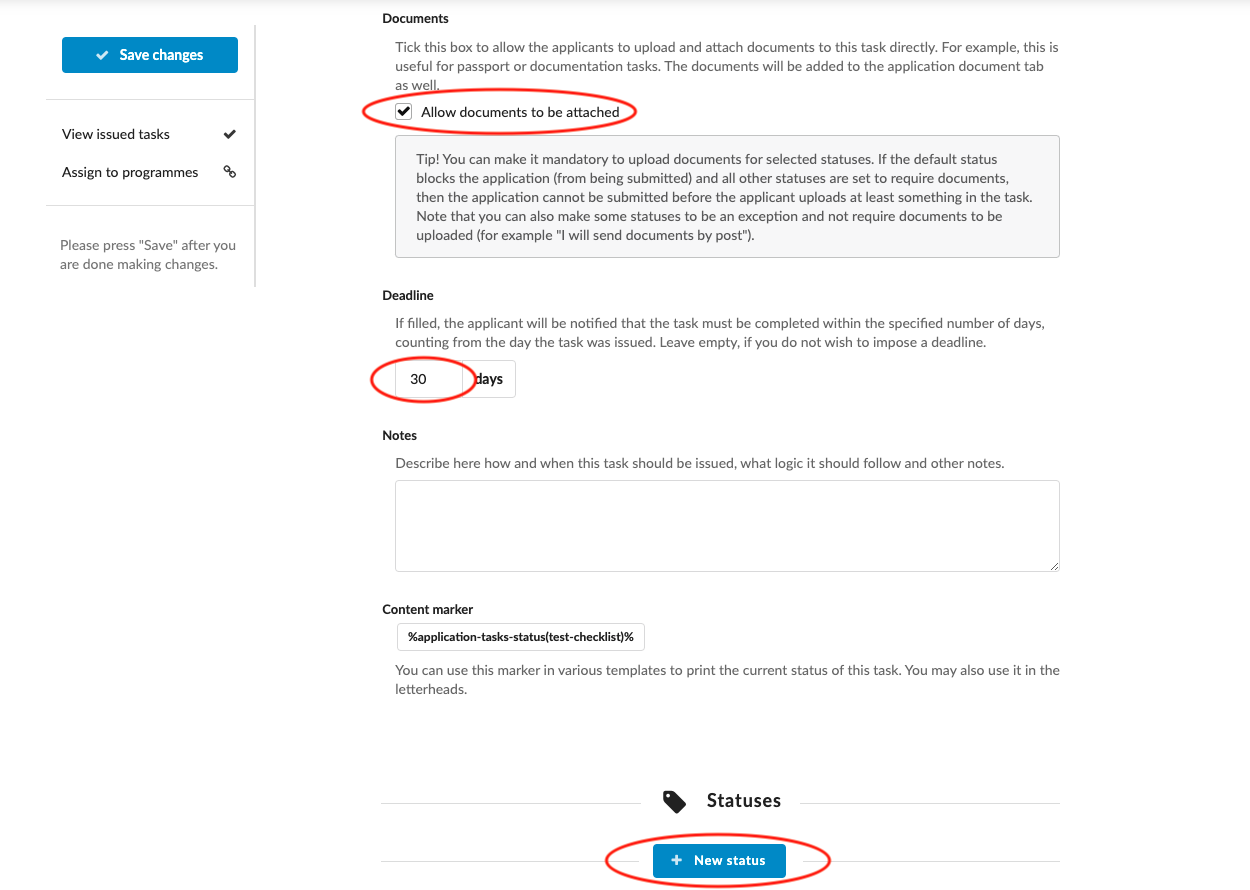
Tick the “Allow documents to be attached” checkbox if the applicant should be able to upload documents directly to the Task. This is a very useful way of collecting an applicant’s documents. They will still appear in the “Documents” section of the application but the DreamApply system will also know that an image uploaded to the “Passport Task” is likely to be a passport, and will be able to treat it as such.
-
Enter a number under “Deadline” to notify the applicant they have a limited duration to complete the Task.
-
Enter any Notes that will help keep the knowledge of the purpose of this Task within the DreamApply system for future reference.
-
Create and configure all the necessary Task statuses. (See the “How to set the status in the task” article for more information.)
-
Create, configure, and activate a Rule to automatically assign the Task to the appropriate applications. (See the “How to set up a Rule” article for more information.)
Users will know how to create and configure Task templates to be used for creating a checklist Task for applications. When assigned to an application, an applicant will know what they need to do (upload documents for example) in order to be evaluated accordingly.
How to set the status in the task