How to add a new institution?
Teaches how to create a new institution in a Multiple institution platform.
-
have the correct administrator permissions (“accounting-edit”)
-
are working in a “Multiple institution” system
-
have gathered institution-specific data, including:
-
Institution names, abbreviation
-
Country, location, address
-
Website
-
Add new institution:
-
Log in as an administrator with the permissions “institutions-view”, and “institutions-edit” (included with the Role “Superuser”).
-
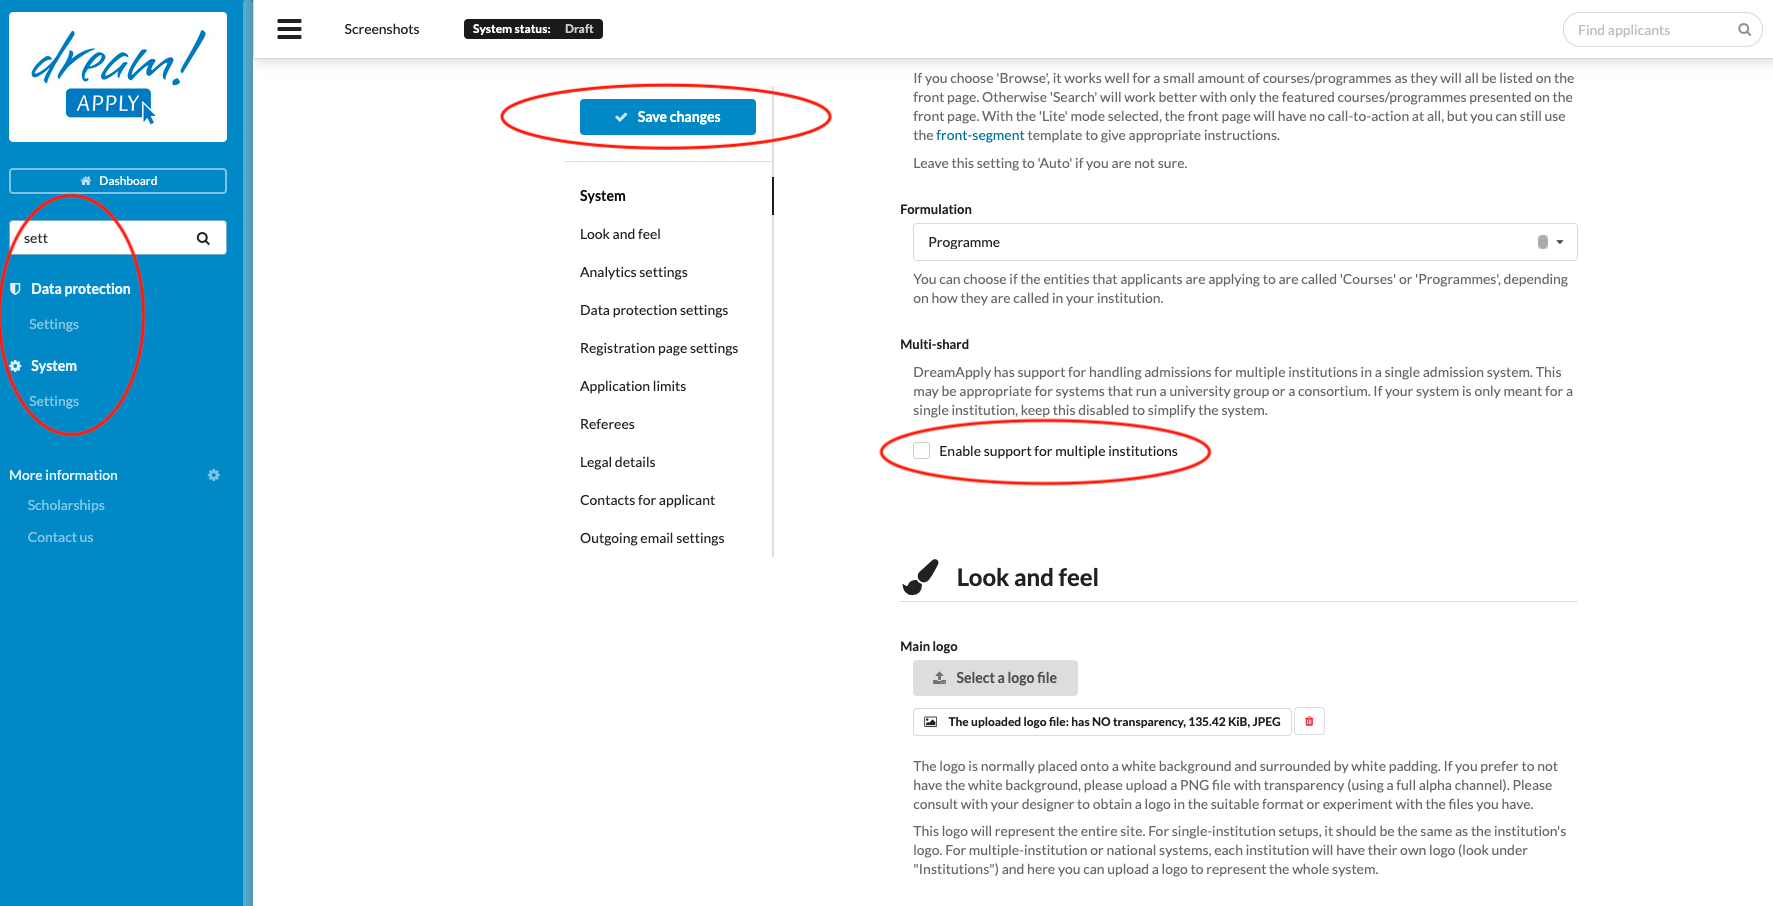
(optional) If your system has not been switched to “Multiple institution” mode:
-
From the Main menu, go to System > Settings > Within the “System” section, toggle the “Multiple institution” switch.
-
Save changes.
-
-
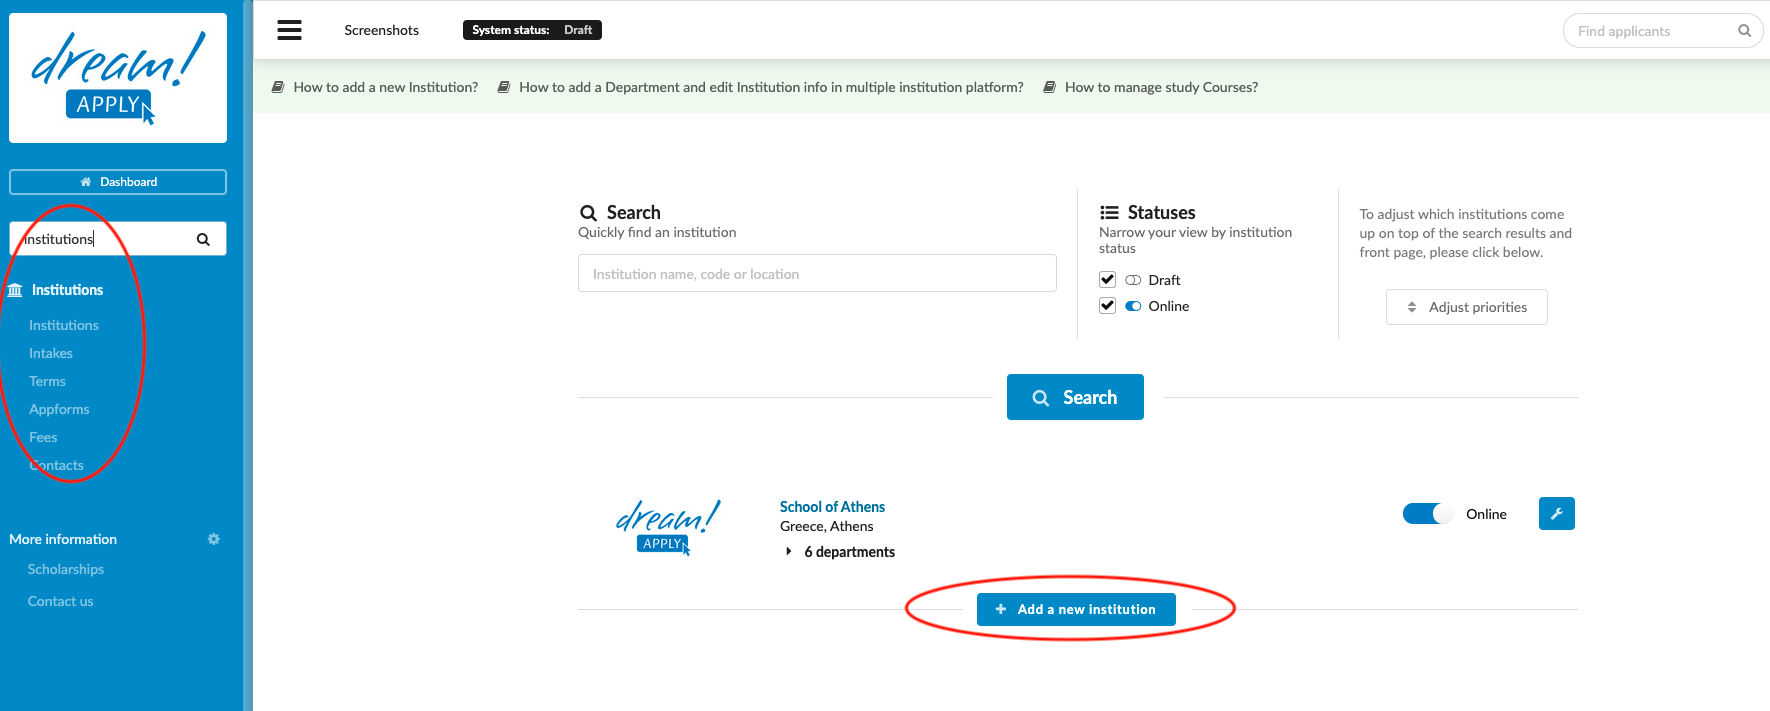
From the Main menu, go to Institutions > Institutions.
-
Scroll to the bottom of the page.
-
Click the “Add new institution” button.
-
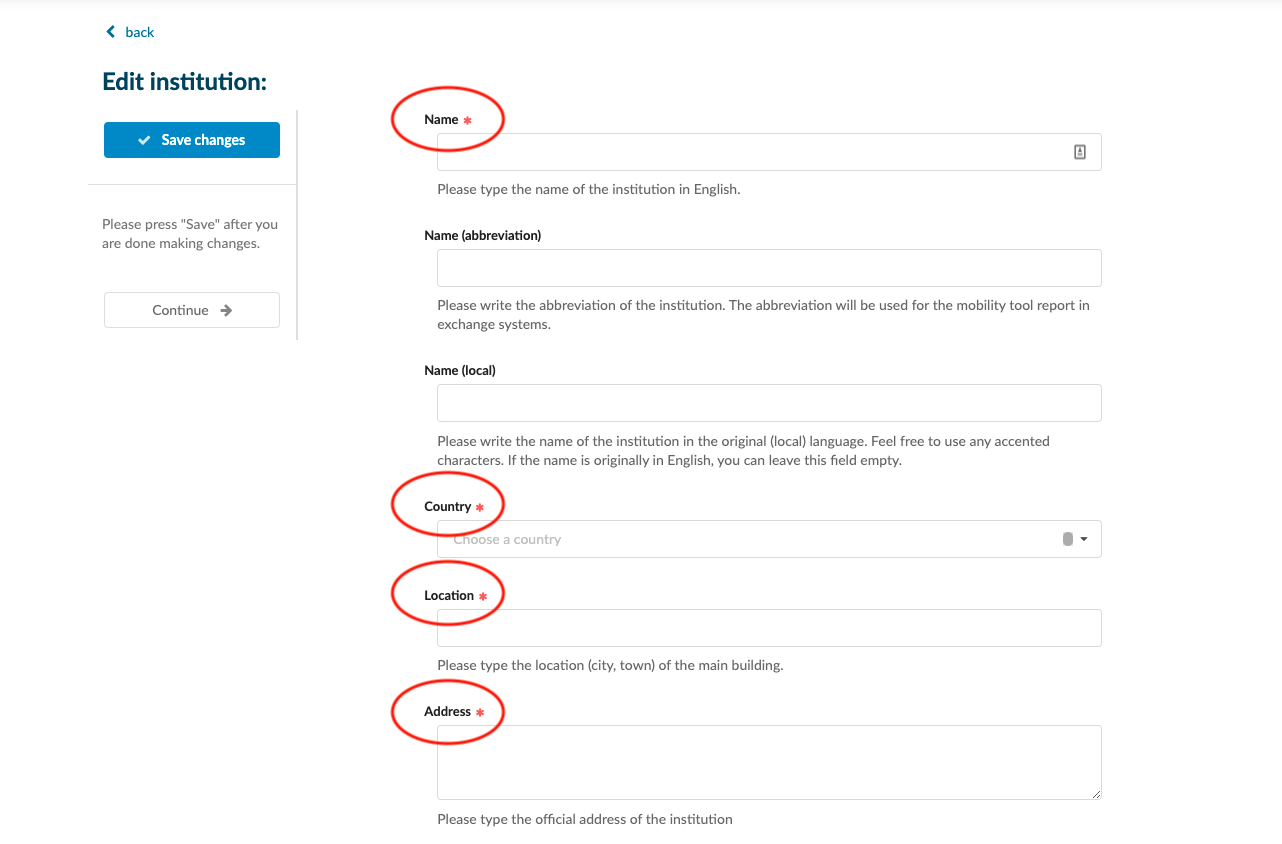
Specify the name of the Institution.
-
Upload the logo
-
Add the Institution’s country, location, and address.
-
Add the URL of the Institution’s website.
-
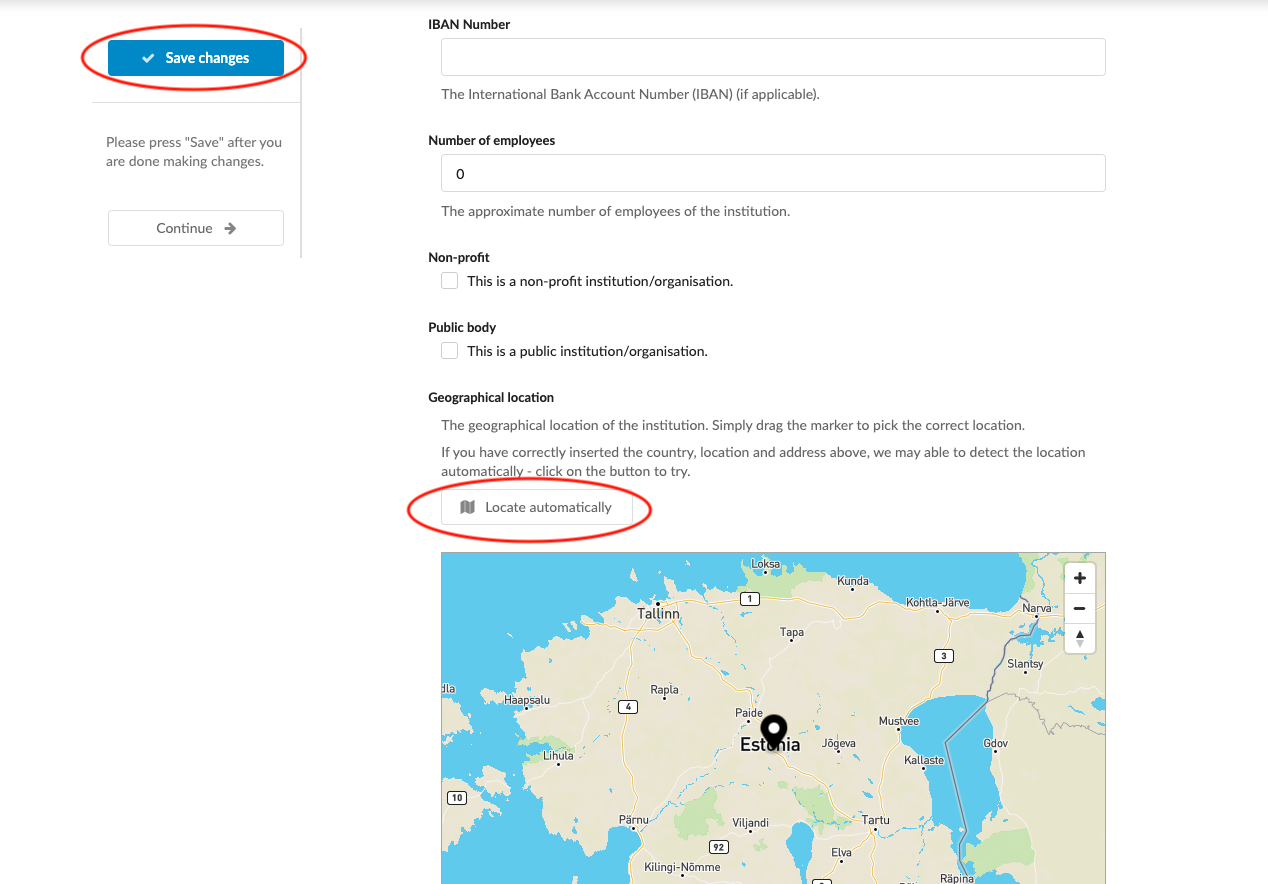
(optional) Fill any additional optional fields desired.
-
Click on the “Locate automatically” button to have the map center on the entered address.
-
Save changes.
-
When the newly created Institution is ready to be published:
-
Navigate to the previous page by clicking on “back” at the top of the page (or find it by going from the Main menu to Institutions > Institutions.
-
Locate the Institution’s name and toggle the switch to “Online mode”.
-
A new institution will be created in the system. Departments and Courses/Programmes can now be created for this Institution.
How to add and manage programs in a “multiple institution” platform.