Home › Start here › System › Offer types › Decision making function ›
Decision making function
This article explains how to make it possible for applicants to be able to make a final decision on an offer.
-
the correct administrator permission (“instance”)
-
Information about the evaluation process at your institution including which Offer types should allow the applicant to make a decision.
- Log in as an administrator with the permission “instance” (included with the Role “Superuser”).
Change offer type settings to make all offers with this type include the ability for an applicant to make a decision.
-
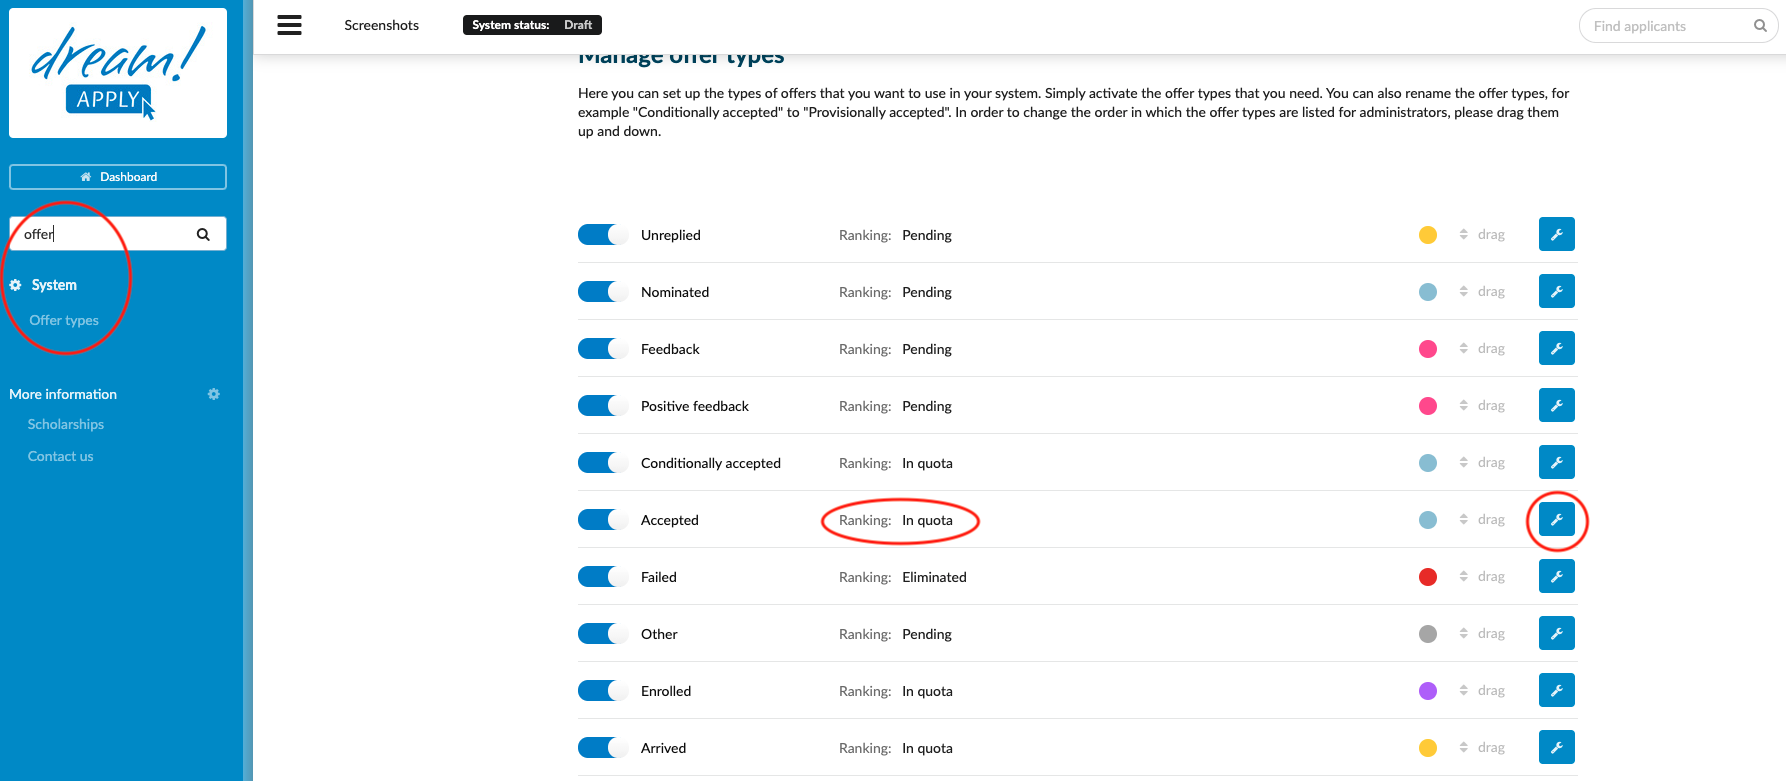
From the Main menu, go to System > Offer types.
-
Locate the Offer status which should allow an applicant to make a decision (typically “Accepted”, or “Conditionally accepted”.
-
Click on the button with a wrench icon to edit the Offer type.
-
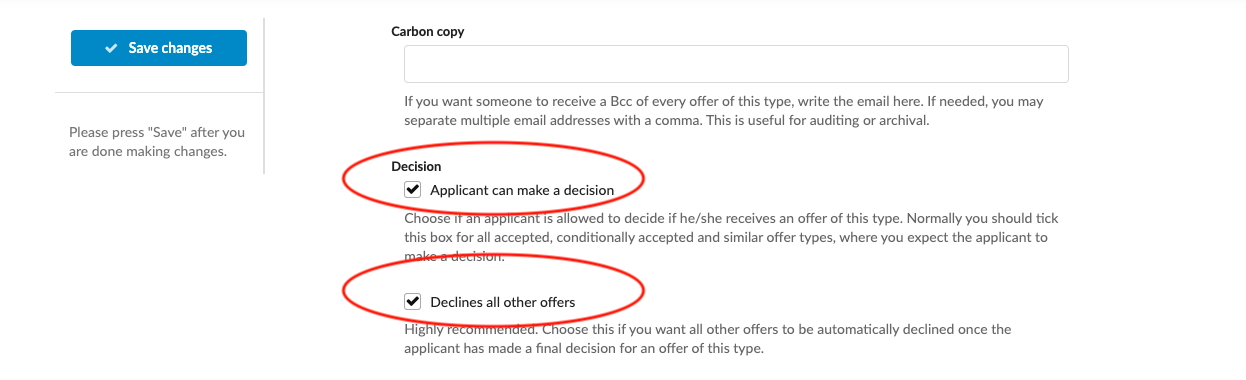
Navigate to the “Decision” section.
-
Tick the “Applicant can make a decision” box.
-
(optional) If you tick the “Declines all other offers” option, then all other offers (other programmes/courses the applicant has applied for in this Academic term) will be automatically get declined when the applicant makes a final decision for an offer of this type. This option is recommended because it will help administrators for the other programmes to more accurately work within their quotas, and, if the applicants are still being evaluated for other programmes, it should help save the evaluators time once they know they applicant has declined the opportunity to study their programme.
-
Applicant can choose the decline reason. List of reasons for editing is available under System > Classificators > Decline reason.
- Always remember to save your changes by clicking on the “Save changes” button!
Manually adjust Decision options.
-
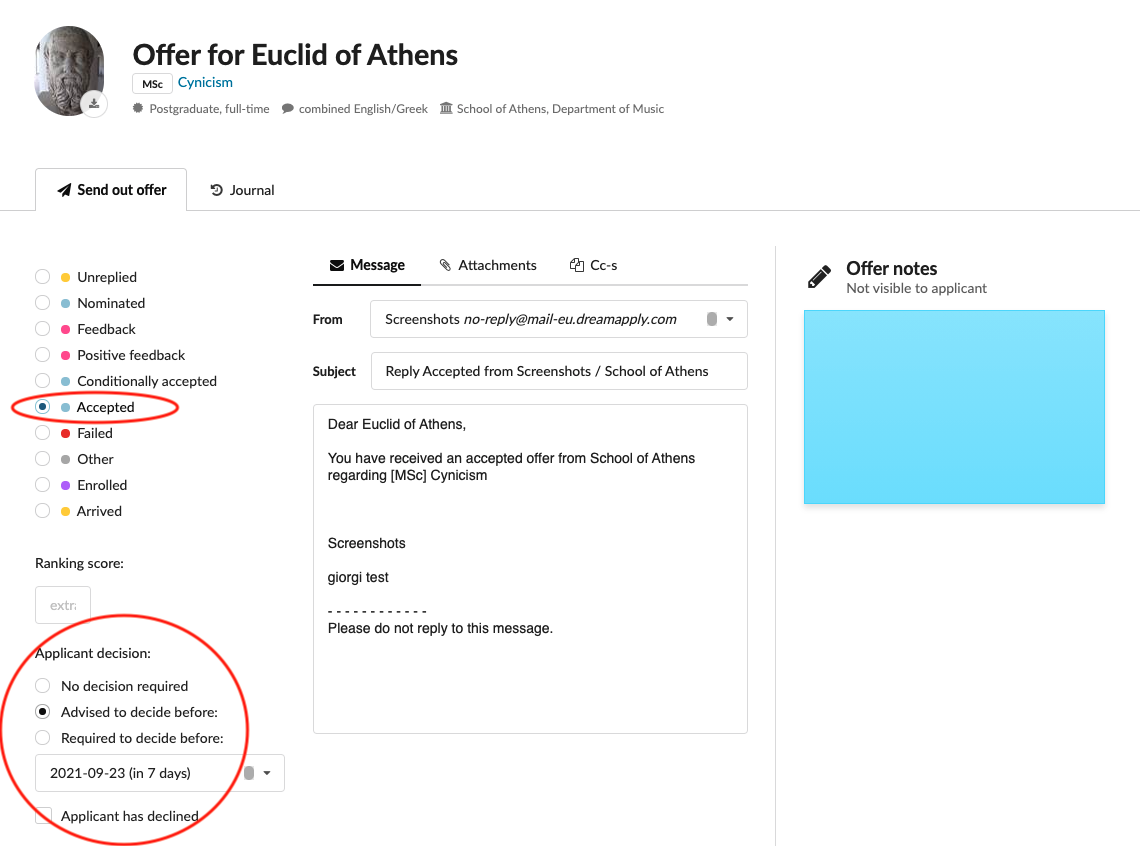
While generating new offer status for the applicant, you can manually adjust the type of decision under the “Applicant Decision” that is visible in the Offer modal once an Offer type that has the Decision function enabled. Here you can choose from:
-
“No decision required” - this will remove the applicant’s ability to make a decision.
-
“Advised to decide before:” - This will encourage the applicant to make a decision before the date you have chosen from the dropdown menu immediately below these options, but will allow them to still make a decision if the date has passed. The default number of days or specific date within which the applicant is advised to decide can be set in Intakes.
-
“Required to decide before:” This will encourage the applicant to make a decision before the date you have chosen from the dropdown menu immediately below these options. If this date passes, the applicant’s will no longer be able to make a decision. The default number of days or specific date within which the applicant must decide can be set in Intakes.
-
“Applicant has declined” - If an applicant makes it clear that they wish to decline an offer, this box can be ticked by an administrator.
-
After activating the decision-making function in the offer type, all applicants who will receive an offer of the type with the Decision function activated will be able to accept or reject your offer.
How to configure offer status?