Home › Start here › Applications › Browse › How to change offer? ›
How to change offer?
Here you can read more about the evaluation process, especially about Offer statuses. This article will teach you how to use Offer statuses and how to send the necessary information to applicants.
Make sure you have Administrator permissions to edit Offers – “offers-view”, “offers-edit”, “offers-confirm”.
Make sure you have already read:
-
Log in as an Administrator.
-
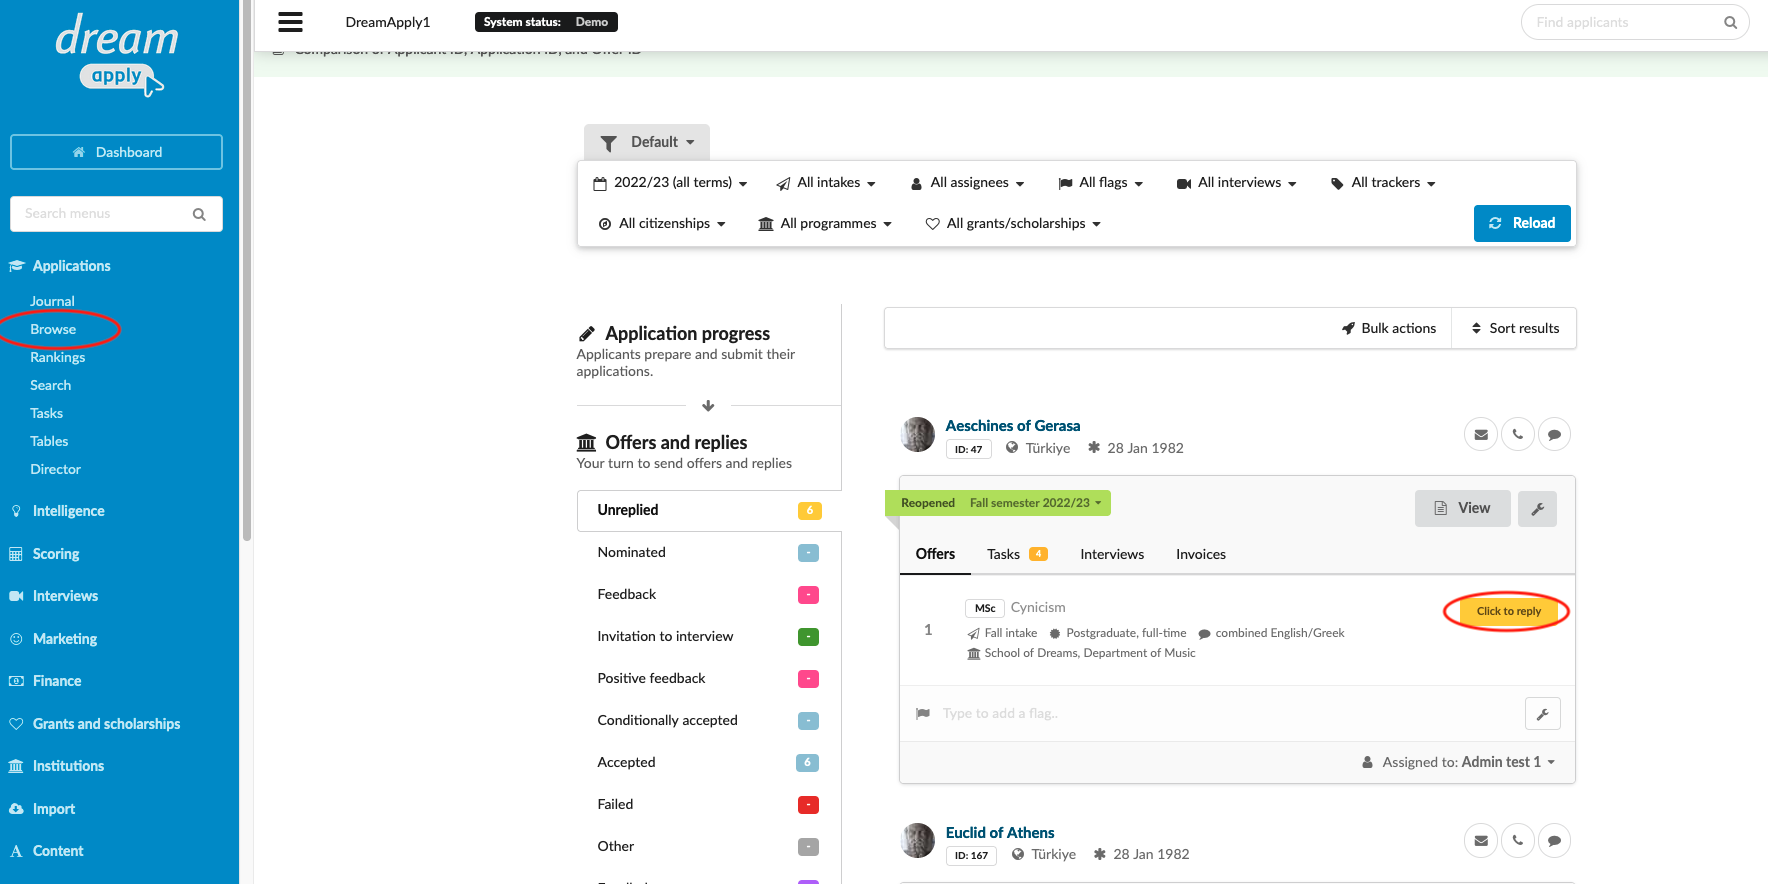
Go to Applications > Browse
-
In the very first bar you can filter applications based on:
-
Navigate to the “Offers and replies” section
-
Click on any status, to view the applicants under that status (For example “Unreplied”)
-
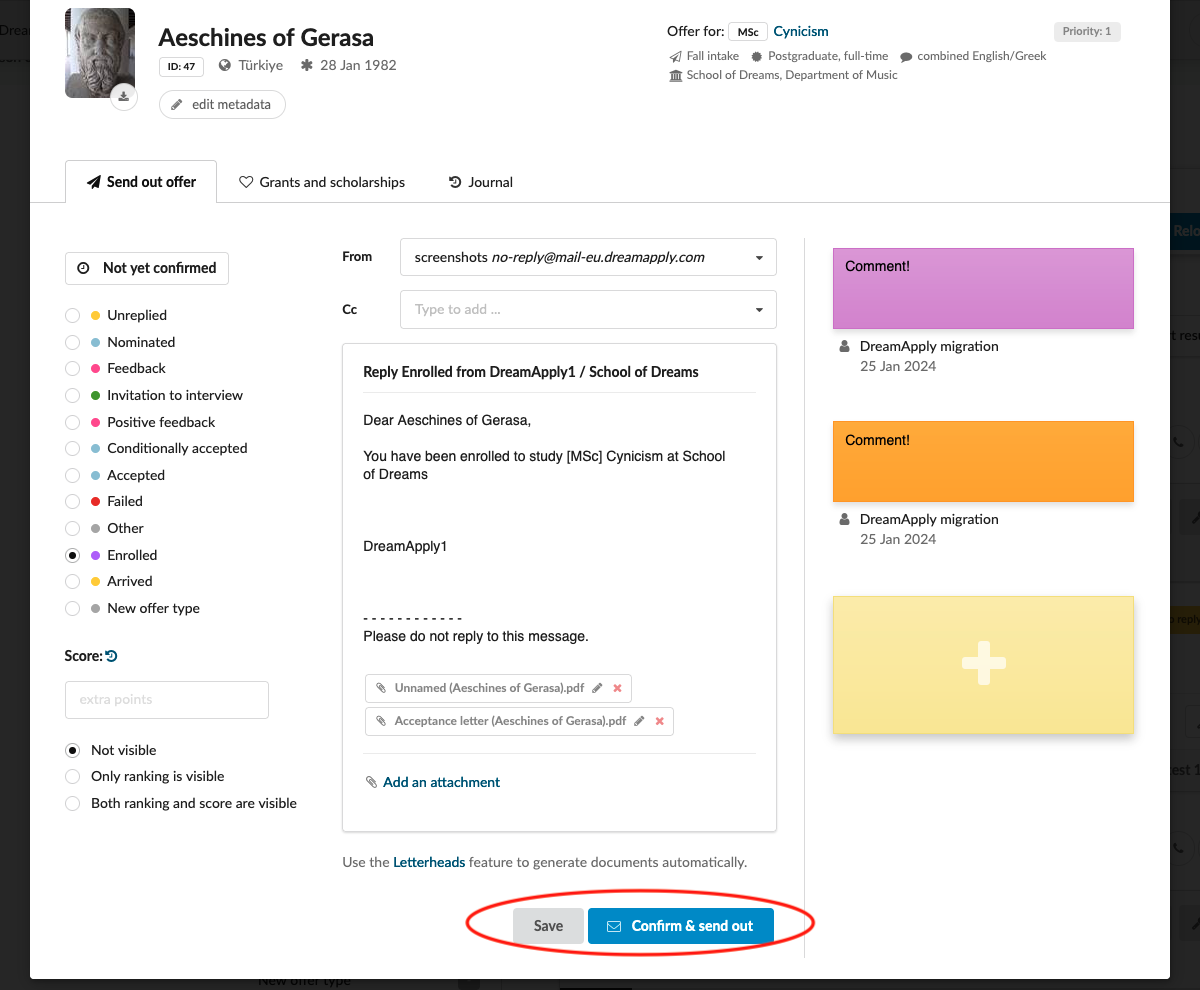
If you are under the “Unreplied” status, locate and click on the yellow button labeled “Unreplied in the application card, to the right of the program name, .”
-
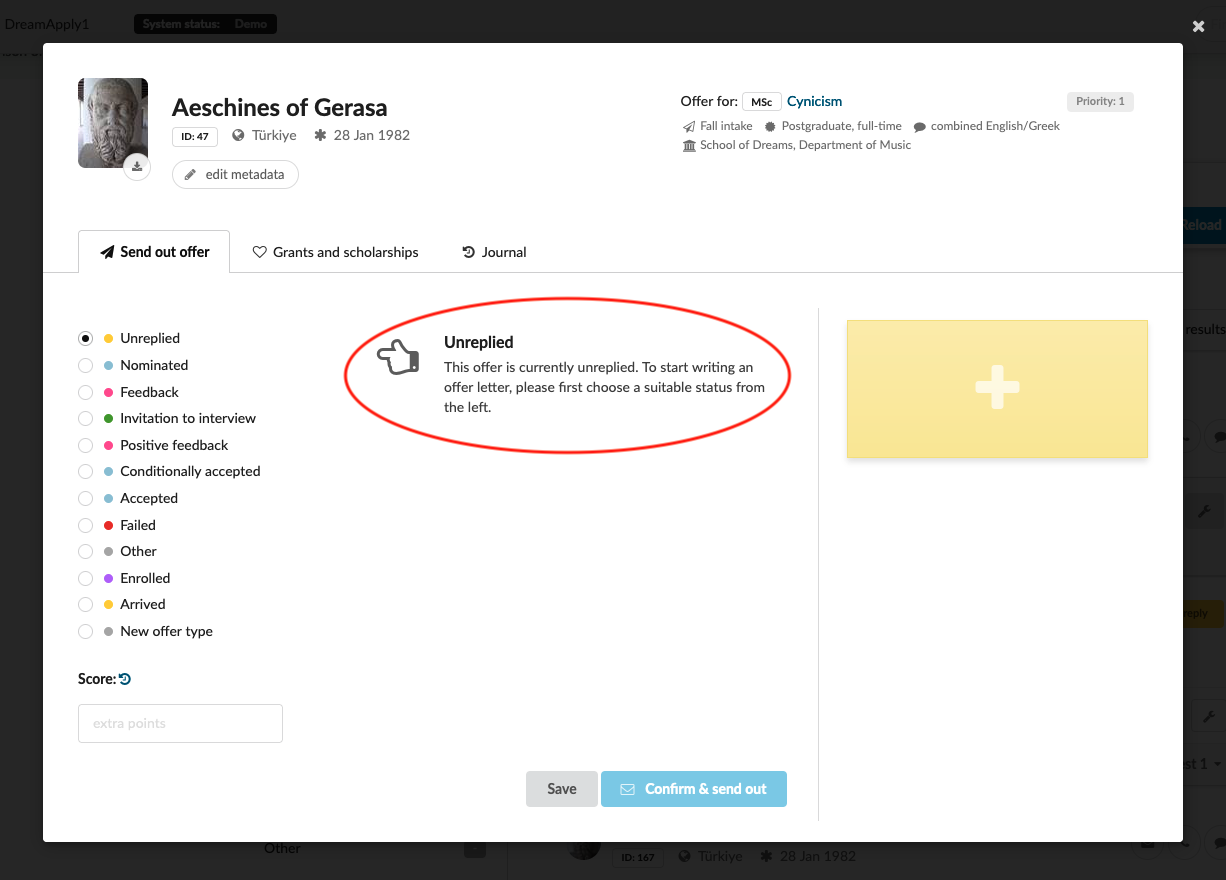
In the Offer card, from the left sidebar, choose a new status.
-
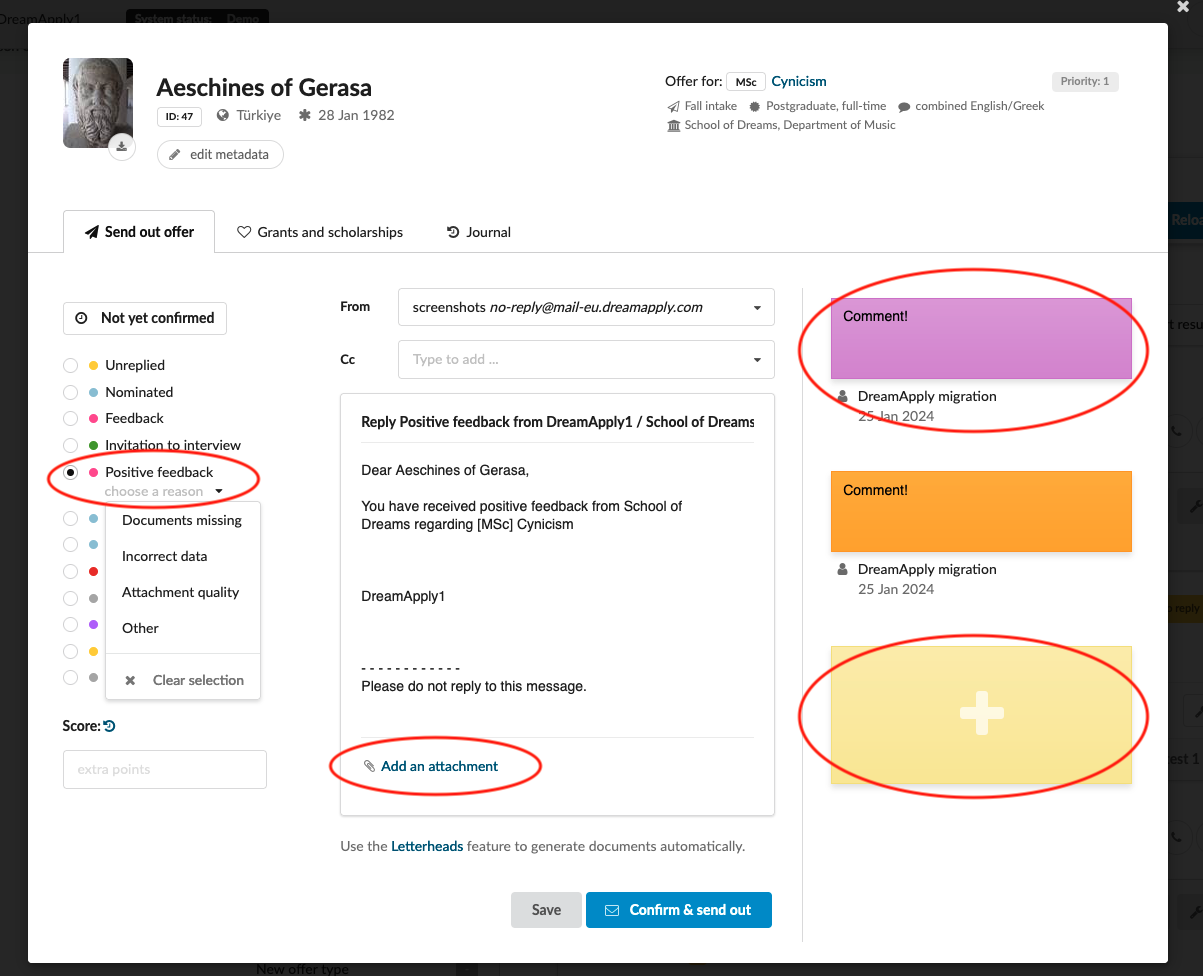
Additionally you can “Choose a reason” - It is an extra step allowing the administrator to choose a reason of offer status.
-
Optinal functions:
-
You can include comments in the ‘Note’ section, and the system will display the time and the user who added the note. You have the flexibility to create as many notebooks as needed, each distinguishable by unique colors. It’s important to note that comments are not visible to applicants but are accessible to all administrators
-
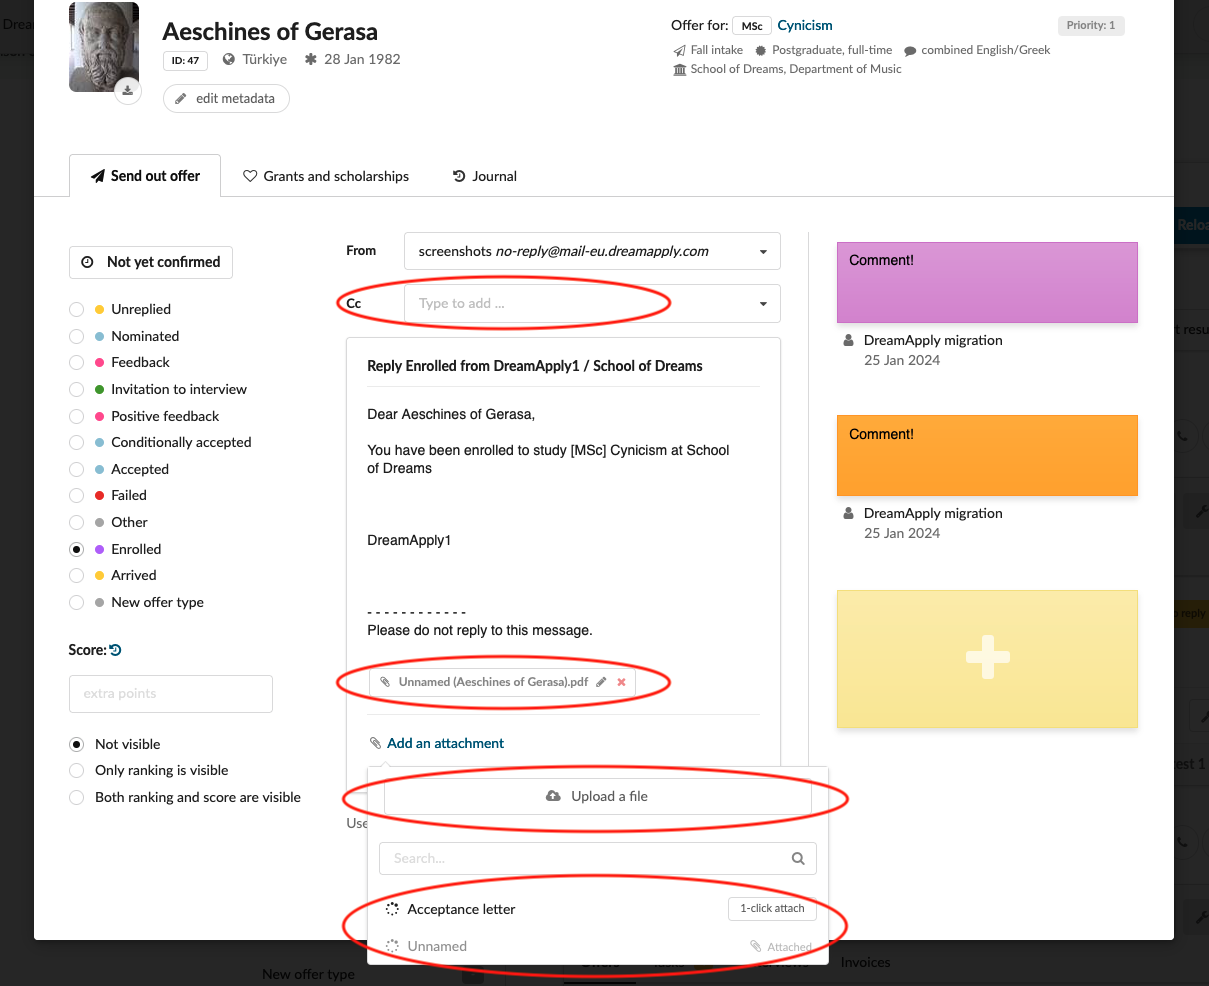
Send an attachment from the “Attachments” tab. You have two options for managing the attachments: You can either upload a file from your computer or generate a letterhead template. Even after generating a letterhead, you retain the flexibility to edit the content or revert to the original version. The system provides information on the number of content markers used in the letterhead and highlights how many of them remain without assigned values.
-
Add an email in CC from the “CC-s” tab
-
Adjust the email as needed. The default text comes from a systems-wide template and can be adjusted as needed.(See the article about templates)
-
-
Once you are ready, click on:
-
“Save” - Applicant will not receive an email/notification, but the status will be changed for the application. This chage will only be visible for administrators.
-
“Confirm & send out” - AApplicant will receive the email with attachment and will be notified that status was changed for the application. (Please note that this button will be changed to “Confirm & re-send” after an offer has sent out.)
-
Pro tip: If you never intend on sending an applicant from a particular offer type, it is possible to disable the “Confirm & send out” button for that offer type. (See “Offer types” for more information.)
Offer statuses are how administrators are able to communicate with applicants in DreamApply. It gives you the possibility to send out information in the form of emails with attachements such as acceptance letters or invoices. By changing offer statuses, you track the progress of the evaluation of an applicant and stay updated regarding the application’s condition.
Read more about the “application view”?
Read more about the application card