Home › Start here › Applications › Browse › Send bulk offer ›
Send bulk offer
This article provides a step-by-step guide to send out offer in a bulk.
Before generating offer statuses, it’s important to filter the target group applicants and determine which status each applicant should receive. This ensures that the process runs smoothly and accurately. So, make sure to take the time to filter and organize your applicant pool before moving forward with generating offer statuses.
Send offer status in a bulk:
-
Log in as admin.
-
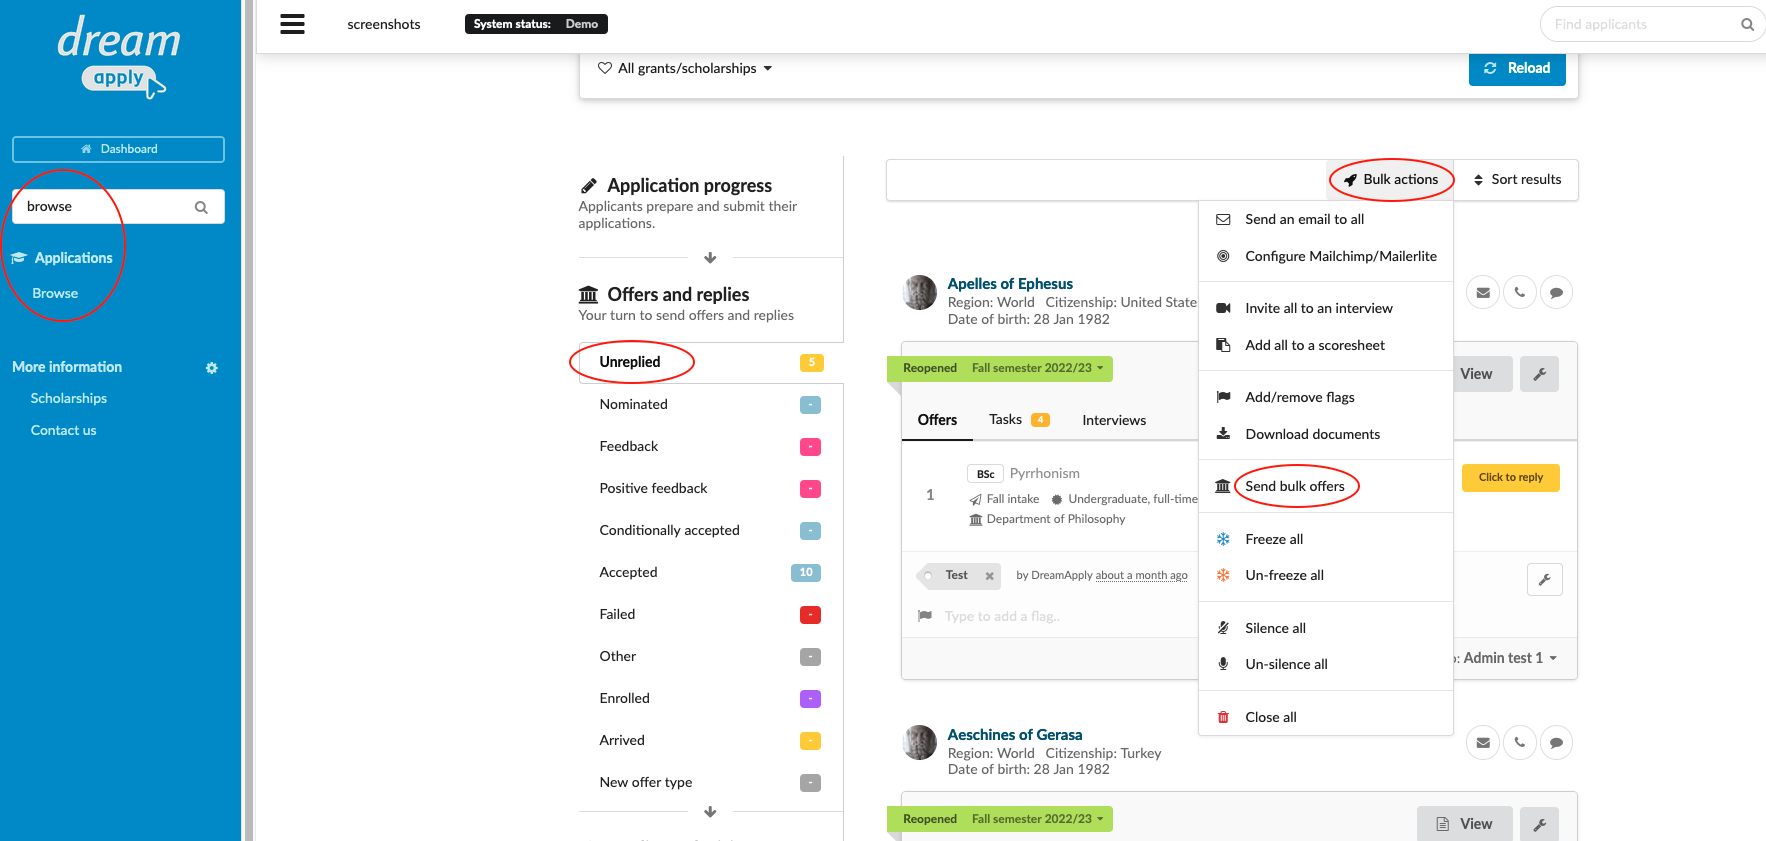
Use the Main menu to navigate to: Applications>Browse.
-
Use the side menu to choose a subset of applicants based on:
-
Applicant progress status
-
Offer status
-
Applicant decision
-
-
(optional) If necessary, narrow the subset of applicants even further by applying Filters based on:
-
Academic term
-
Intake
-
Tracker
-
Region
-
-
Courses/Programmes by either cherry picking from a list or by:
-
Department
-
Status
-
Type
-
Mode
-
Language
-
-
Click “Reload” to apply filters.
-
Review list of applicants to ensure the correct subset has been selected.
-
Click “Bulk actions” > “Send bulk offer”.
-
Review the statistical information and click on “Continue”.
-
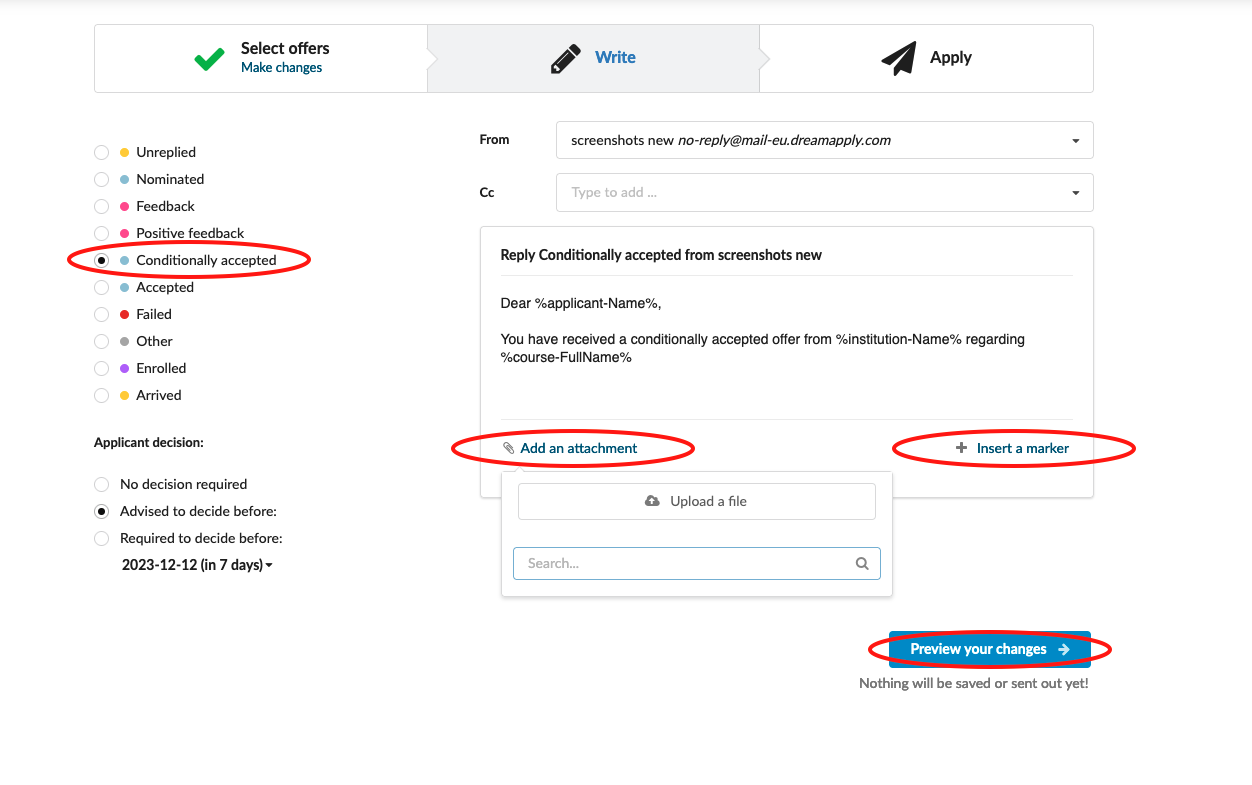
Choose a new offer status and set the deadline for applicant’s decision (optional).
-
Customize an email template by using content markers and add an attachment (optional).
-
Click on “Preview your changes”.
-
Review the chanages and click on “Confirm and send out”.
You will be able to export the selected documents from the system in a ZIP file.