Home › Start here › Import › Import leads ›
Import leads
In this article, you will learn how to import leads from an Excel file into the system, making the process of importing data easier and more efficient. If you have a list of applicants in Excel, you can easily import the data with the added benefit of a tracker code being assigned to all the imported applicants. Not only that, but the applicants will also receive a welcome letter containing their login credentials, allowing them to start their application right away. With these steps, you can streamline your lead management process and provide a better user experience for your applicants.
To ensure a successful import of your applicant data into the system, make sure you have collected the following information in your Excel file:
-
Full name of the applicant
-
Email address associated with the applicant
-
Citizenship information of the applicant
-
Contact phone number of the applicant
Having these details readily available will help to streamline the data import process and ensure that all necessary information is captured accurately.
-
Log in as an administrator
-
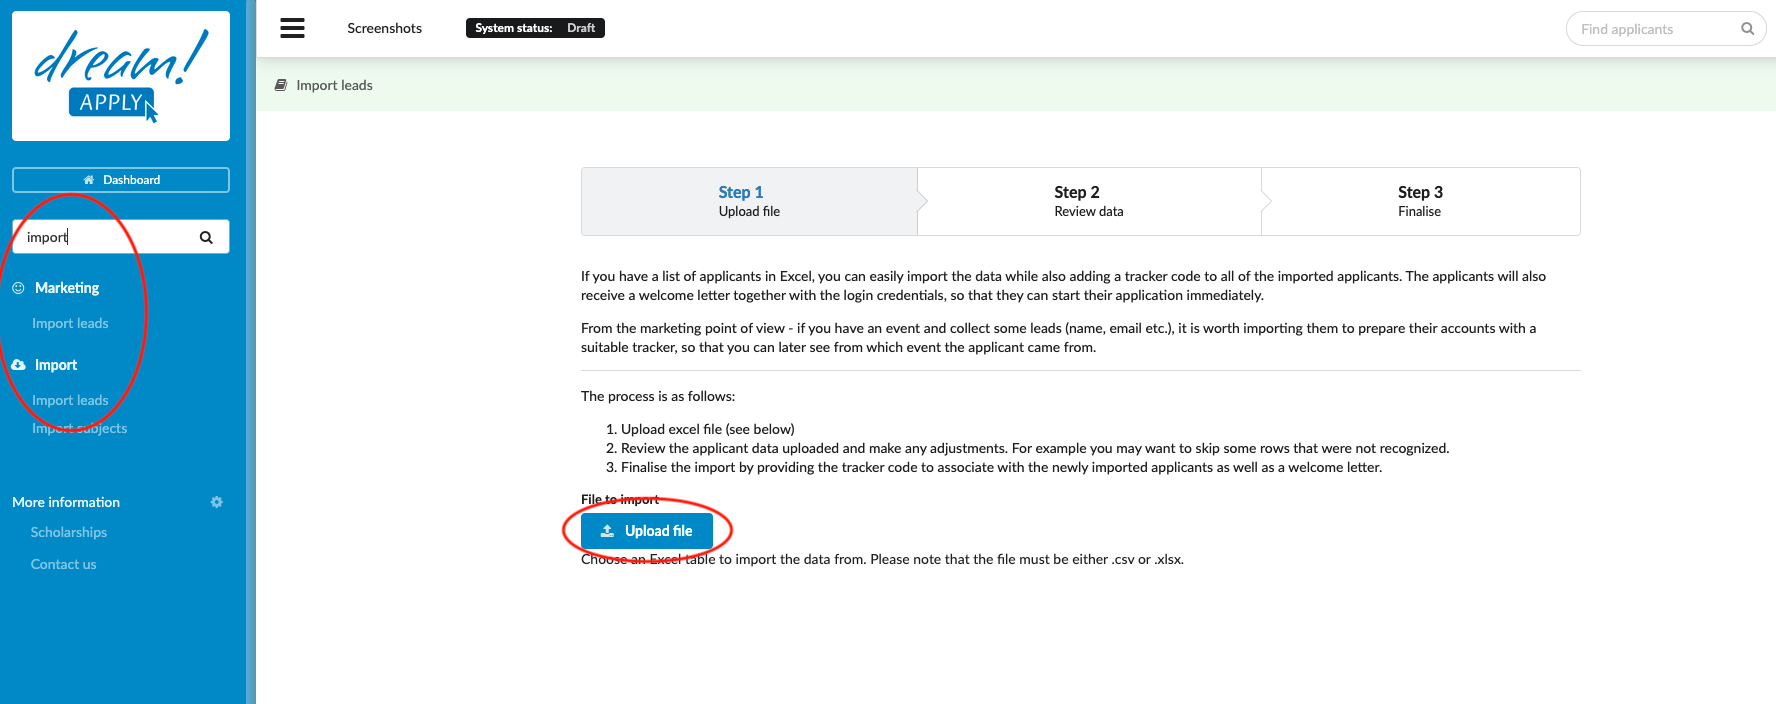
From the Main menu, go to: Import > Import leads.
-
Click on “Upload file” and start uploading your Excel file
-
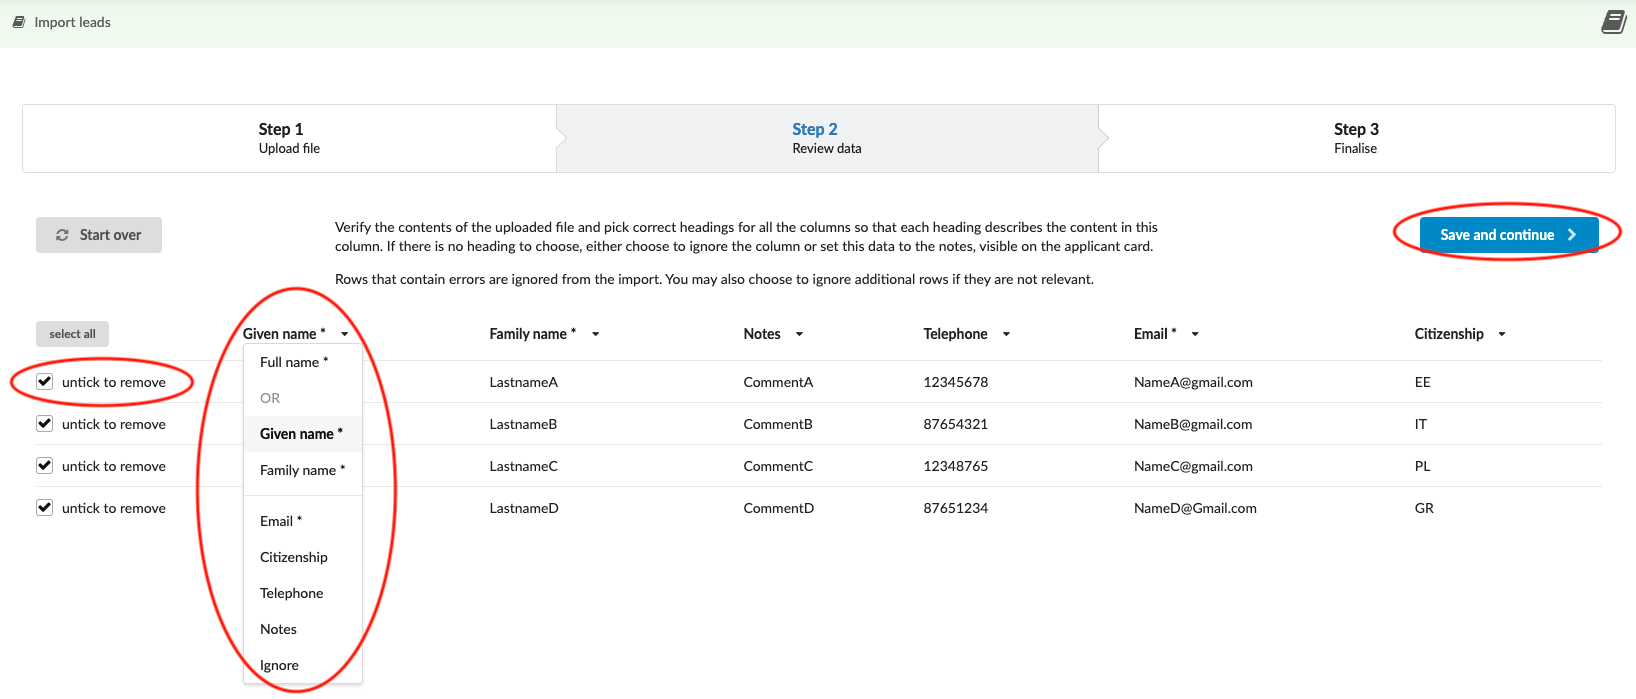
Review the applicant data uploaded and make any adjustments:
-
For instance, you may need to skip some rows that the system did not recognize during the import process. To achieve this, simply uncheck the corresponding box.
-
When importing data from your Excel file, it’s important to ensure that the appropriate headers are assigned to each column. Be sure to carefully choose the correct header for each column to avoid errors or confusion during the data import process. Remember to double-check all headers before proceeding with the import. For instance, make sure that the citizenship information is entered as a two-letter abbreviation.
-
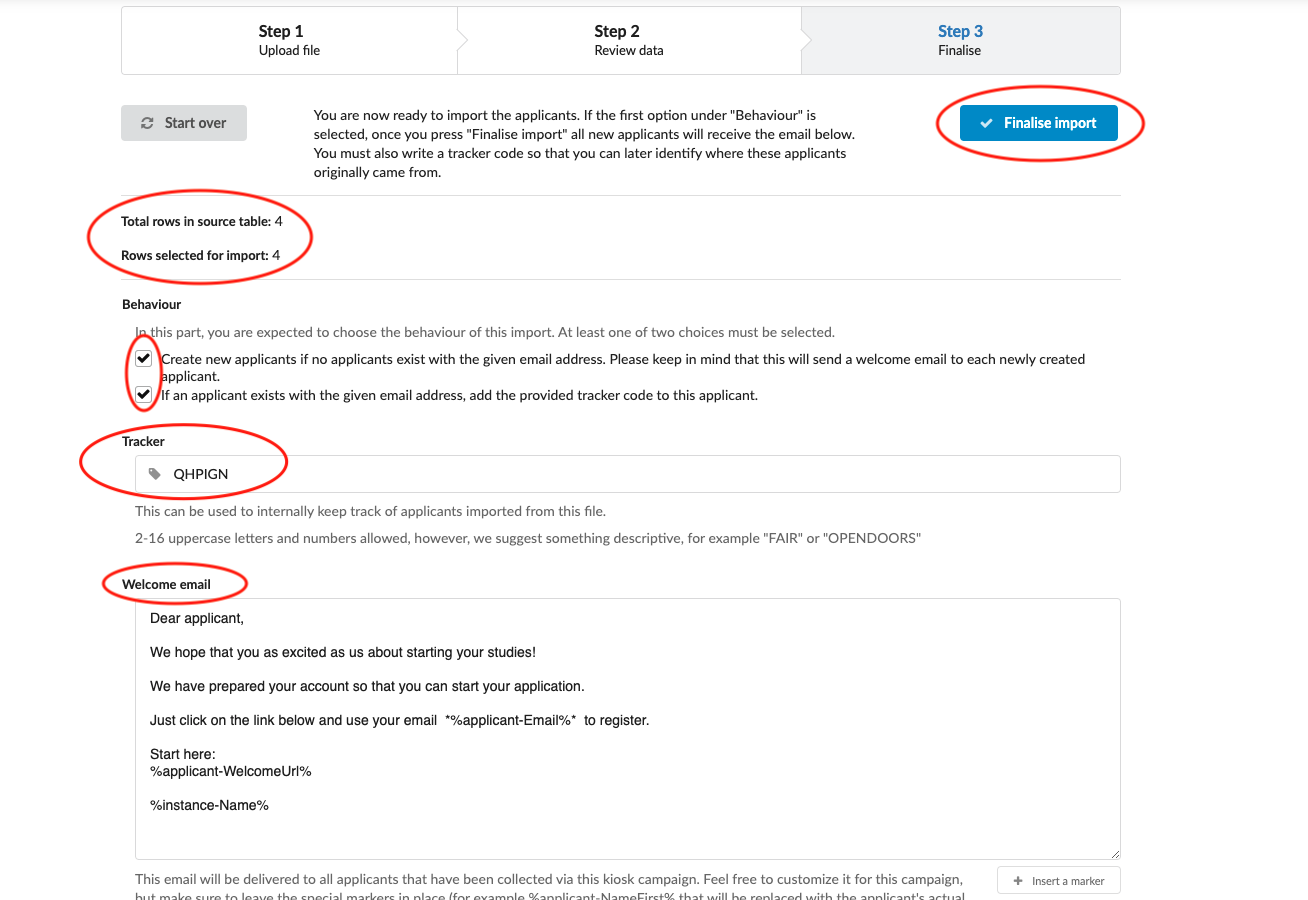
Select a tracker code that will be assigned to all imported applications. This can be used to internally keep track of applicants imported from the file.
-
Customize the welcome email text that will be sent to applicants and include their access credentials. This email is an important part of the onboarding process and should be tailored to reflect your institution’s brand and voice. Consider providing clear instructions on how applicants can access the system and begin their application process. Review the email content carefully to ensure that it’s clear, accurate, and includes all necessary information.
-
Click on “Finalise import”.
-
With these simple steps, you can easily import leads data from your Excel file into the system, saving your applicants valuable time and making the application process more user-friendly. Once you have internet access, importing the data will automatically create accounts for your leads and send welcome emails, streamlining the onboarding process.
Furthermore, this process allows you to track and monitor the progress of imported leads, providing insights into the success of your application process. You’ll be able to generate reports that show how many leads have submitted applications, enrolled, and more. This information is crucial for evaluating the effectiveness of your lead management strategy and making data-driven decisions to improve your processes.