Home › Start here › Marketing › Leads funnel ›
Leads funnel
Teaches how to check registered, applied, and submitted leads in the system.
-
the Marketing addon enabled (please feel free to contact [email protected] if you would like more information on enabling this addon)
-
the correct administrator permission (“applicants-view”)
Check the leads:
-
Log in as an administrator with the permission “applicants-view” (included with the Role “Marketing administrator” in addition to “Superuser”).
-
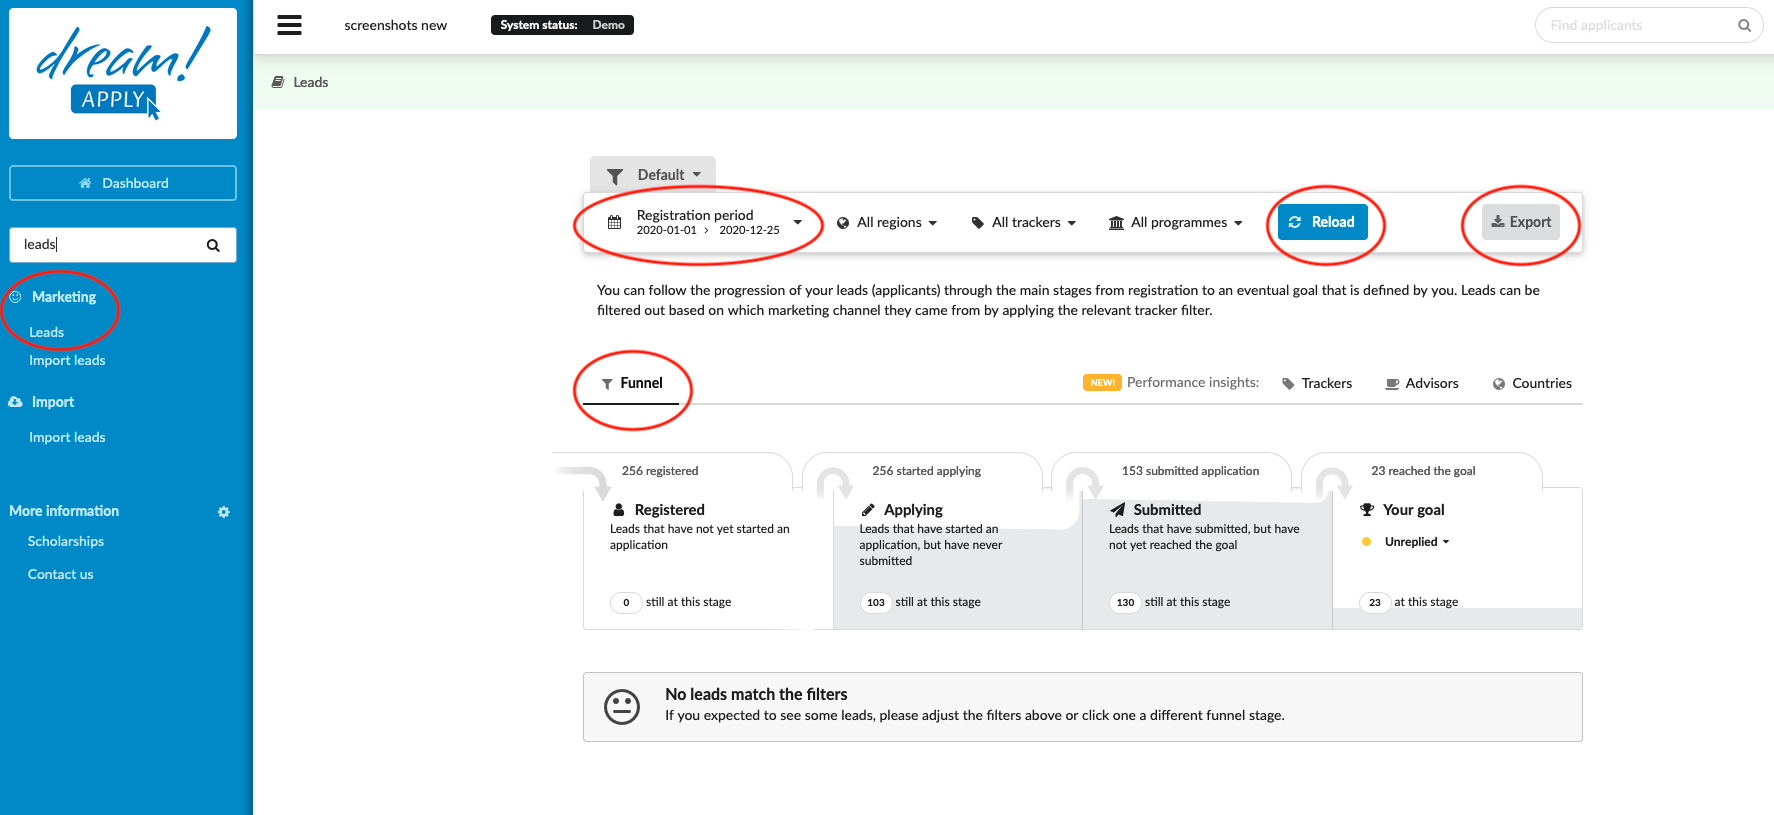
From the Main menu, go to Marketing > Leads.
-
(optional) Set the filter to narrow in on the desired subset of Leads:
-
Filter for a specific Registration period:
-
Click on “Registration period”.
-
Either “Quickly choose” by clicking on the desired period of time.
-
Or, enter a custom range of dates:
-
Enter a beginning “From” date.
-
Enter an ending “Until” date.
-
-
-
Filter specific regions or choose
-
Click on “All regions”.
-
Toggle the “filter specific regions” switch.
-
Select the regions/countries to be filtered for.
-
-
Filter applications based on trackers.
-
Click on “All trackers”.
-
Toggle the “filter specific trackers” switch.
-
Select the Trackers to be filtered for.
-
-
Choose what stage of Leads is desired. Read more how to import leads.
-
Registered - Shows those Leads who have a registered account but haven’t selected a study programme. This number is given at the bottom of the box (Still on this stage). At the top of the box, you can see the total number of registered leads. All imported leads will appear in this section. Read more about how to import leads.
-
Applying - In this section, you will find the Leads who have started an application by adding at least one study programme. Total number of leads, who have started applying is given at the top of the box. The number of leads, still on this stage (not submitted) is given at the bottom of the box.
-
Submitted - Here, you can find all the Leads who have submitted an application. At the top of the box, you can find the total number of submitted applications. At the botton of the box, you can find the number of submitted applications, who have not received any offer yet.
-
Goal - By choosing the available offer status you can set the goal for the lead. For example, if the goal is “Accepted”, then this section will show the total number of accepted applications.
-
-
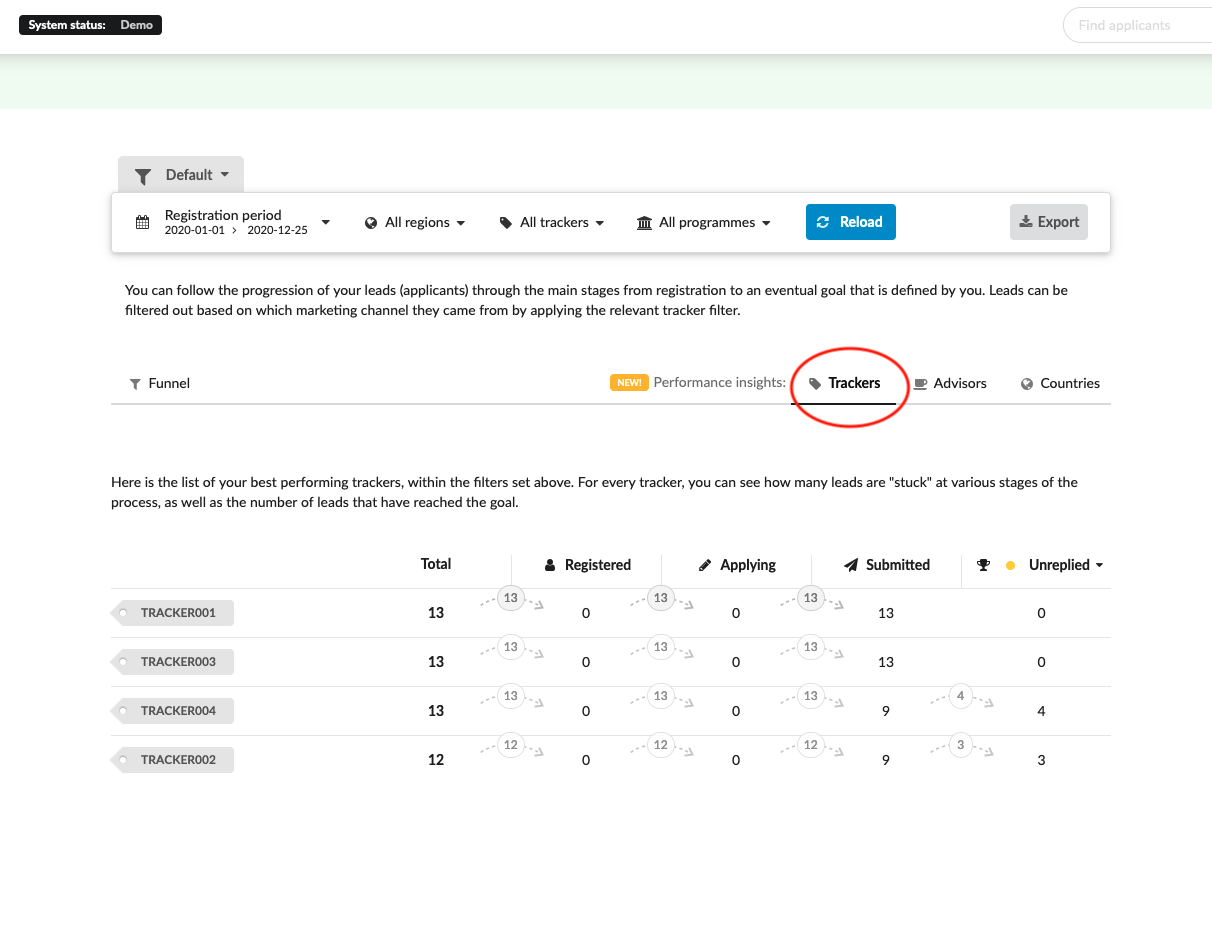
Utilize the “Tracker” button to access the same data organized according to tracker codes.
-
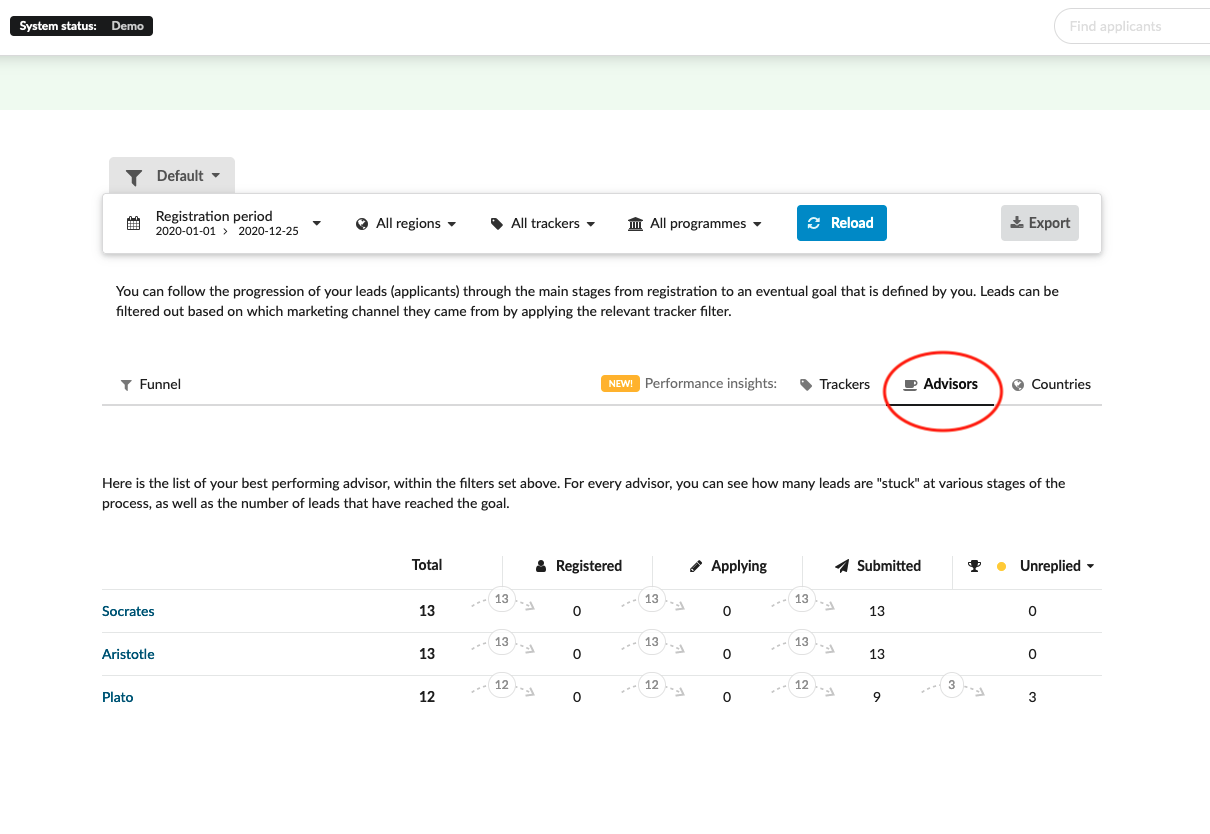
Upon entering the “Advisor” section, you’ll find applications listed per advisor, mirroring the original dataset.
-
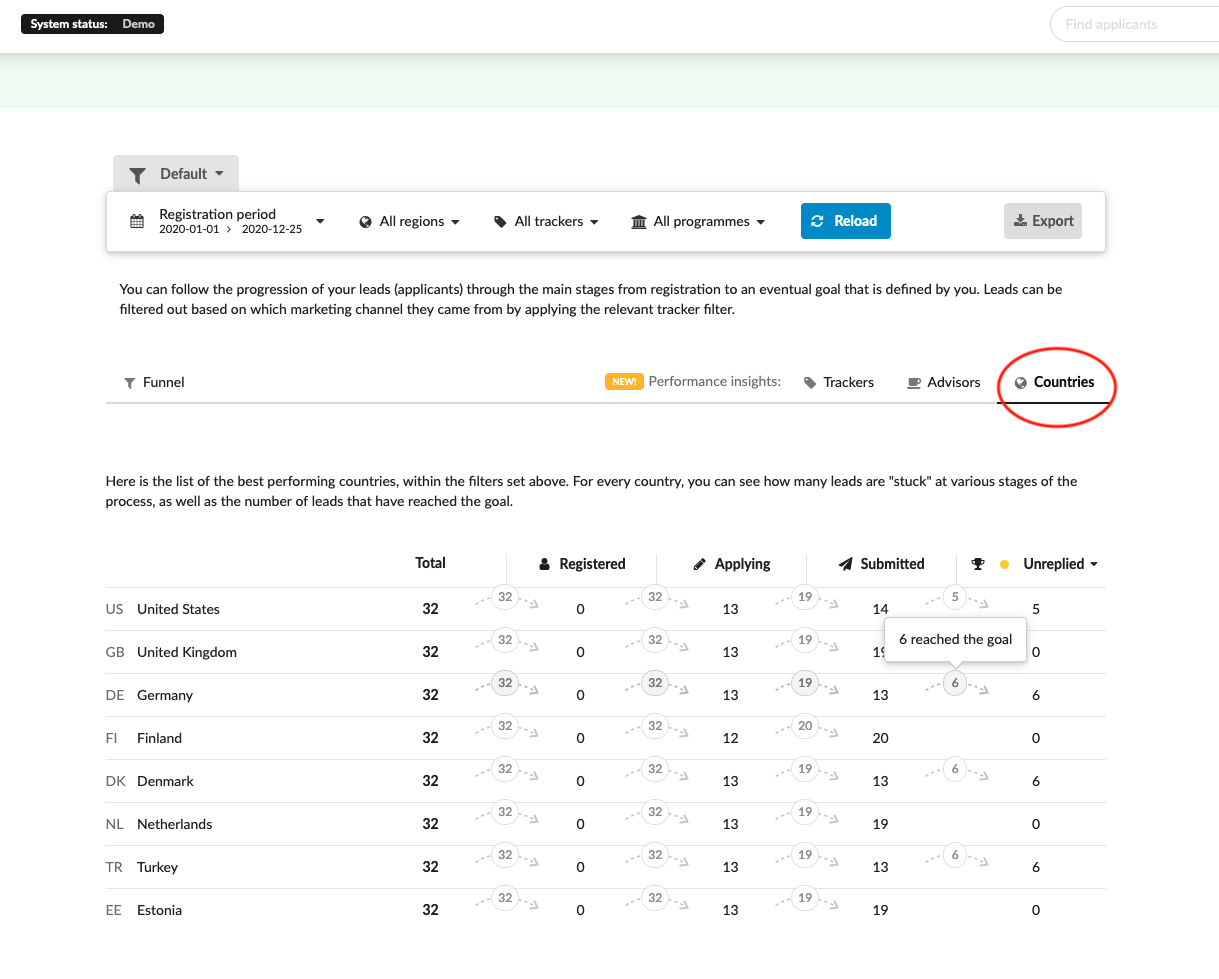
By clicking the “Country” button, the system will populate the table with identical data, this time organized by country.
-
(optional) Export Leads.
-
Click on the “Export” button.
-
Select “Excel (.xlsx)” or CSV (.csv) from the dropdown list.
-
-
(optional) Perform Bulk actions
-
Click on the “Bulk actions” button.
-
Select “Send an email to all” from the dropdown list.
-
Fill in the subject field.
-
Add text to the body of the email.
-
Click the “Send away” button.
-
-
Select “Subscribe all to your chosen Engagement” from the dropdown list (requires the Engagement addon).
-
Select the group you would like to have the applicants added to.
-
Click on the “Subscribe applicants” button.
-
-
The Leads section can be helpful for tracking the applicant’s performance from registration to submission. Using some of the built-in tools can be helpful in the conversion of Leads to Applicants.
How to check an applicant’s profile?
How to import leads in the system