Home › Start here › Applications › Browse › Applicant profile ›
Applicant profile
The Applicant Profile serves as a centralized hub for all applicant data, providing quick and easy access to relevant information. This article provides instructions on how to locate an applicant’s profile and navigate its various sections.
-
Know which applicant(s) you would like to view. There are many ways to locate the applicant(s) you are looking for depending on what information you have about them.
-
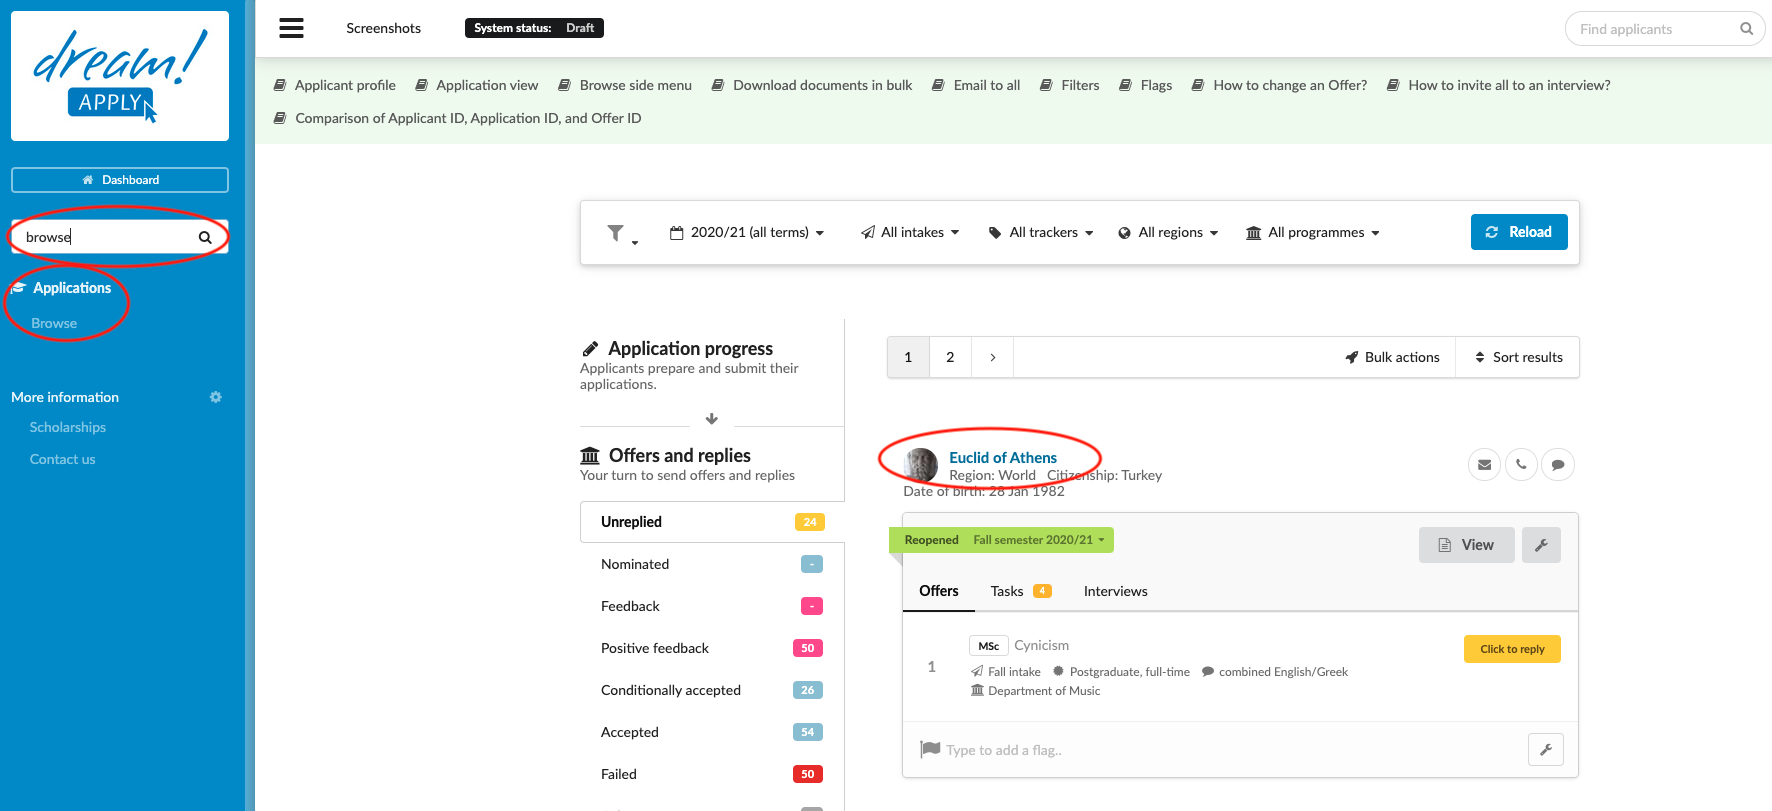
A name, email, or Applicant ID can be used to search for a specific applicant. (see Search for more information)
-
Offer status is useful when working with applicants at a certain step of the application process and all applicants of a certain Offer status are organized together in Browse. (see Browse for more information)
-
Tasks can be used to search for applicants who have a particular Task status of a particular Task. (see Tasks for more information).
-
Some other ways that can be used to locate applicants is via Journals (if it is known when something was done by an applicant, see Journals for more information), Rankings (when dealing with applicants based on their Ranking for a specific Course/Programme, see Rankings for more information), Tables (when a Table is being used (see Tables for more information).
-
Log in as an administrator.
-
Locate the desired application using the Applicant Profile, Browse, Search, or Tasks features.
-
Click on the applicant’s name or photo to open the Applicant Card, which appears above the page.
-
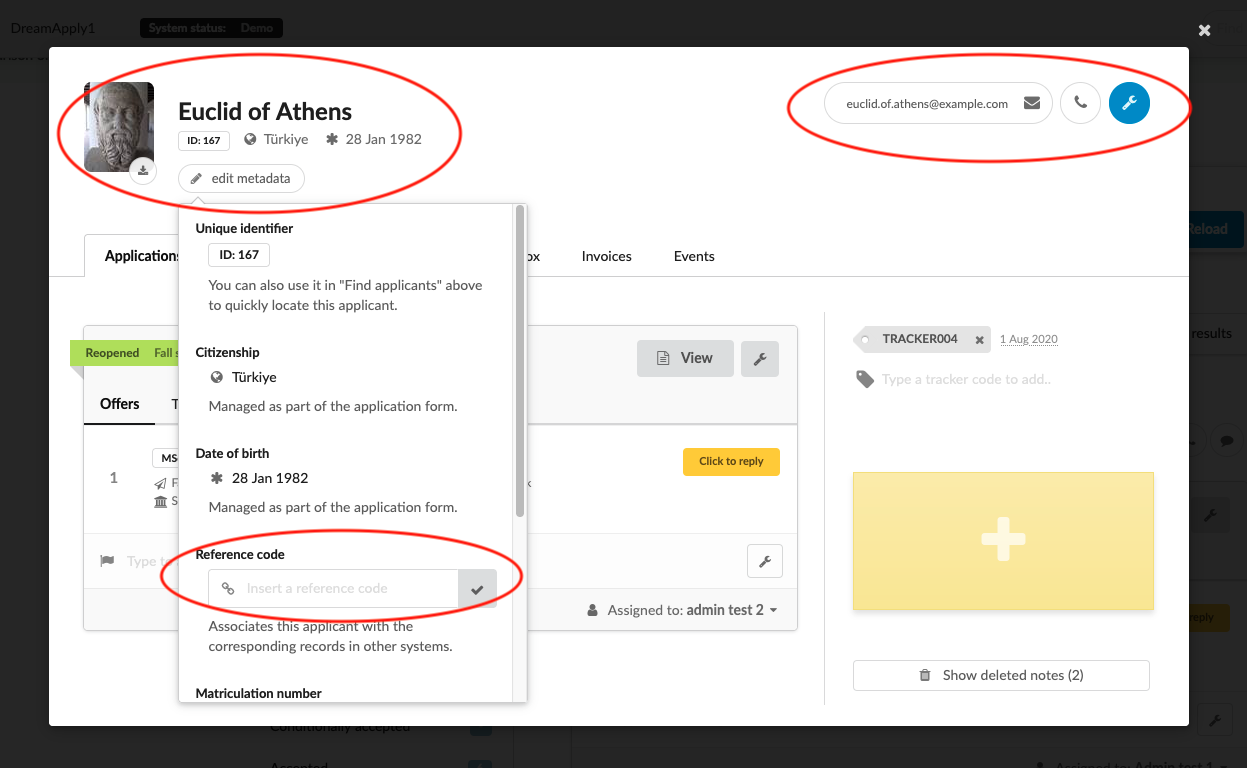
Formal photo - Clicking on the applicant’s photo will open the full-sized photo in a new window. A download button appears, allowing you to download the photo.
-
Applicant summary - This section displays the applicant’s name, region, citizenship, date of birth, and Applicant ID.
-
Edit metadata - Clicking the ‘Edit metadata’ button provides you with general information about the application and allows you to input the details such as the ‘reference code’ and ‘matriculation number.
-
Applicant email - The applicant’s email address appears here. Clicking on it allows you to copy the email as text or start an email in the default email client.
-
Phone icon - Clicking on this icon reveals the applicant’s telephone number and provides options to contact the applicant via telephone or Skype call.
-
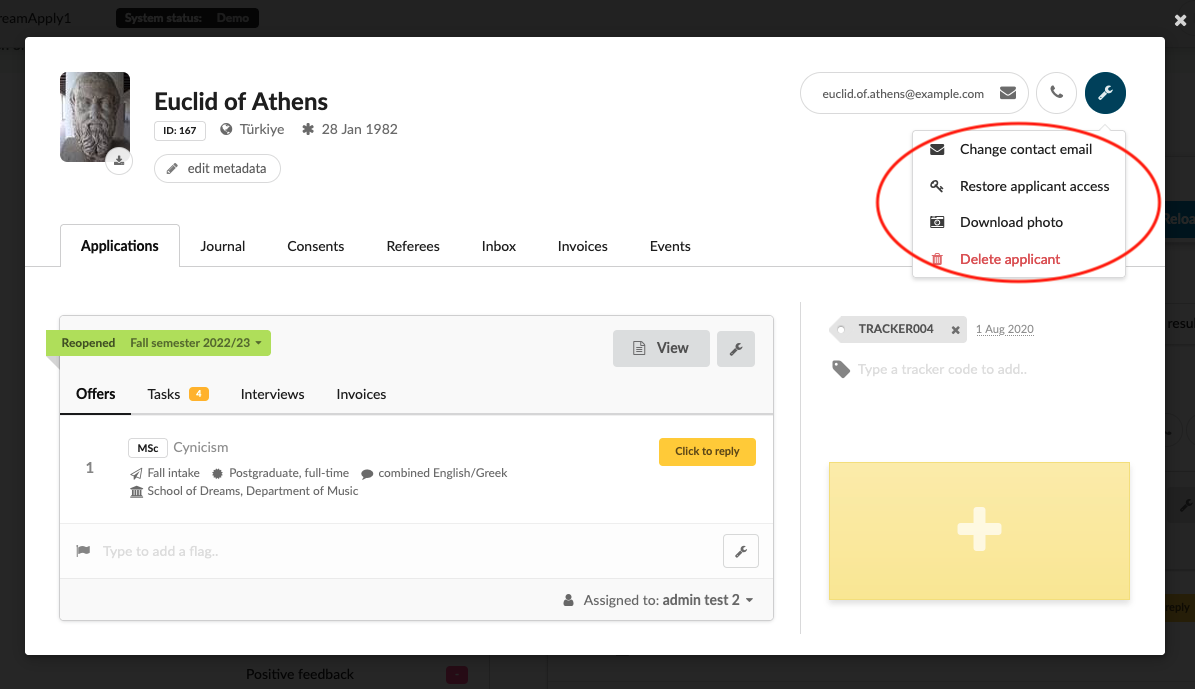
Wrench icon – Click on this wrench for access to possible administrator actions
- Change contact email address – This makes it possible to change the applicant’s contact email address when necessary.
Changing contact email address is not enough for changing applicant’s login email address (DreamID email). Applicant might have two different emails, one for contact and the second for DreamID. Next bullet describes how to change applicant’s login email address (DreamID).
-
Send new credentials – This makes it possible to provide the applicant with new credentials when requested. Read more here.
-
Download photo – This is one way to download the applicant’s photo.
-
Delete applicant – This is one way to delete the application.
-
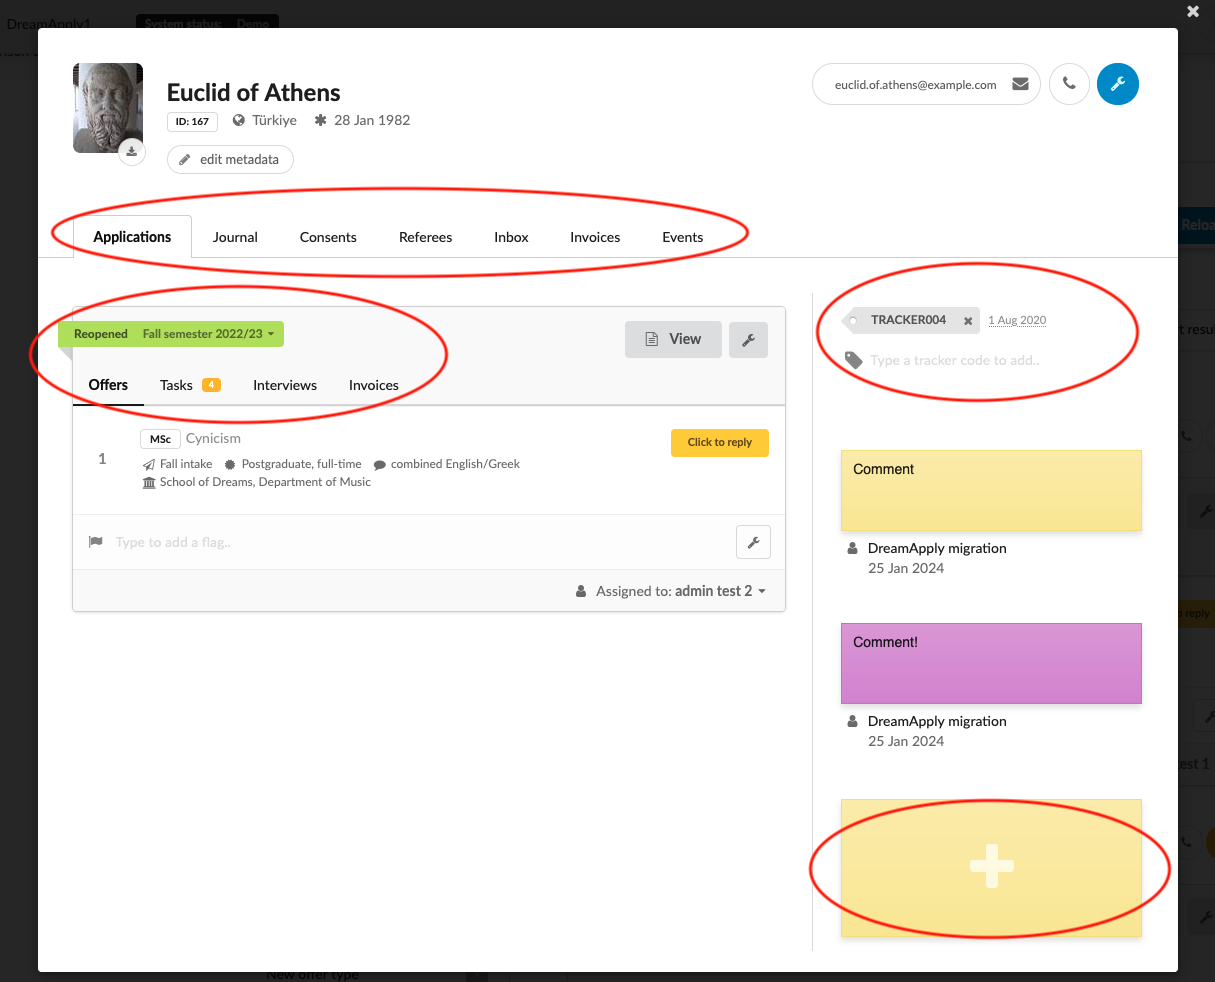
Application profile tabs – Different modules will appear beneath the tabs depending on which tab has been selected.
-
Applications – When selected the various applications will appear (see Appforms for more information)
-
Term - Shows under which academic term was placed applicant, by clicking on it and choosing new term, you can place applicant under another semester.
-
Offers - Shows the list of the courses applicant has applied for
-
Tasks - This tab displays the checklist items generated for the applicant
-
Interviews - Shows the submitted interviews and new intervie invitation can be send by clicking on “Invite to an interview”
-
Invoices (addon) – When selected, all the invoices issued to the applicant for this specific application will become visible. By clicking on “Add new invoice” you can manually issue the new invoice. (see Addon: Finances for more information)
-
-
Journal – When selected all the Journal events of the applicant’s progress will be visible. (see Journals for more information)
-
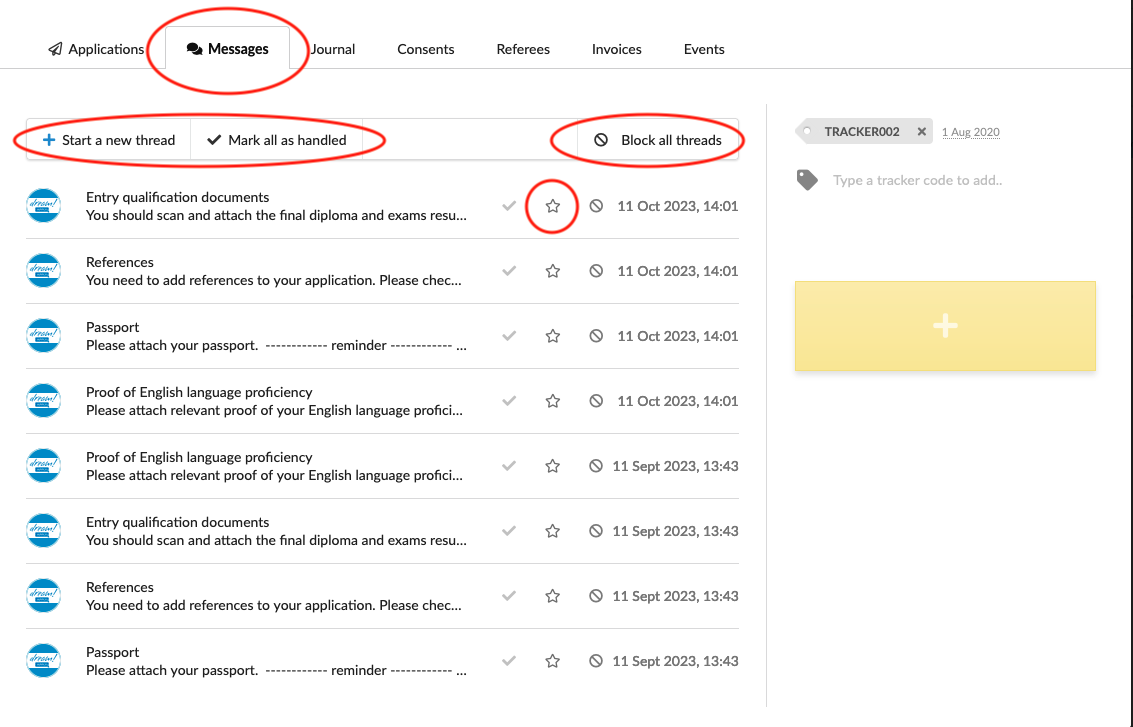
Messages - When selected, all the emails sent out by the DreamApply system to the applicant will be readily visible. You can simply click on any outgoing email to seamlessly continue the conversation or send additional emails within the same thread. Likewise, the applicant’s responses will be displayed within the same thread for easy reference.
-
-
Consents – When selected all the Consents the applicant has consented to will be visible. (see Consents for more information)
-
Referees – When selected all the references by the applicant’s Referees will be visible. (see References for more information)
-
Invoices (addon) – When selected all the invoices that have been given to the applicant will be visible. (see Addon: Finances for more information)
-
Events – When selected all the events the applicant has registered will be visible. (see Calendar for more information)
-
Tracker code (addon) – This is where a Tracker code can be added to an Applicant profile manually. (see Addon: Marketing for more information)
-
Notes – You can include comments in the ‘Note’ section, and the system will display the time and the user who added the note. You have the flexibility to create as many notebooks as needed, each distinguishable by unique colors. It’s important to note that comments are not visible to applicants but are accessible to all administrators.
In order to use Applicant profile:
Navigate the Applicant profile by section:
To initiate a new conversation on a different topic, you can click on “Start New Thread”. Here, you can specify the type of communication as a subject, attach files if necessary, and include additional recipients in the CC field. All messages and emails will be conveniently delivered to the applicant’s inbox within their DreamApply profile.
Furthermore, you have the ability to mark threads as handled once resolved, feature/star important conversations, or block threads as needed for clarity and organization
By following these instructions, you will be able to locate an applicant’s Applicant Profile and easily access the information you need. Related articles include information on Appforms, Consents, and Events.
Appforms – Where the questions and instructions on the application are controlled.
Consents – What consents are and how to create and manage them.
Events – What events are and how to create and manage them.