Home › Start here › Marketing › Advisors ›
Advisors
This article teaches how to create, edit, and delete an advisor’s account.
-
the Marketing addon enabled (please feel free to contact [email protected] if you would like more information on enabling this addon)
-
the correct administrator permissions (“advisors”)
-
understood the difference between the limitation levels
-
gathered advisor-specific data, including:
-
name
-
access limitation level
-
(optional) email address and contract details
-
-
Log in as an administrator with the permission “advisors” (included with the Role “Marketing advisor” in addition to “Superuser”).
-
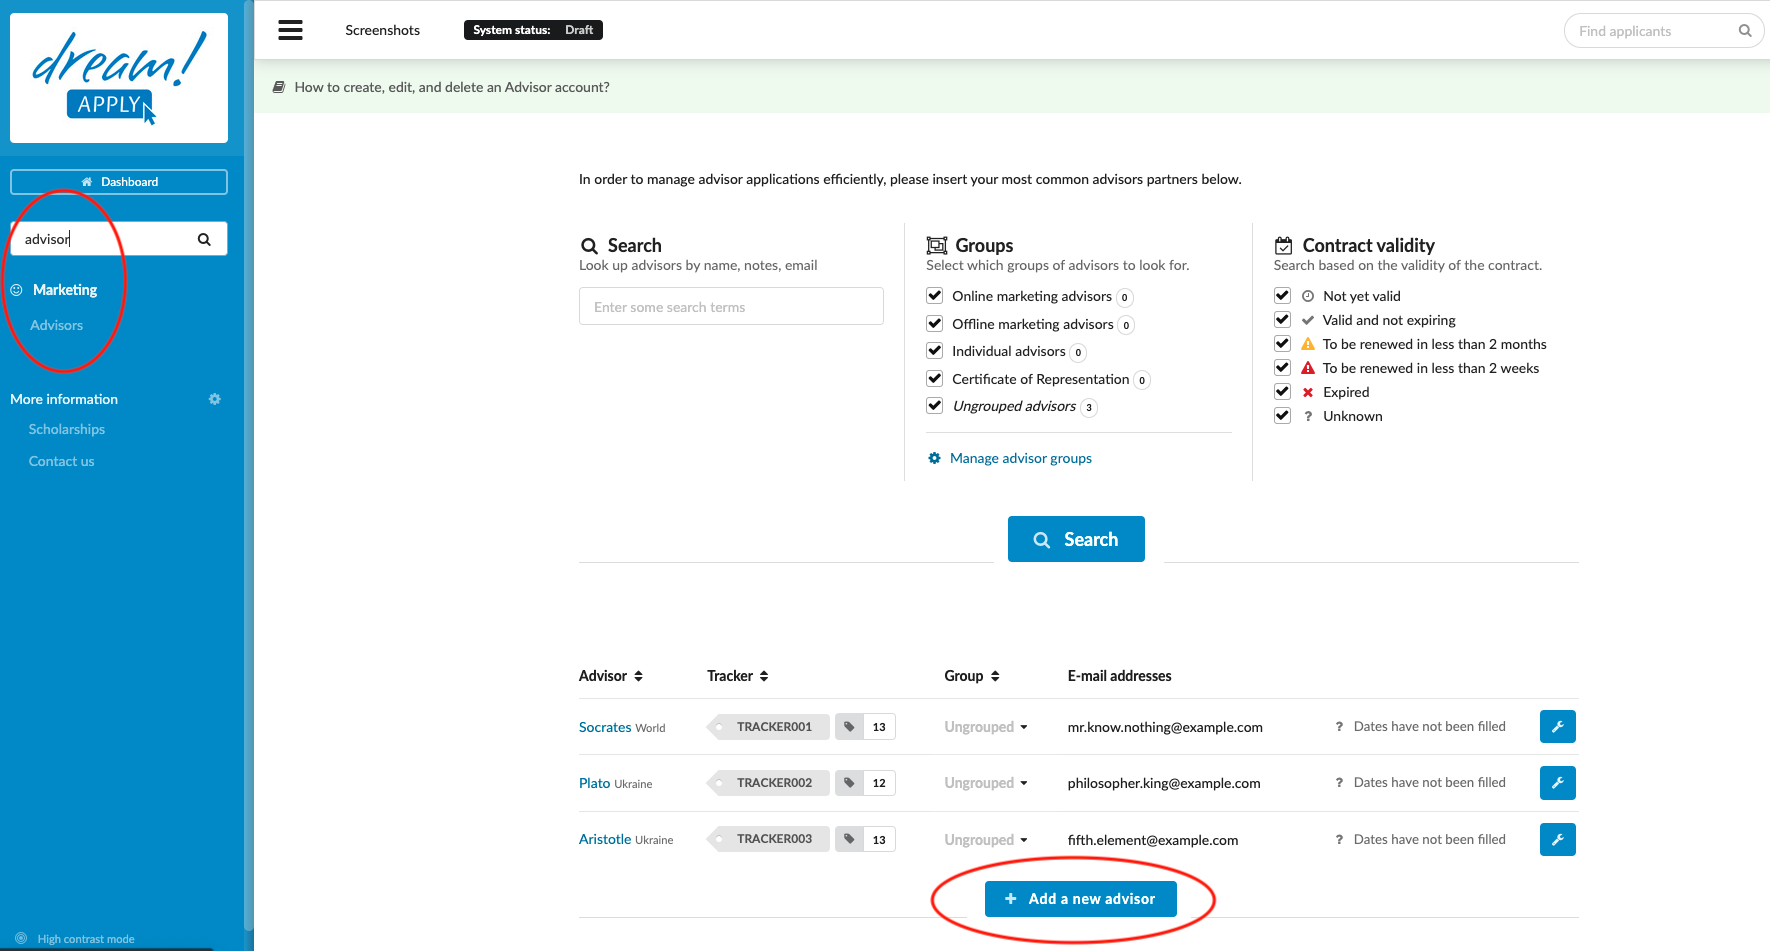
From the Main menu, go to Marketing > Advisors
Add new advisor:
-
Click the “+ Add a new advisor” button.
-
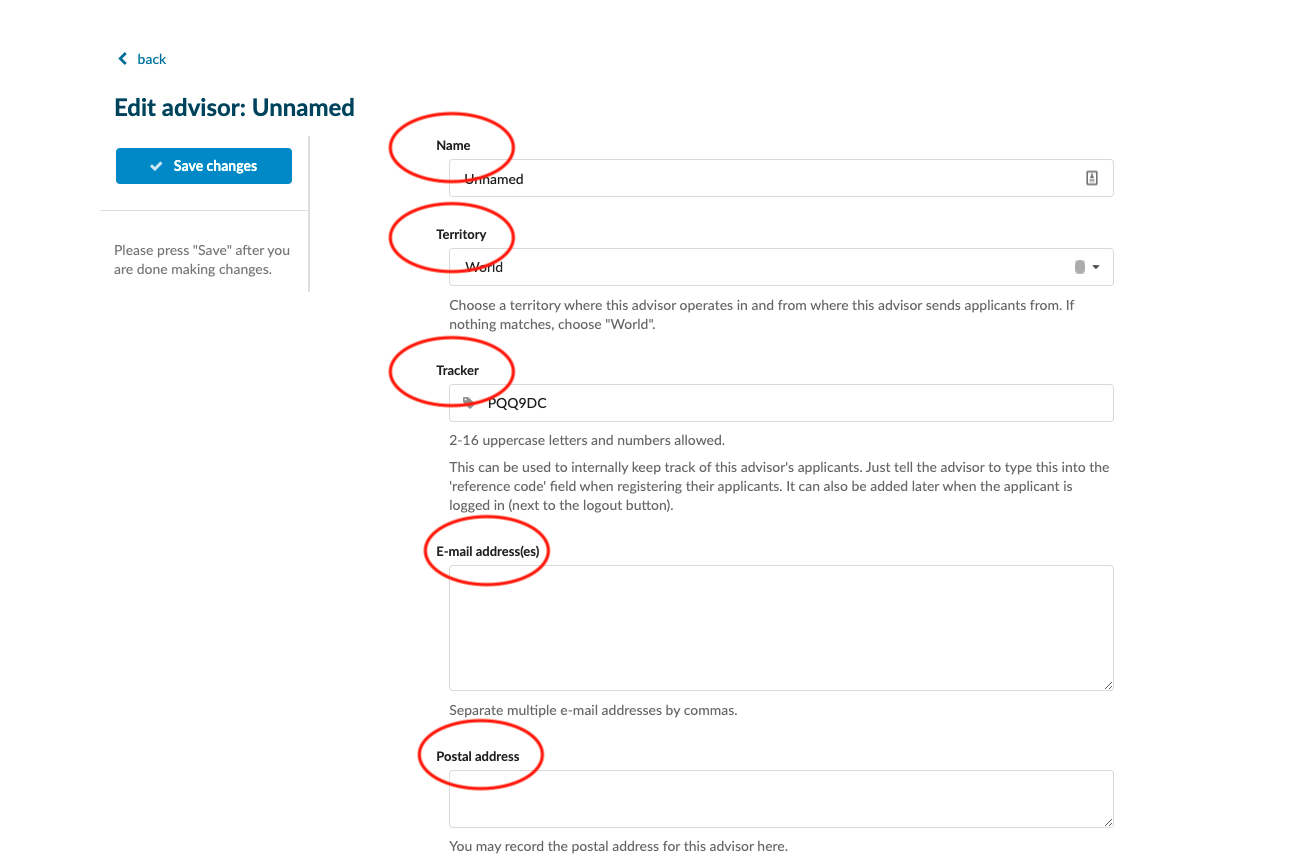
Enter the Advisor’s name and territory.
-
(optional) If a different, less random tracker code is desired, enter it now. After saving the Tracker code will not be able to be edited.
-
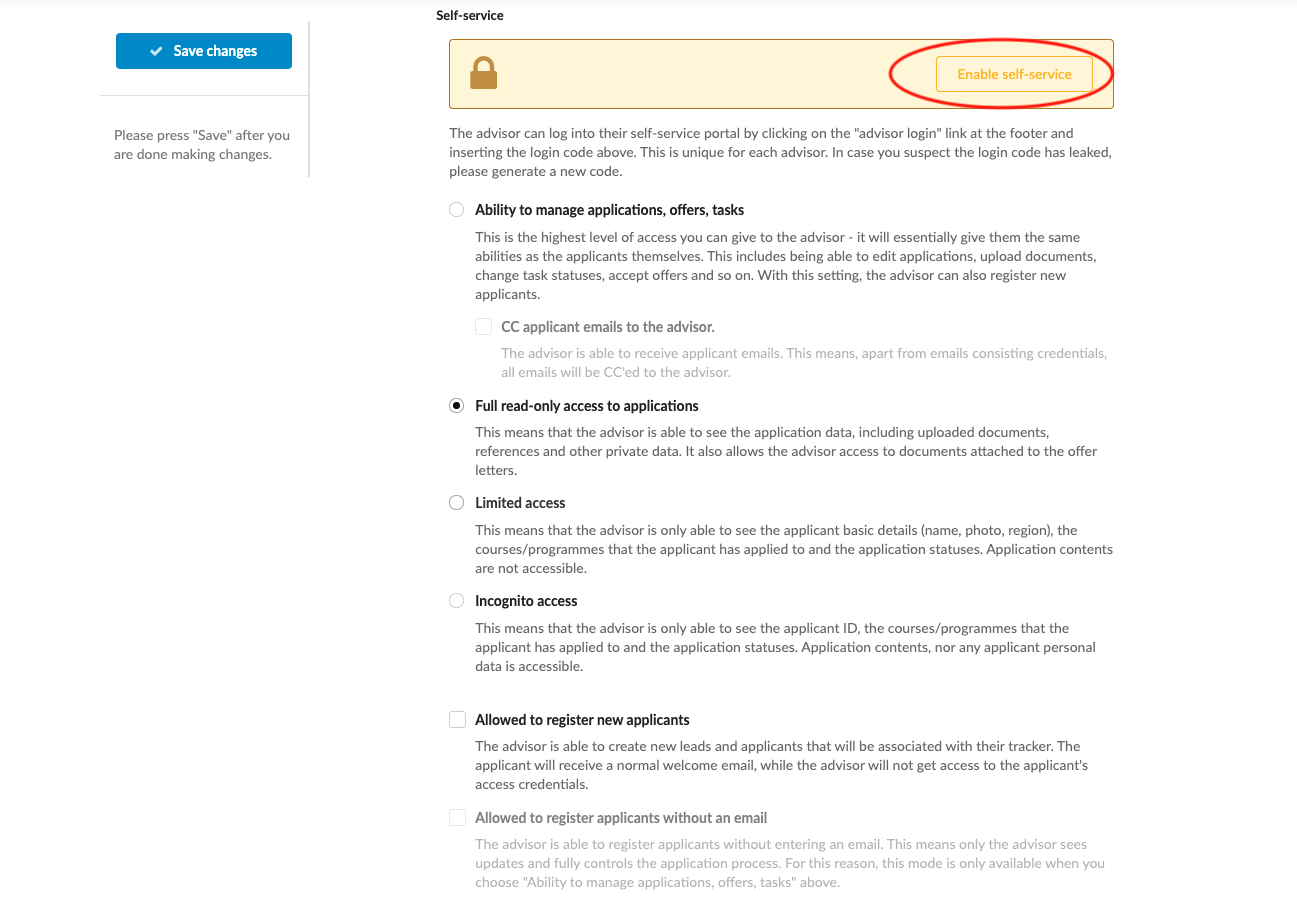
Choose the desired access level:
-
Ability to manage applications, offers, tasks – this gives the same access as the applicants who have the Advisor’s Tracker code.
- CC applicant email to the advisor - The advisor is able to receive applicant emails. This means, apart from emails consisting credentials, all emails will be CC’ed to the advisor.
-
Full read-only access to applications - this gives access to view the data of the applicants, including documents, who have the Advisor’s Tracker code.
-
Limited access – this gives access to the basic details of the applicants who have the Advisor’s Tracker code.
-
Incognito access – this gives access to only anonymized data of the applicants who have the Advisor’s Tracker code.
-
-
(optional) Allow to register new applicants - This will allow advisor to create the application, which will be associated with advisor’s tracker. Applicant will receive the welcome email with access credentials, while advisor will not get it.
-
(optional) Allow to register applicants without an email - This will allow the advisor to register the new applicant without inserting any email address. This means that advisor has a full control on the application and only advisor receives emails, notifications and all updates related to the application. Since this function gives a lot of power to the advisor, it can be only used, if adviros permission is “Ability to manage applications, offers, tasks”.
-
(optional) Add one or more email addresses.
-
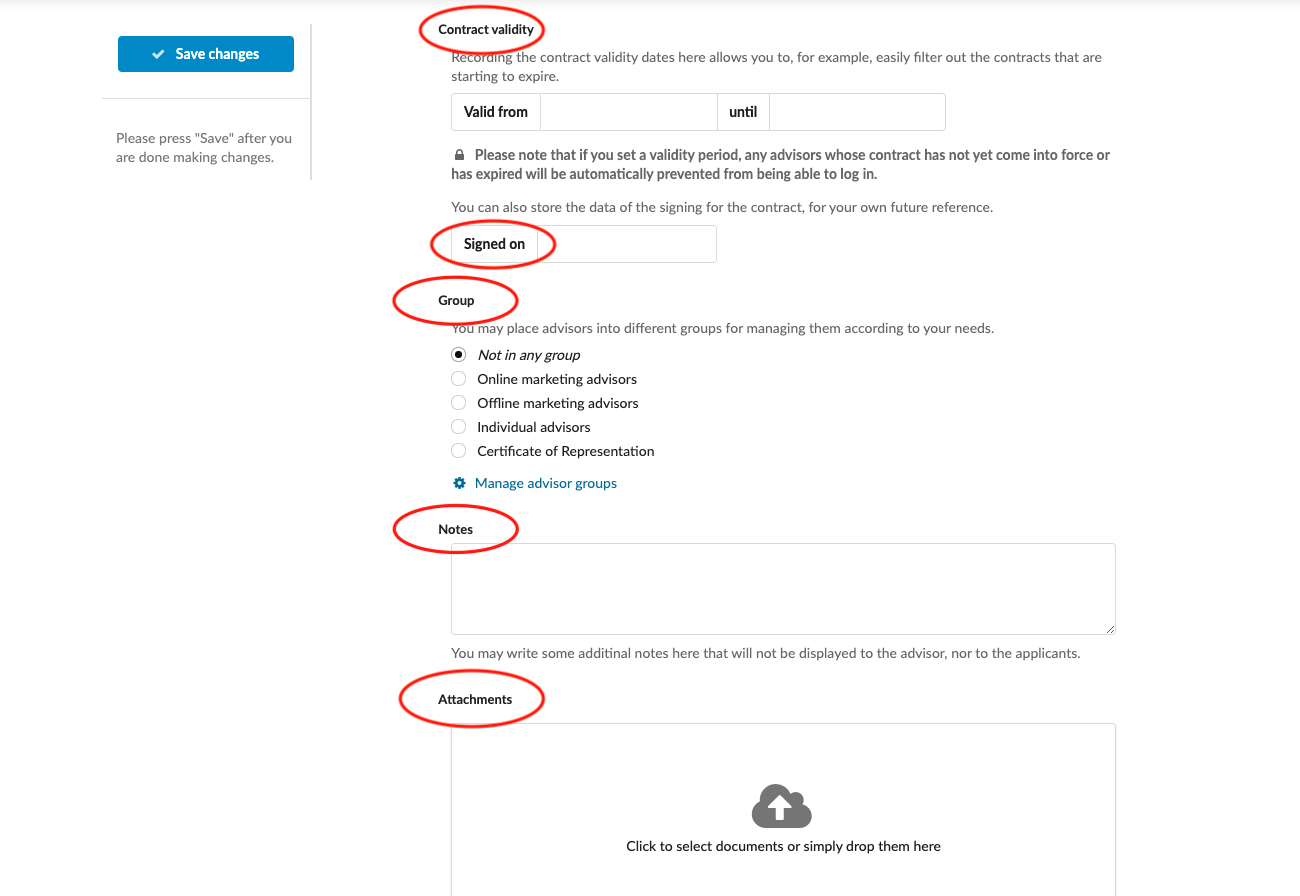
(optional) Add any necessary information about the contract.
(optional) Place advisor in the relevant group for organizational purposes. You can create new groups by clicking on “Manage advisor groups”, (Marketing > Advisros > under the filter tab.) or from System > Classificators > Advisor group. Read more here.
-
Navigate to the Self-service section and click on the “Enable self-service” button to generate the necessary access credentials for the account.
-
An 8-digit alpha-numeric code will appear in the Self-service section. These are the Advisor’s login credentials. Email them to the Advisor from your preferred email client.
-
Don’t forget to save your changes by clicking on the “Save changes” button.
Edit an existing Advisor:
-
Locate the Advisor you would like to edit.
-
Click on the button with the wrench.
-
Select the “Edit” option.
-
Make any necessary changes.
-
Don’t forget to save your changes by clicking on the “Save changes” button.
-
Delete existing Advisor:
-
-
Locate the Advisor you would like to delete.
-
Click on the button with the wrench.
-
Select the “Delete” option.
-
Confirm this action by clicking on the “Sure” button.
An admin with the permission “advisors” will be able to create new advisors, edit existing advisors, and delete advisors. Advisors will receive their credentials to the self-service portal allowing them to log in to the system as an advisor allowing Advisors to track or advance their applicant’s progress (based on access level granted).
How to create and adjust tracker