How to automate invoices?
This article teaches how to create a trigger for invoices and automate invoice issuing process.
Make sure you have:
-
configured fees
-
created invoice template
-
created invoice serial number
Series allows you to number and group your invoices.
-
Log in as an administrator
-
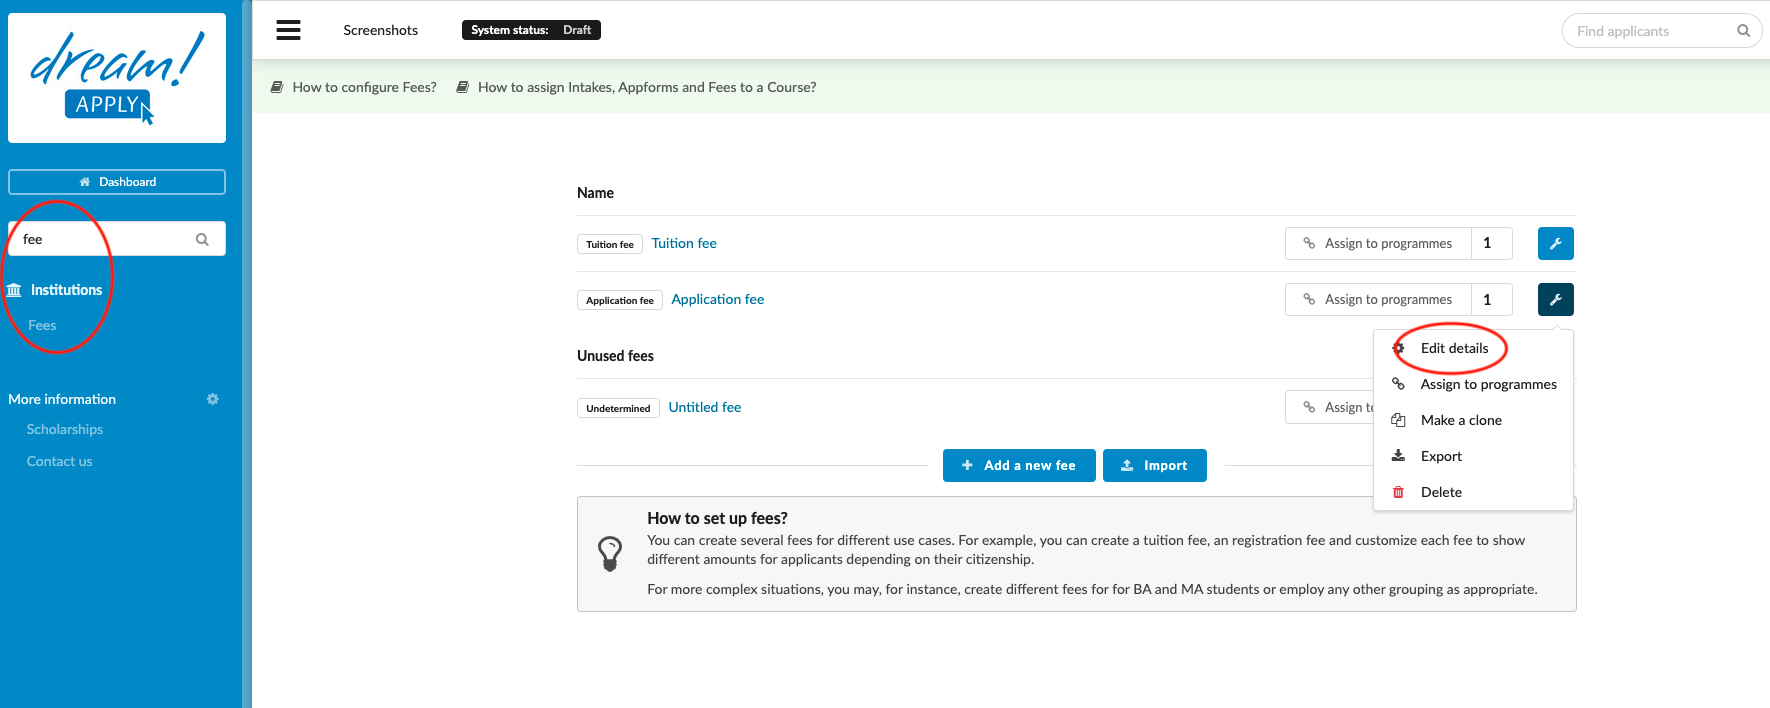
From the Main menu, go to: My institution > Fees.
-
Locate the desired fees and open it for editing:
-
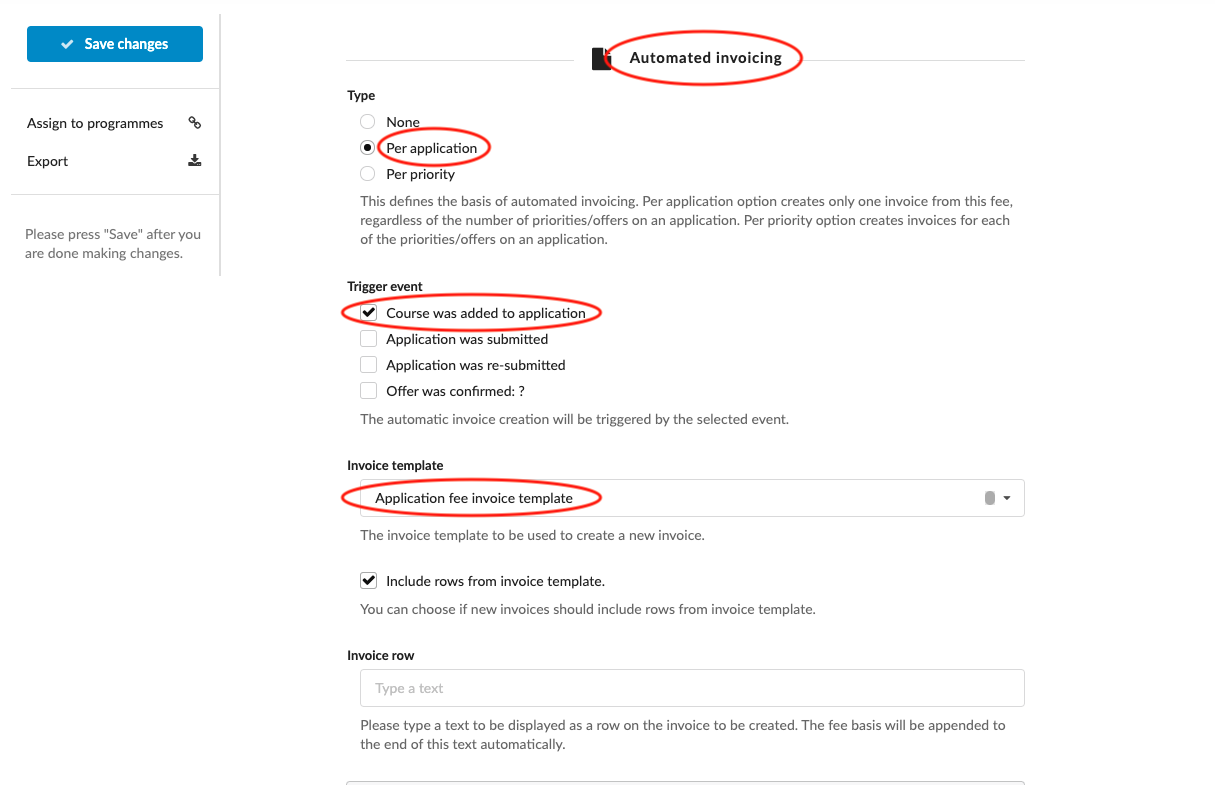
Scroll down till “Automated invoicing section”
-
Choose how would you like to send the invoice:
-
Per application - No matter for how many courses applicant has applied for, still system will issue only one invoice.
-
Per priority - System will issue as many invoices, as many courses applicant has applied for.
-
-
Choose a trigger event:
-
Course was added to application - Once applicant adds the course (clicks on “Apply now” button), system will issue the invoice. This trigger might be useful for application and registration fee invoices (invoices, which should be paid before submission).
-
Application was submitted. - Invoice will be issued only after submission.
-
Application was re-submitted. - System will issue the invoice only in case of resubmission.
-
Offer was confirmed:
- Choose an offer type.(Ex: Conditionally accepted) - Invoice will be issued only after the confirmation of the chosen offer status. This trigger might be useful for tuition fee invoices. (Ex: Tuition fee invoice will be issued only after generating “Conditionally accepted” status.)
-
-
Choose an invoice template - Choose which invoice template should be used by the trigger.
-
Invoice row - Please type a text to be displayed as a row on the invoice to be created. The fee basis will be appended to the end of this text automatically. (For example: “Application fee -")
-
Save changes.
-
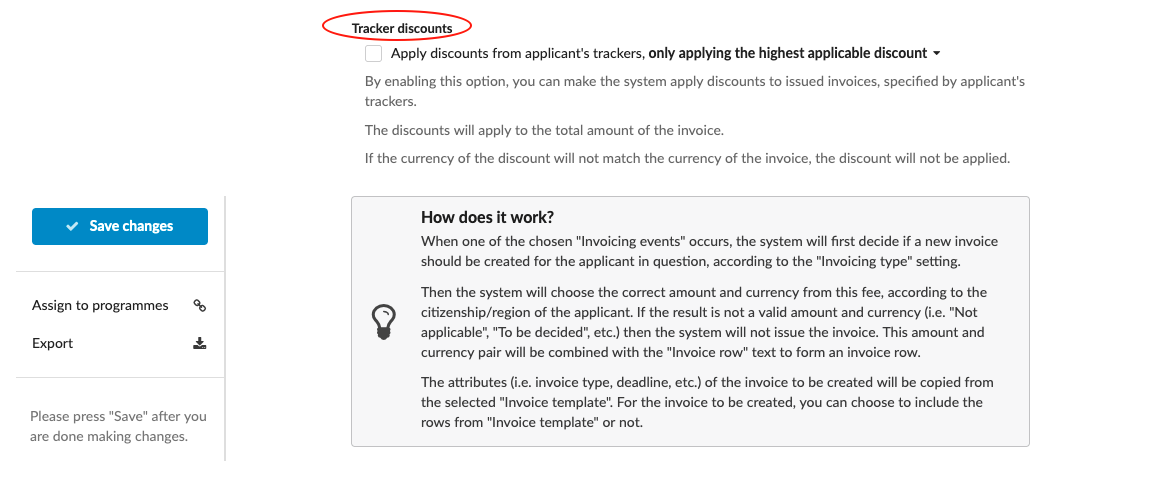
Tracker discount - By enabling this option, you can make the system apply discounts to issued invoices, specified by applicant’s trackers. The discounts will apply to the total amount of the invoice. Before enabling this function, please make sure that you have: 1. Created a tracker code with “Reduction” inputs (Speficies the percentage or the fixed fee for the discount), 2. Assigned the tracker code to the application (Manually or by using a Rules).
After setting the trigger up, system autoamtically will issue the invoices. For example, if you are working on “Application fee”, then system will use a chosen invoice template to create and issue an application fee invoice. System will take the currency and amount from the “Application fee” settings and will appended it to the end of “invoice row”.
How to create an invoice template?
How to set a serial number for invoice?