How to customise offer types?
This article explains how offer statuses can be configured and made ready to fit the workflow of your evaluation process.
-
the correct administrator permissions (“instance”)
-
analyzed the evaluation process and have a good understanding of your work flow
-
Log in as an administrator with the permission “instance” (included with the Role “Superuser”).
-
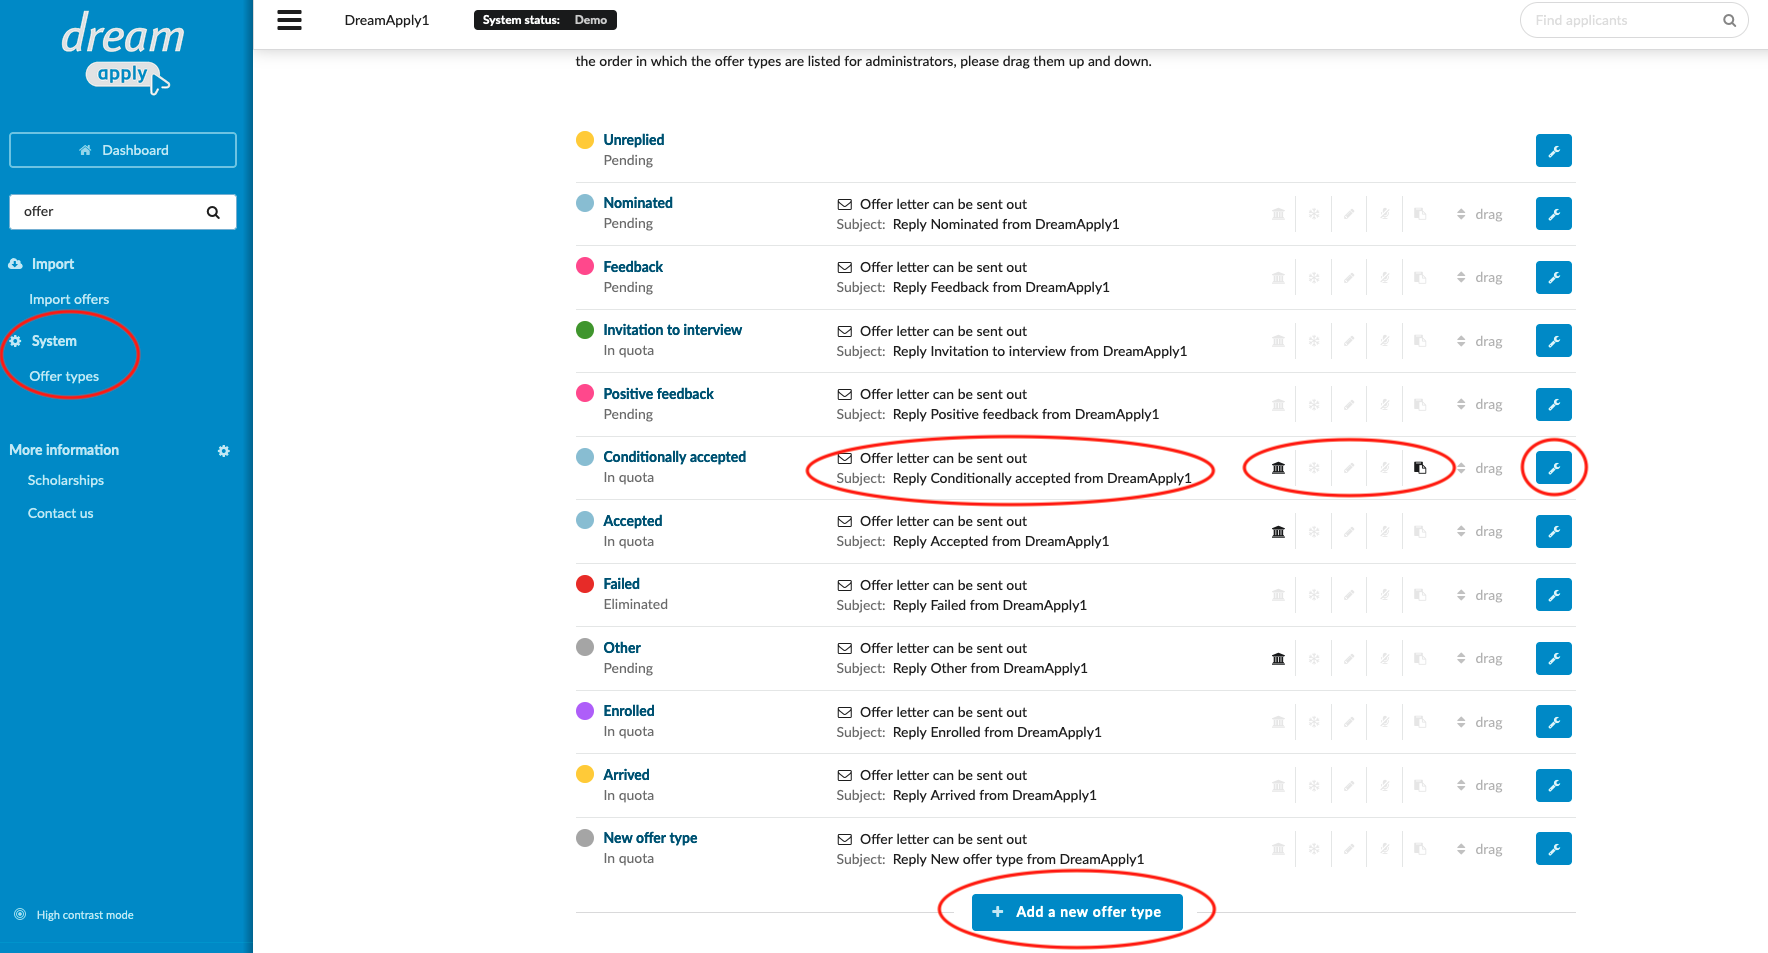
From the Main menu, go to System > Offer types.
Activate or deactivate Offer types
-
You can delete existing offer by clicking on Wrench icon > Delete
-
To add the new offer status, click on “Add new offer type” and adjust the settings.
Before you begin editing the offer settings, take a moment to review all the active features (Additional details) associated with each offer status:
-
Whether an offer letter can be sent out
-
If applicants can make decisions upon confirmation
-
Whether data on the application is frozen upon confirmation
-
If applications can be reopened after confirmation
-
If applications are silenced upon confirmation
-
Whether the offer status adds an additional application form question upon confirmation
To modify these permissions as needed, please follow the instructions below:
-
Click on the wrench button to edit the offer types you intend to use.
-
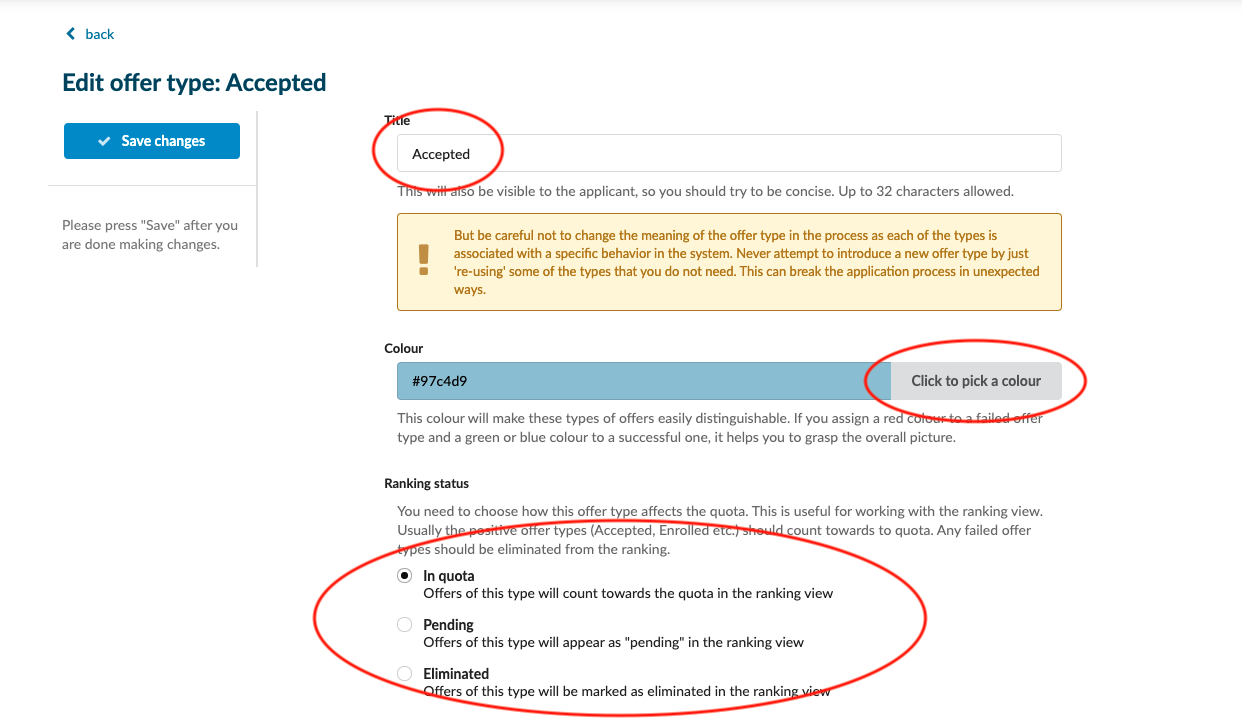
(optional) Change the Offer type’s “Title”. (NB! The default title of the offer statuses will remain hard coded in the system. If you are using DreamApply’s API, the default Title will be used rather than a customized Title.
-
(optional) Choose a color for the status. - this can be helpful to help establish more visual meaning to an Offer type
-
(optional – Ranking addon must be enabled) Choose a “Ranking status” for the Offer type:
-
In quota – useful for final positive Offer types
-
Pending – useful for Offer types which are being used for evaluation, such as “Feedback”, “Ready for exam”, for example.
-
Eliminated – useful for Offer types that have a negative status (unsuccessful, rejected, failed, etc.)
-
-
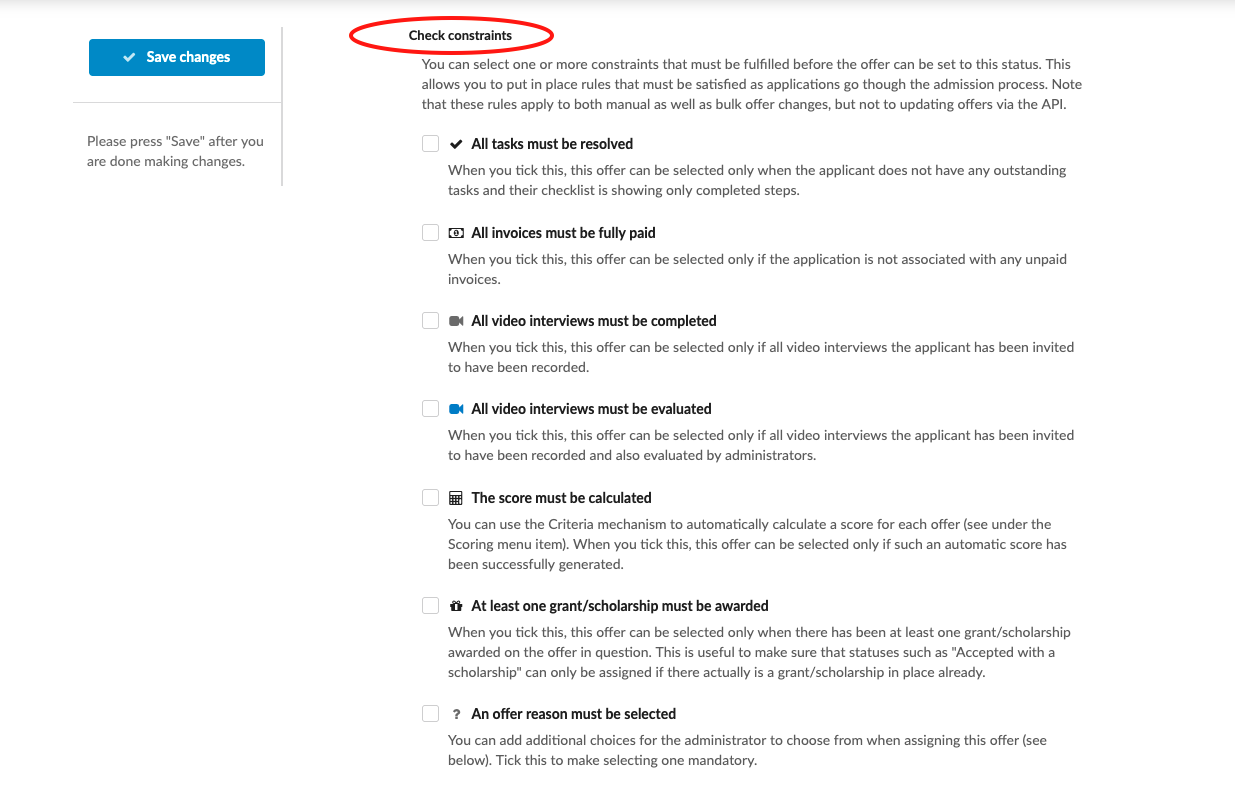
Check constraints - You can select one or more constraints that must be fulfilled before the offer can be set to this status. This allows you to put in place rules that must be satisfied as applications go though the admission process. Note that these rules apply to both manual as well as bulk offer changes, but not to updating offers via the API.
-
All tasks must be resolved - When you tick this, this offer can be selected only when the applicant does not have any outstanding tasks and their checklist is showing only completed steps.
-
All invoices must be fully paid - When you tick this, this offer can be selected only if the application is not associated with any unpaid invoices.
-
All video interviews must be completed - When you tick this, this offer can be selected only if all video interviews the applicant has been invited to have been recorded.
-
All video interviews must be evaluated - When you tick this, this offer can be selected only if all video interviews the applicant has been invited to have been recorded and also evaluated by administrators.
-
The score must be calculated - You can use the Criteria mechanism to automatically calculate a score for each offer (see under the Scoring menu item). When you tick this, this offer can be selected only if such an automatic score has been successfully generated.
-
At least one grant/scholarship must be awarded - When you tick this, this offer can be selected only when there has been at least one grant/scholarship awarded on the offer in question. This is useful to make sure that statuses such as “Accepted with a scholarship” can only be assigned if there actually is a grant/scholarship in place already.
-
An offer reason must be selected - You can add additional choices for the administrator to choose from when assigning this offer (see below). Tick this to make selecting one mandatory.
-
-
Decide the Offer type is for internal use only, or if it is necessary for applicants to be aware of when their offers have been assigned this Offer type.
-
Untick the box for Offer types that are for internal purposes only - it will not be possible to notify the applicant an offer status change to this Offer type.
-
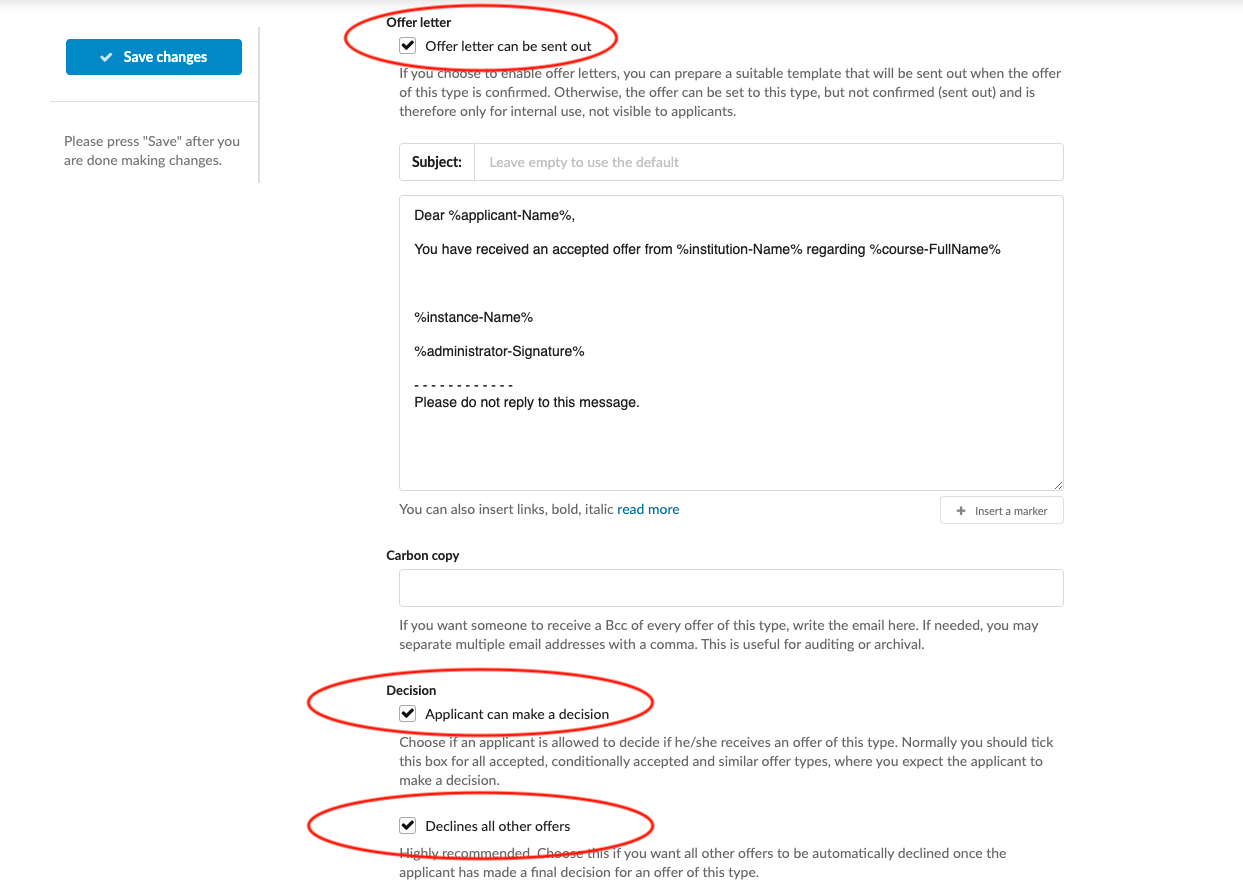
Tick the box to indicate that this offers of this Offer type can be “Confirmed & sent out” to applicants.
-
(optional) Enter a custom Subject line into the “Subject” field. Leaving this blank will use the default Subject line.
-
(optional) Enter custom text below for the template of the email that will be sent to applicants when their offers with this Offer type are “Confirmed & sent out”. Read more here about templates.
- (optional) Add available Content markers to the text of the email by clicking on the “+ Insert a marker” button. This will take specific data related the offer and dynamically insert it place of the content marker.
-
(optional) Add a Carbon copy - If you want someone to receive a Bcc of every offer of this type, write the email here – useful for archival purposes.
-
-
-
Add or remove the possibility for applicants to make a decision on their offers with this Offer type. Read more here about decision making function.
- If you mark the box under “Decline all offers” then all other offers will be automatically declined once the applicant has made a final decision for an offer of this type.
-
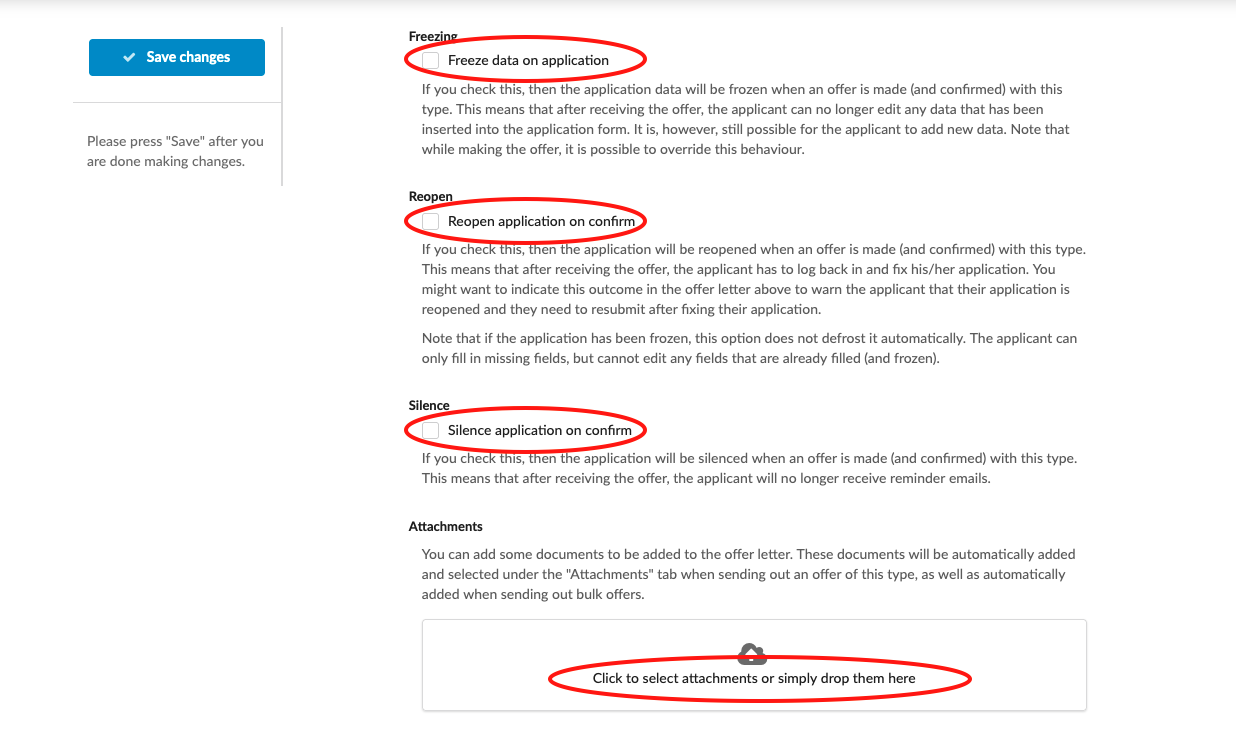
Freezing – Check this box if you would like all data that is in the application to be frozen once they have an offer that receives this Offer type. Read more here about freezing function.
-
Reopen – Check this box if you would like the applicant’s application to reopen when it contains an offer of this Offer type. Useful if applications with an offer of this Offer type will need further attention from the applicants.
-
Silence – Check this box if you would like for the system to stop sending reminders for the application that has an offer of this Offer type.
-
Attachments - You can add some documents to be added to the offer letter. These documents will be automatically added and selected under the “Attachments” tab when sending out an offer of this type, as well as automatically added when sending out bulk offers.
-
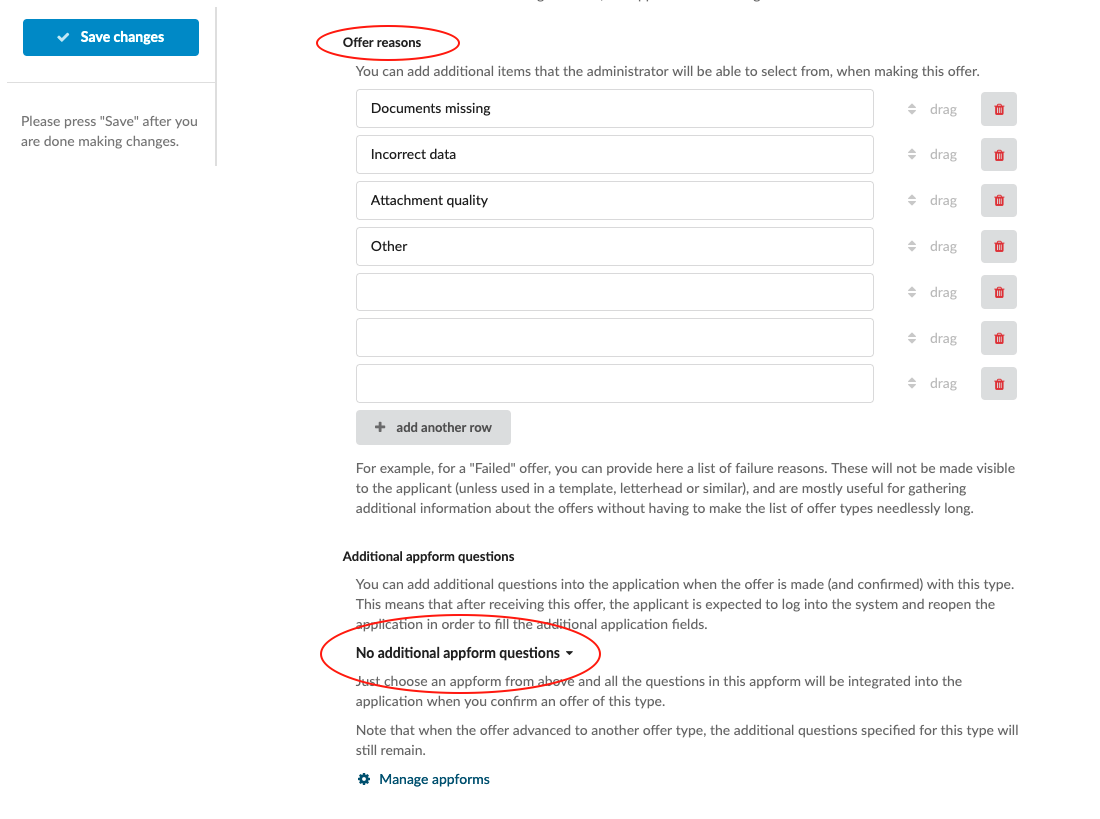
Offer reason - You can add additional items that the administrator will be able to select from, when making this offer.
-
Additional app form questions – Select and appform from the dropdown to have additional questions automatically added to the application when an offer is made (and confirmed) with this Offer type. Read more here about additional appform questions
Once offer statuses are configured, you can start evaluating applications and generating statuses.
Read more here about decision making function.