How to add and customise letterheads?
This article explains how to create, edit, and delete Letterheads in the DreamApply system.
Make sure you have
-
the “Letterheads” addon enabled (please feel free to contact [email protected] if you would like more information on enabling this addon)
-
the correct administrator permissions (“letterheads”)
-
Knowledge of what Letterhead should be created, edited, and deleted.
-
Log in as an administrator with the permission “letterheads” (included with the Role “Superuser”).
-
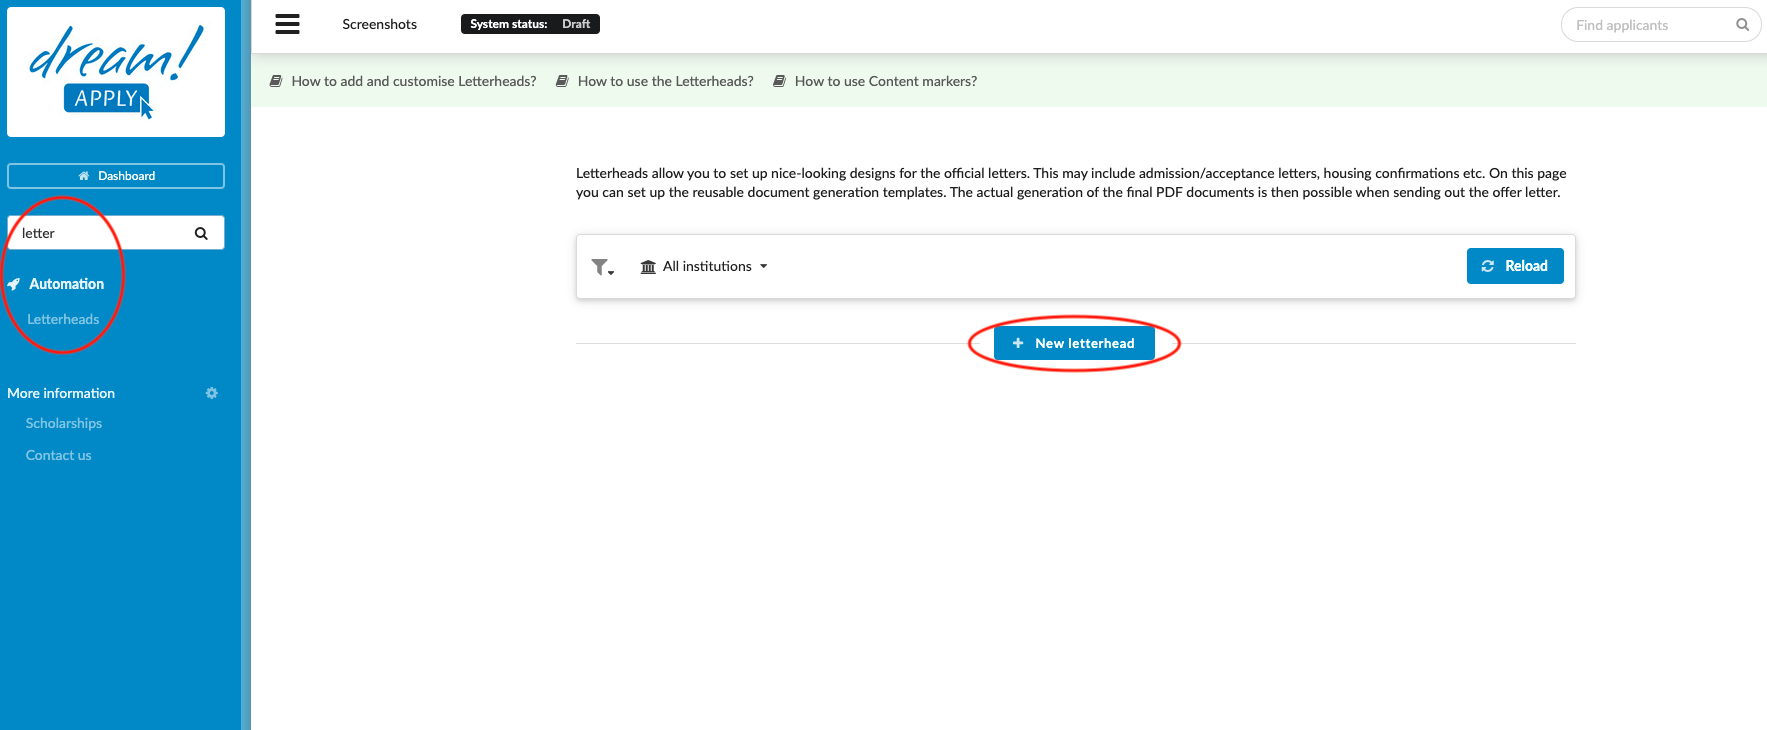
From the Main menu, go to Automation > Letterheads.
Create a new Letterhead
-
Click on “+ New letterhead”.
-
Adjust the necessary settings. (For more information see “Edit and existing Letterhead” below.)
-
Adjust the Letterhead template. (For more information see “Edit and existing Letterhead” below.)
-
Always remember to save your changes by clicking on the “Save changes” button!
-
Click on “< back”.
-
(optional) Clone your Letterhead by clicking on the “Clone” button.
-
(optional) Make a Letterhead appear on the top by clicking on the Star icon.
Edit an existing Letterhead
-
Locate the target Letterhead to be edited.
-
Click on the “Edit” button.
-
Adjust the following settings as needed:
-
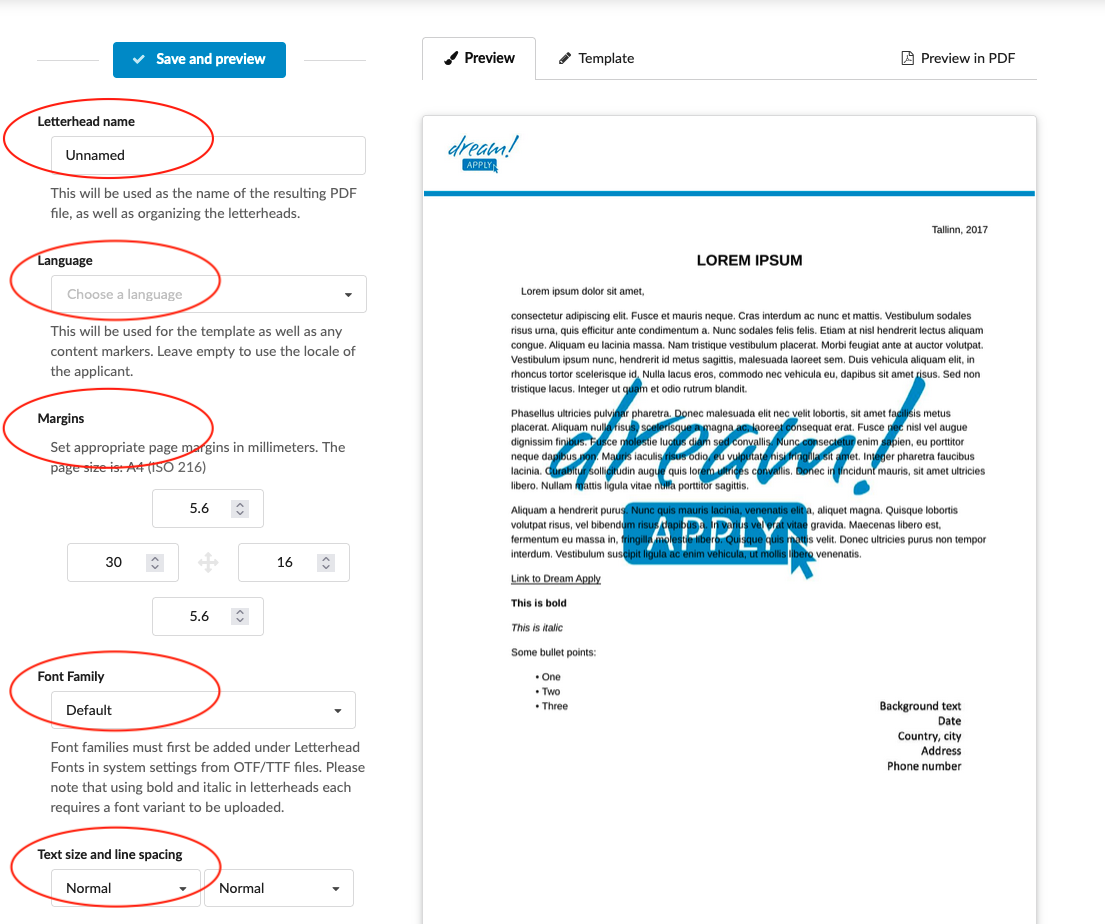
Enter a name in the “Letterhead name” field.
-
(optional for multi-institution systems) Choose an institution that should have access to this Letterhead.
-
(optional) Choose a Language – or leave it blank and it will use the locale of the applicant.
-
Margins - Set appropriate page margins in millimeters. The page size is: A4
-
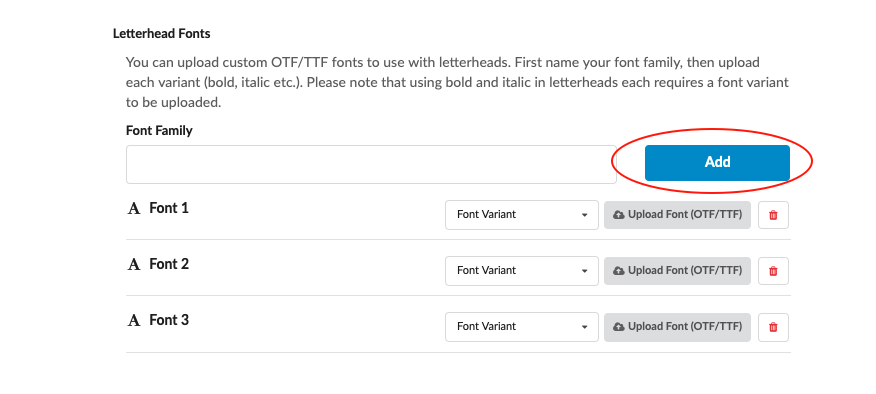
(optional) Set the a custom font. Font families must first be added under Letterhead Fonts in system > settings from OTF/TTF files. Please note that using bold and italic in letterheads each requires a font variant to be uploaded.
-
Adjust the “Text size and spacing” as needed.
-
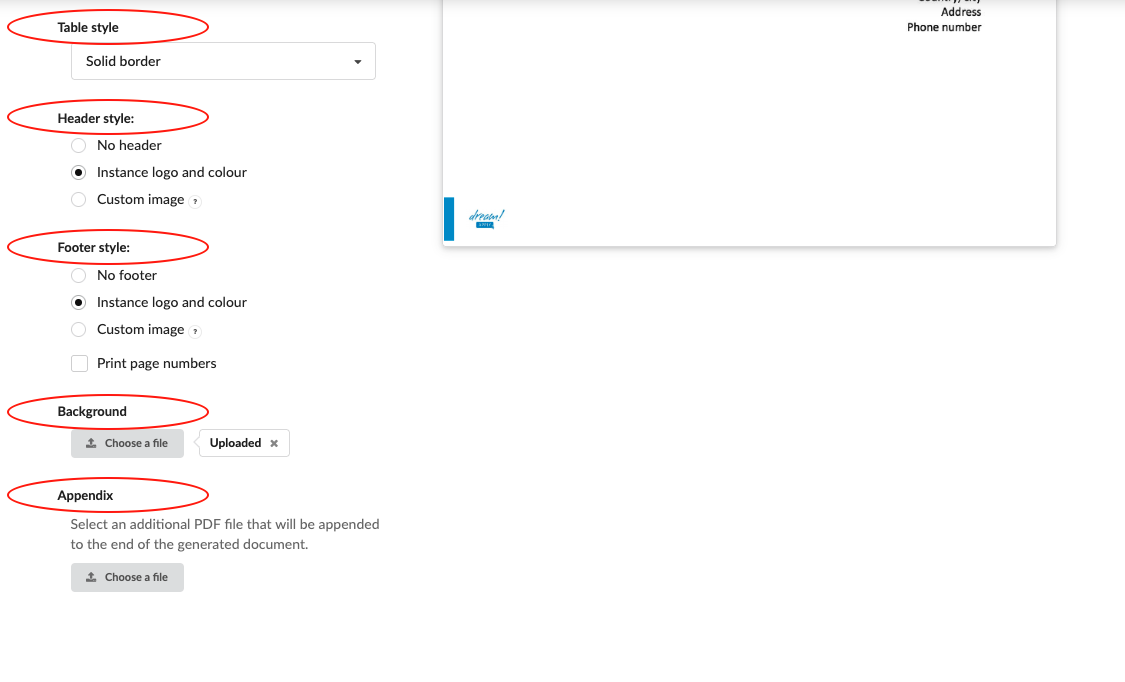
Adjust Table style - Choose between: 1. No boarder (recommended) 2. Hairline boarder 3. Solid boarder.
-
Adjust the Header/footer style settings:
-
No header/footer - use this when the Letterhead should not have a header/footer.
-
Instance logo and color – use this when the Letterhead header/footer should be automatically created by the DreamApply system using the system colour and logo.
-
Custom image - You can upload your own header/footer.
-
-
(Optional) Print page numbers – this this box to have the page numbers included on your document.
-
Background - Upload the background template. Uploaded template will apply for all pages of your letterhead. It might be the background logo, side logo, default content at the edge of the paper.
-
Appendix - Click on “Choose a file” and select an additional PDF file that will be appended to the end of the generated document. Appended document will be visible only if you download the letterhead in PDF form.
-
-
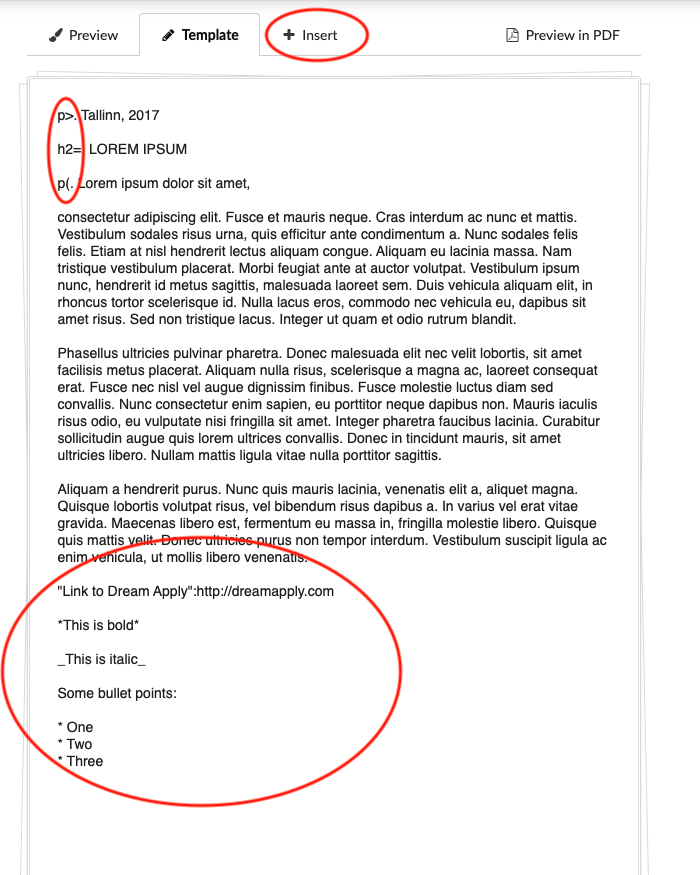
Adjust the Letterhead template:
-
Select the “Template” tab.
-
Enter the text desired for this Letterhead.
-
Adjust the style of the template by using the Textile markup syntax. For more details on the Textile markup syntax, click the link to the Textile documentation in the “How to design the letterhead template?” box.
-
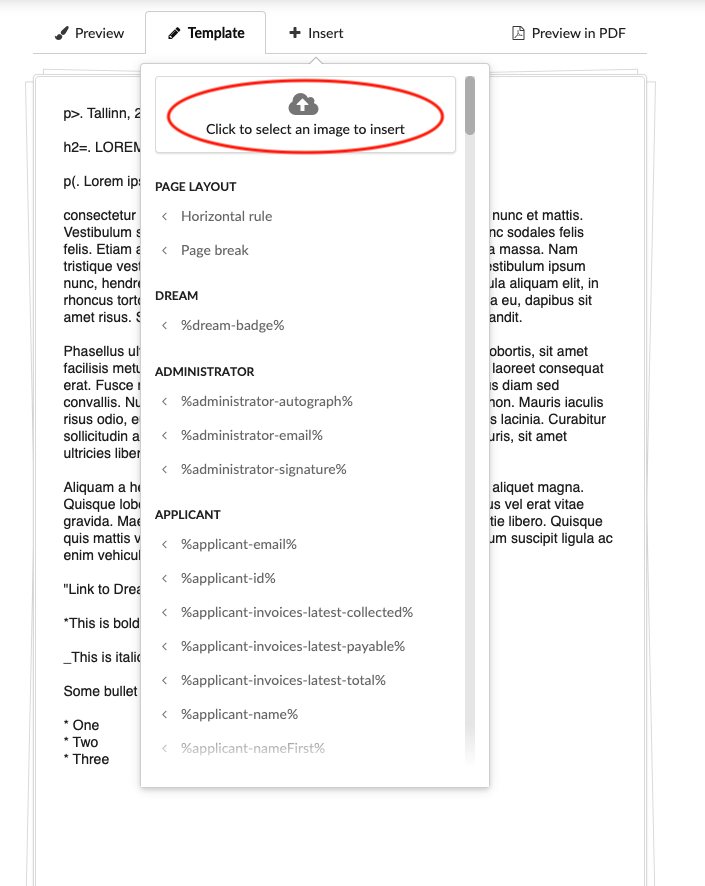
Insert content markers:
-
Place your text cursor where the content marker should be inserted.
-
Select the “+ Insert a marker” tab.
-
Choose the appropriate content marker from the dropdown menu.
-
-
-
Always remember to save your changes by clicking on the “Save changes” button!
-
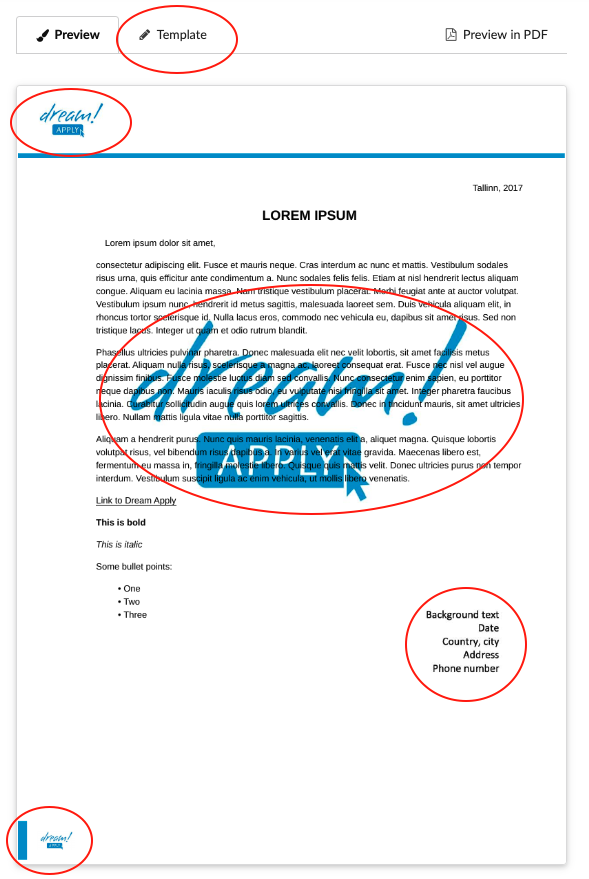
Click on “Preview” to quickly examine the effects your edits.
-
Click on “Preview in PDF” to create download a PDF version of the Letterhead – useful for previewing multi-page documents.
-
NB! Keep in mind that content markers will not change as they have no information to fetch until they are generated for a specific offer.
-
Delete a Letterhead
-
Locate the target Letterhead to be deleted.
-
Click on the button with a garbage can in the Letterhead’s bottom right corner.
-
Confirm the action by clicking on the “Sure” button.
Users should be able to create, clone, star, edit, and delete Letterhead. After creating a new Letterheads, you can start sending them out. Letterheads can be used as acceptance letters, conditionally acceptance letters, notification letters, etc.
You can create as many Letterheads as you need. By using content markers (Applicant full name, course name, intake/term period, fee amount, faculty name, etc.), the DreamApply system will automatically customize the Letterhead templates for every offer of every applicant. Using Letterheads will save the effort of manually editing the text when letterheads can are generated and sent out with offers.
Read more here about decision making function.