Home › Start here › Finance › Payment gateway › POSNET ›
POSNET
This article teaches you how to use your Flywire account to accept payments in DreamApply.
Make sure that you have:
-
the Finance addon enabled (please feel free to contact [email protected] if you would like more information on enabling this addon)
-
the correct administrator permissions (“accounting-edit”)
-
you have an active Posnet account, including your account’s:
-
Merchant ID
-
Terminal ID
-
Posnet ID
-
Encryption key
-
you have already created at least one invoice template (or are happy with one of the ones that came with the system as a default)
-
Log in as an administrator with the permissions “accounting-edit” (included with the Role “Accountant” in addition to “Superuser”).
-
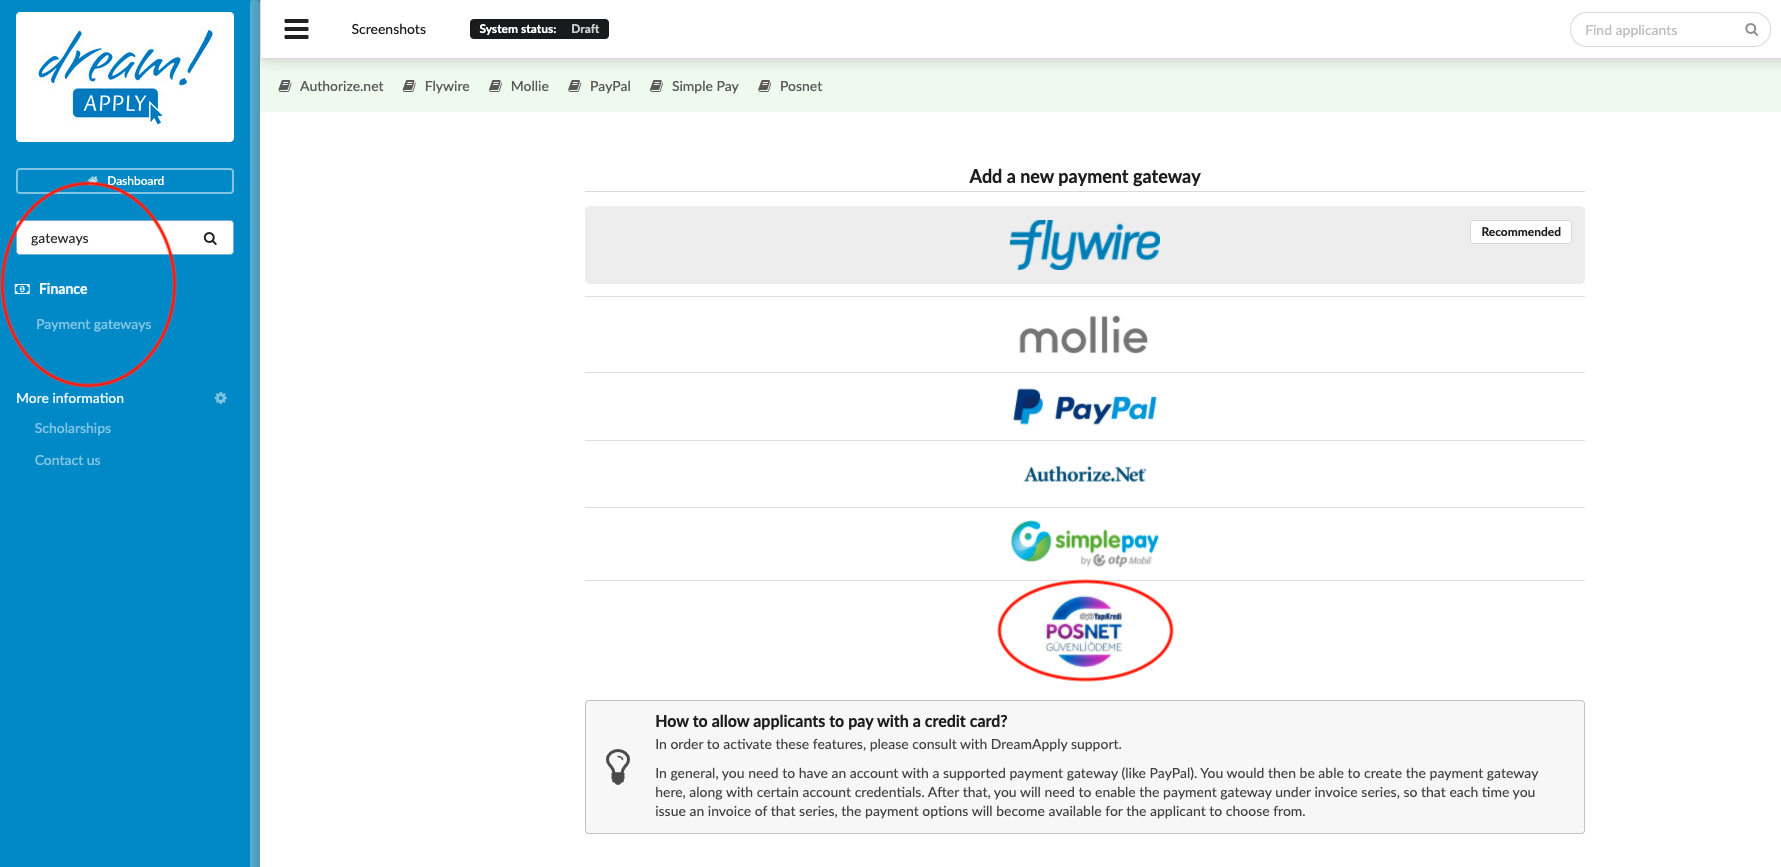
In the Main menu, go to Finance > Payment gateway.
-
Choose Posnet from the list of available Payment gateways.
-
Fill the following sections:
-
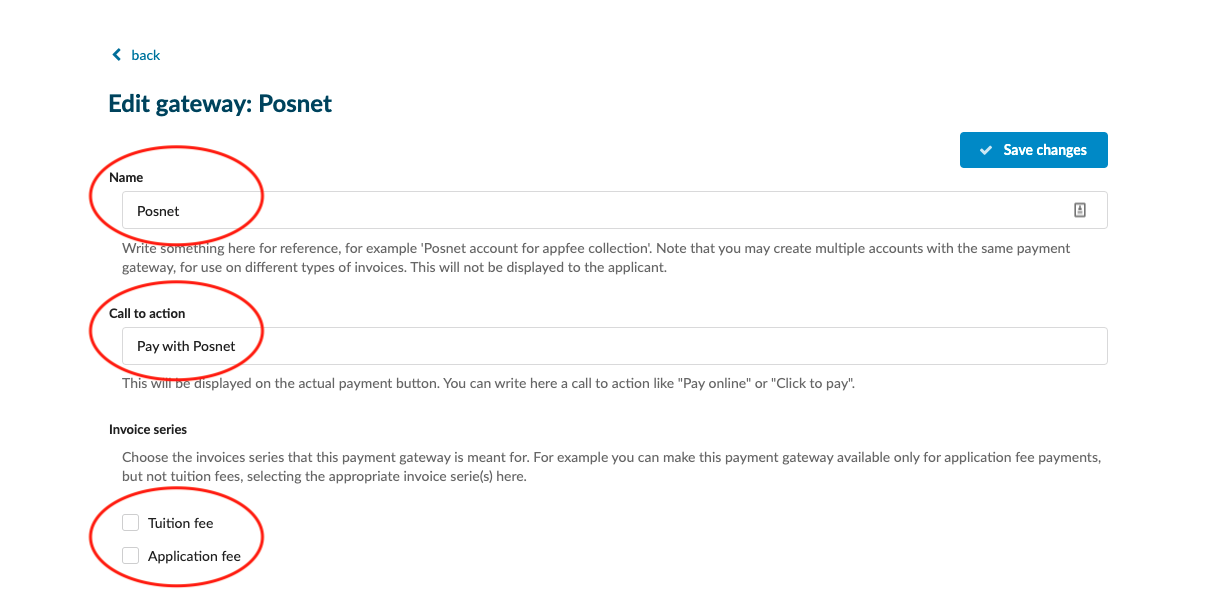
Name – Give a name that will help everyone who works with invoices understand the payment gateway’s intended purpose. This name will not be displayed for applicants to see.
-
Call to action – Here you are able to modify what will be written on the button the applicant will use to use Posnet to make their payment.
-
Invoice series – Choose which invoice series you would like to have be payable via the Posnet gateway of the given name. (If your payment collection structure requires it, you can create multiple invoice series and payment gateways, a different one for each Department, for example.)
-
-
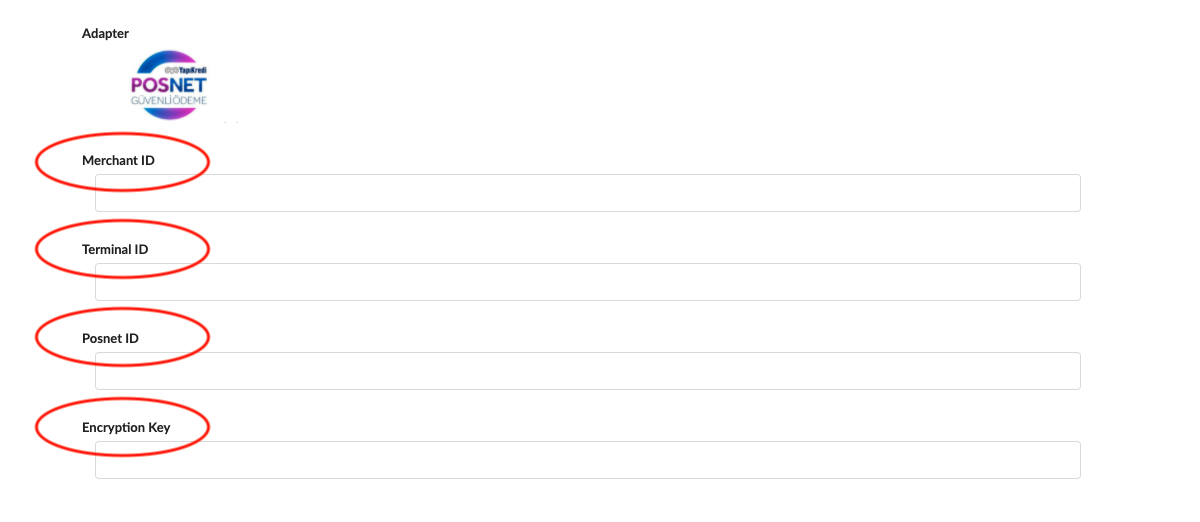
Adapter:
-
Merchant ID - Copy and paste these credentials from what Posnet has provided you with.
-
Terminal ID - Copy and paste the terminal ID provided by Posnet
-
Posnet ID - Add your Posnet account ID
-
Encryption key - Copy and paste this from the Posnet portal so Posnet knows where to direct the payments to.
-
After activating a Posnet payment gateway, applicants will be able to make a payment to your Posnet account by clicking on the payment button on any invoice issued from the assigned series.
How to configure the invoice template?