Home › Start here › Finance › Inventory ›
Inventory
This article teaches you how to create a new inventory within the system, how to effectively utilize it, generate reports, and understand how it appears to applicants. The inventory feature provides applicants with the flexibility to purchase additional services from the university, such as a tour in the city, insurance policy, transfer from airport, rent the bicycle, dormitory fee and etc. The system enables applicants to easily select their desired services, add them to their cart, and automatically generates an invoice for the chosen services. You have the option to configure the system to issue a consolidated invoice for multiple services or a separate invoice for each individual purchase.
Make sure you have:
-
the Finance addon enabled (please contact [email protected] if you would like more information on enabling this addon).
-
the correct administrator permissions (“accounting-edit”).
-
You have already created invoice template. How to create an invoice template?
-
You have already created VAT rule (optional).
-
Log in as an Administrator with the permission “accounting-edit” (included with the Role “Accountant” in addition to “Superuser”).
-
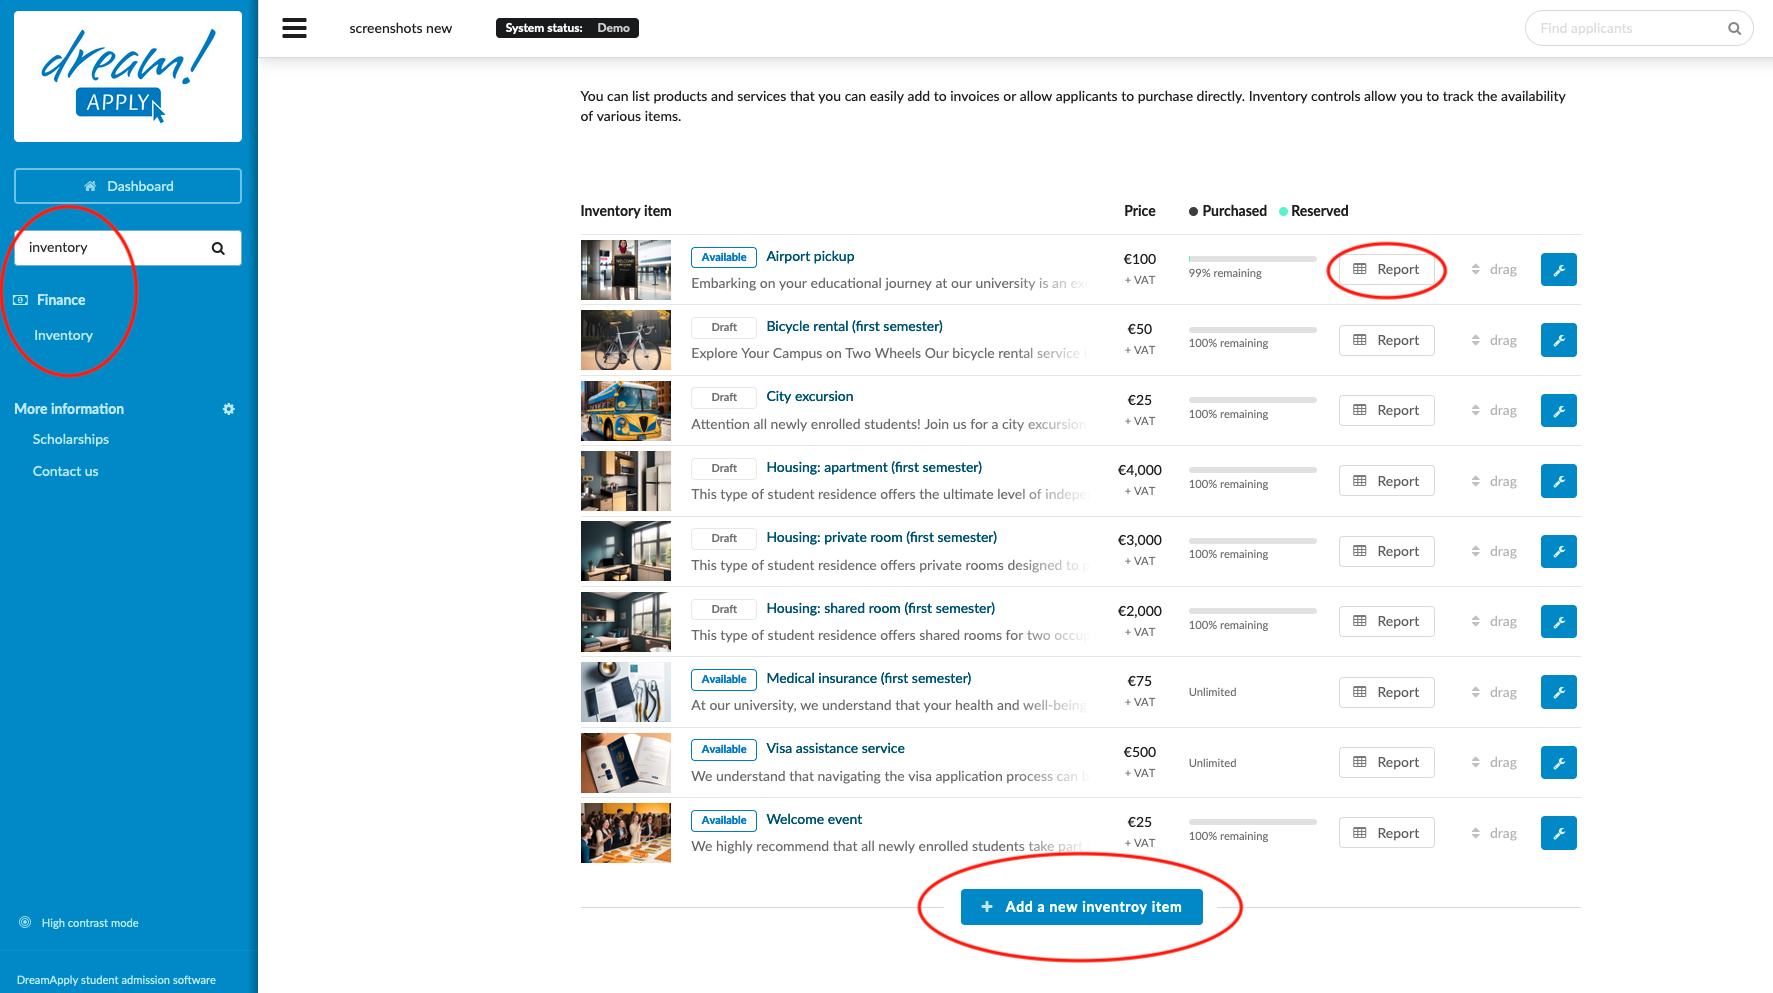
From the Main menu, go to Finance > Inventory.
-
To create new Inventory:
-
Click “+ Add a new inventory item”.
-
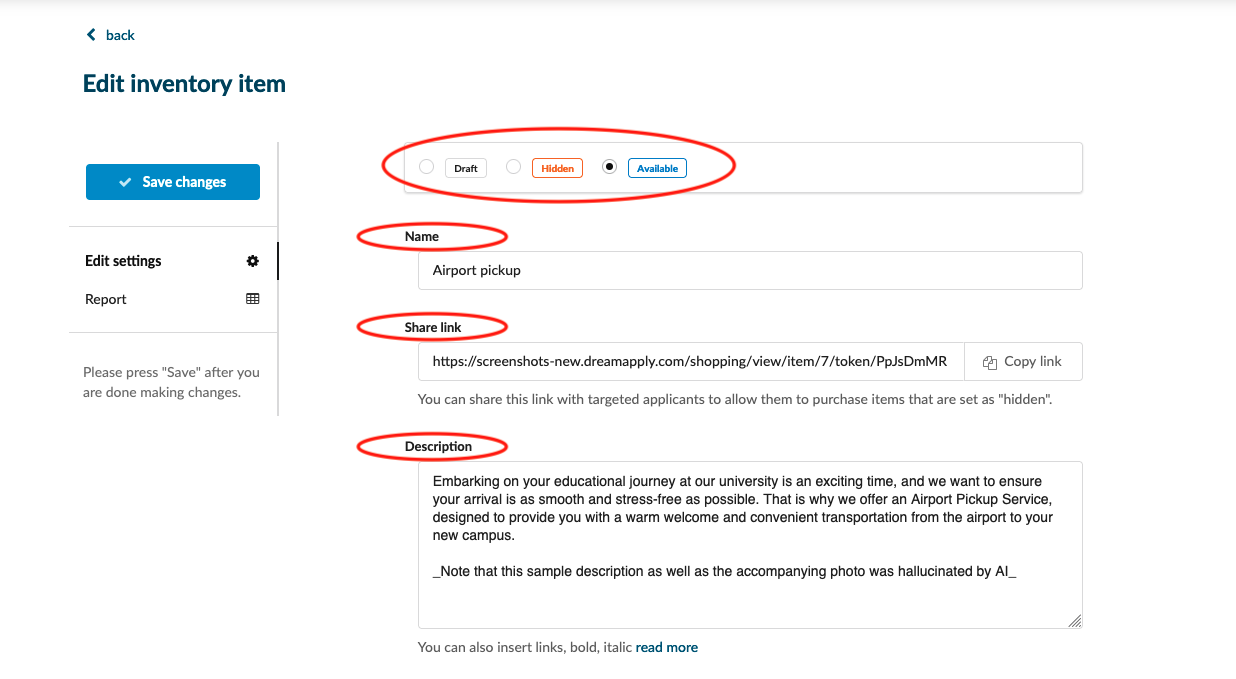
Enter a name for a new Inventory.
-
You can choose the inventory mode between:
-
Draft: It stays hidden for the applicants
-
Hidden: It remains concealed from general applicants, but any registered applicant with an submitted application can gain access through a dedicated link, conveniently located in the “Share link” section.
-
Accessible: This feature is open to all registered applicants with an submitted application.
-
-
-
Share link: You can share this link with targeted applicants to allow them to purchase items that are set as “hidden”. The link can be shared via email, notifications, or seamlessly integrated into your email or letterhead templates, such as acceptance letters.
-
Description: In this section, you have the opportunity to provide additional information about the services offered by the university for purchase. The description will be readily visible to applicants, allowing them to gain a more comprehensive understanding of the service before making a purchase.
-
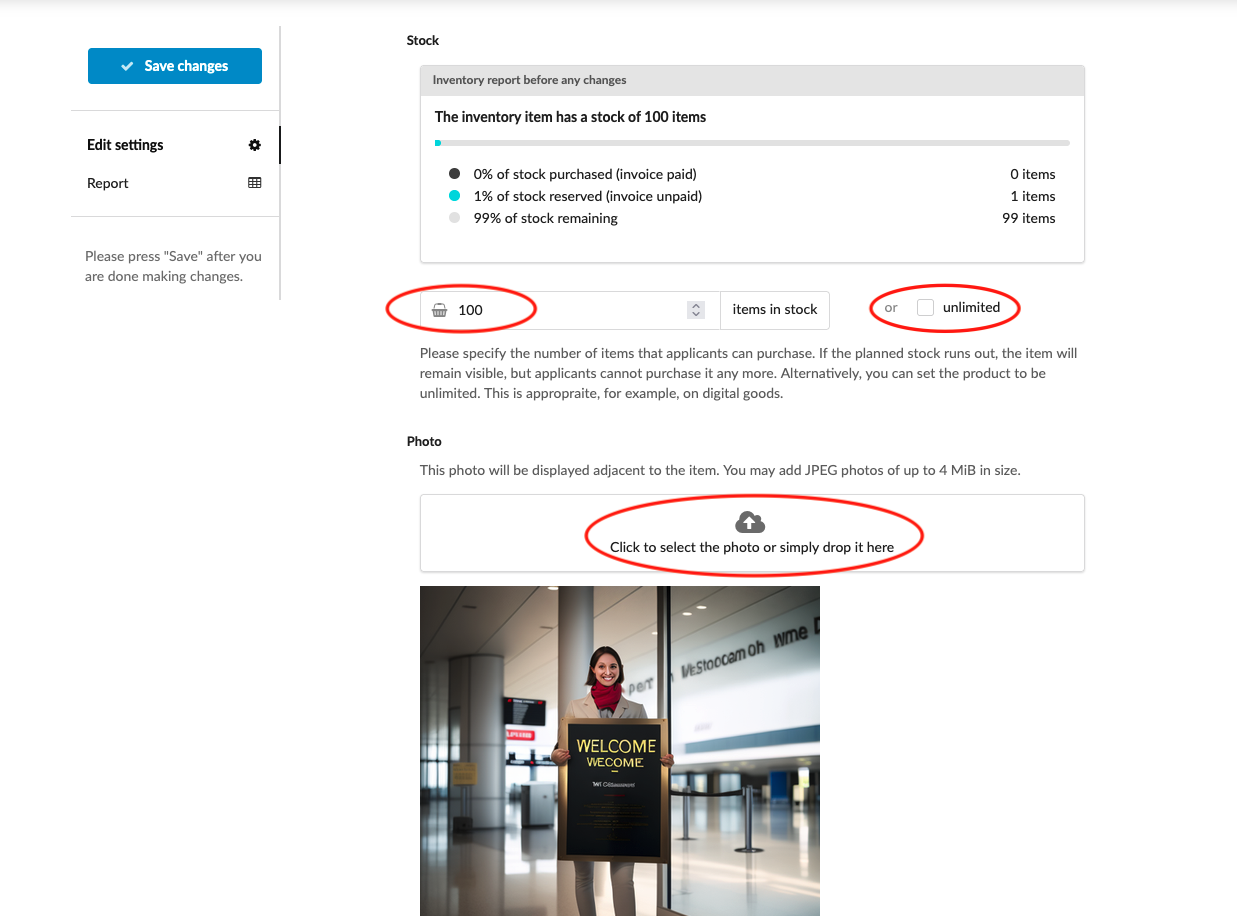
Stock: You can define the stock limitations for the available services/items for purchase. If the planned stock is depleted, the item will still be visible, but applicants won’t be able to make a purchase. Alternatively, you have the option to mark the box to indicate an unlimited stock.
-
Photo: You can upload the photo, which will be displayed adjacent to the item. You may add JPEG photos of up to 4 MiB in size.
-
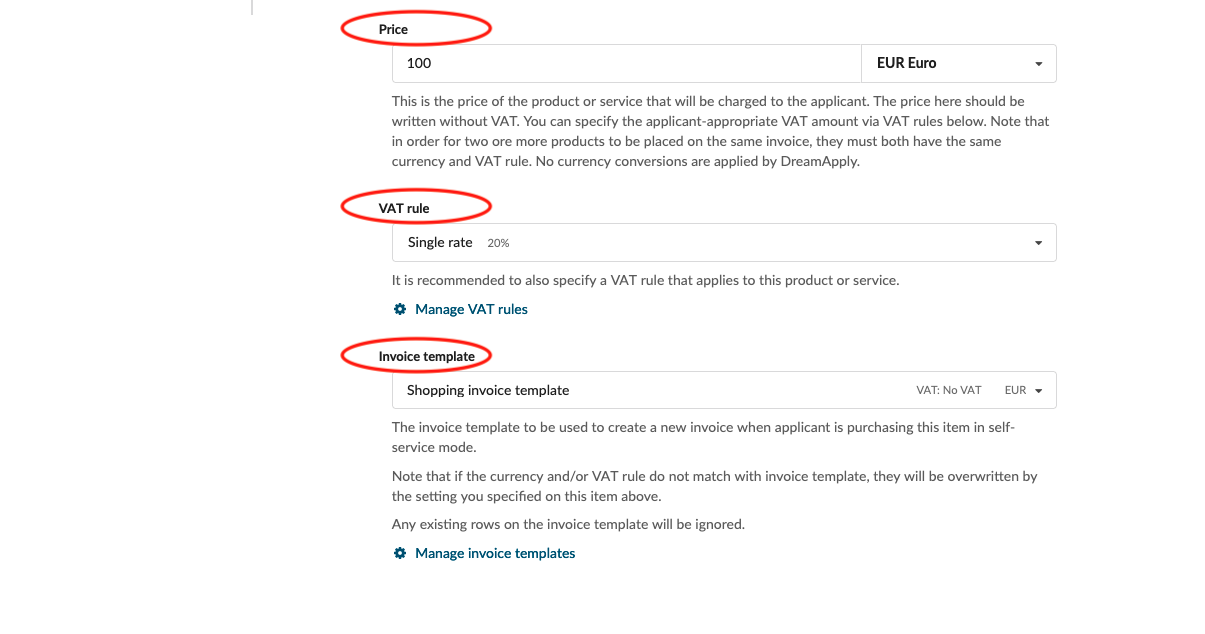
Price and Currency: This is the price of the product or service that will be charged to the applicant. The price here should be written without VAT. You can specify the applicant-appropriate VAT amount via VAT rules below. Note that in order for two ore more products to be placed on the same invoice, they must both have the same currency and VAT rule. No currency conversions are applied by DreamApply. The system will automatically capture the price and currency, and it will include this information in the invoice before issuing it. This process does not necessitate any manual effort from the system administrators.
-
VAT: It is recommended to also specify a VAT rule that applies to this product or service. Read more how to create VAT rule
-
Invoice template: You can choose an invoice template which will be used to create a new invoice when applicant is purchasing the item in self-service mode. Note that if the currency and/or VAT rule do not match with invoice template, they will be overwritten by the setting you specified on this item above. Any existing rows on the invoice template will be ignored. Read more how to create invoice template.
-
Upon creating and saving the new inventory feature in the system, it becomes accessible to all applicants who have submitted their applications. The shopping cart and all available items for purchase become visible to applicants immediately after they submit their applications. To make a purchase, applicants simply need to click the “Add to Cart” button for the product they are interested in, and it will be added to their shopping cart. Once they have reviewed their selected products, applicants can proceed by clicking the “Checkout” button. This action will automatically trigger the issuance of the invoice, which can be found in the Finance section of the applicant’s view.
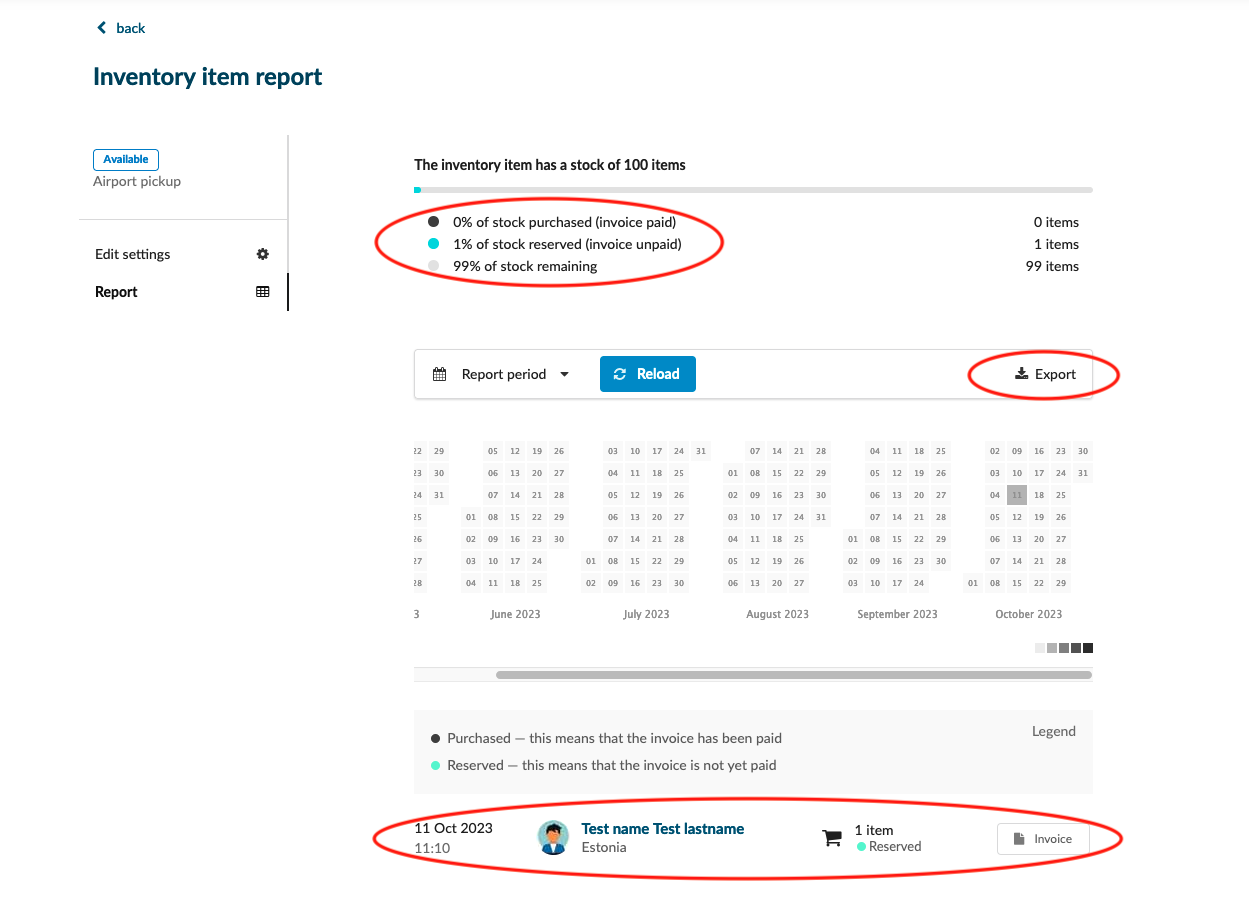
By clicking on the “Report” button, you can access statistical information for each inventory item. The report provides daily insights into the number of invoices issued and the number of invoices that were paid. You also have the option to export this data into Excel or a CSV file for further analysis.
How to send out the invoice manually
How to view and collect issued invoices?